Using builtin widget
At the “Create ‘Hello World’ Prototype” section, you already now how to pick a widget from gallery and put it to dashboars. In this section, we will go deeper on each kind of widget, change the option to she how we can manipulate them just by some simple arguments.
Before you begin, let make a simple prototype with below python code. If you don’t know how, please read this tutorial first “Create ‘Hello World’ Prototype” section
from sdv_model import Vehicle
import plugins
from browser import aio

vehicle = Vehicle()

for i in range(10):
  # code to turn headlight on
  await vehicle.Body.Lights.IsLowBeamOn.set(True)
  await aio.sleep(1)
  # code to turn headlight on
  await vehicle.Body.Lights.IsLowBeamOn.set(False)
  await aio.sleep(1)
Very simple code, blinking headlight on/off every second ten times. Now let’s open Dashboars_Config, click “Pick A Widget from Gallery” and review the list of Widget we have:
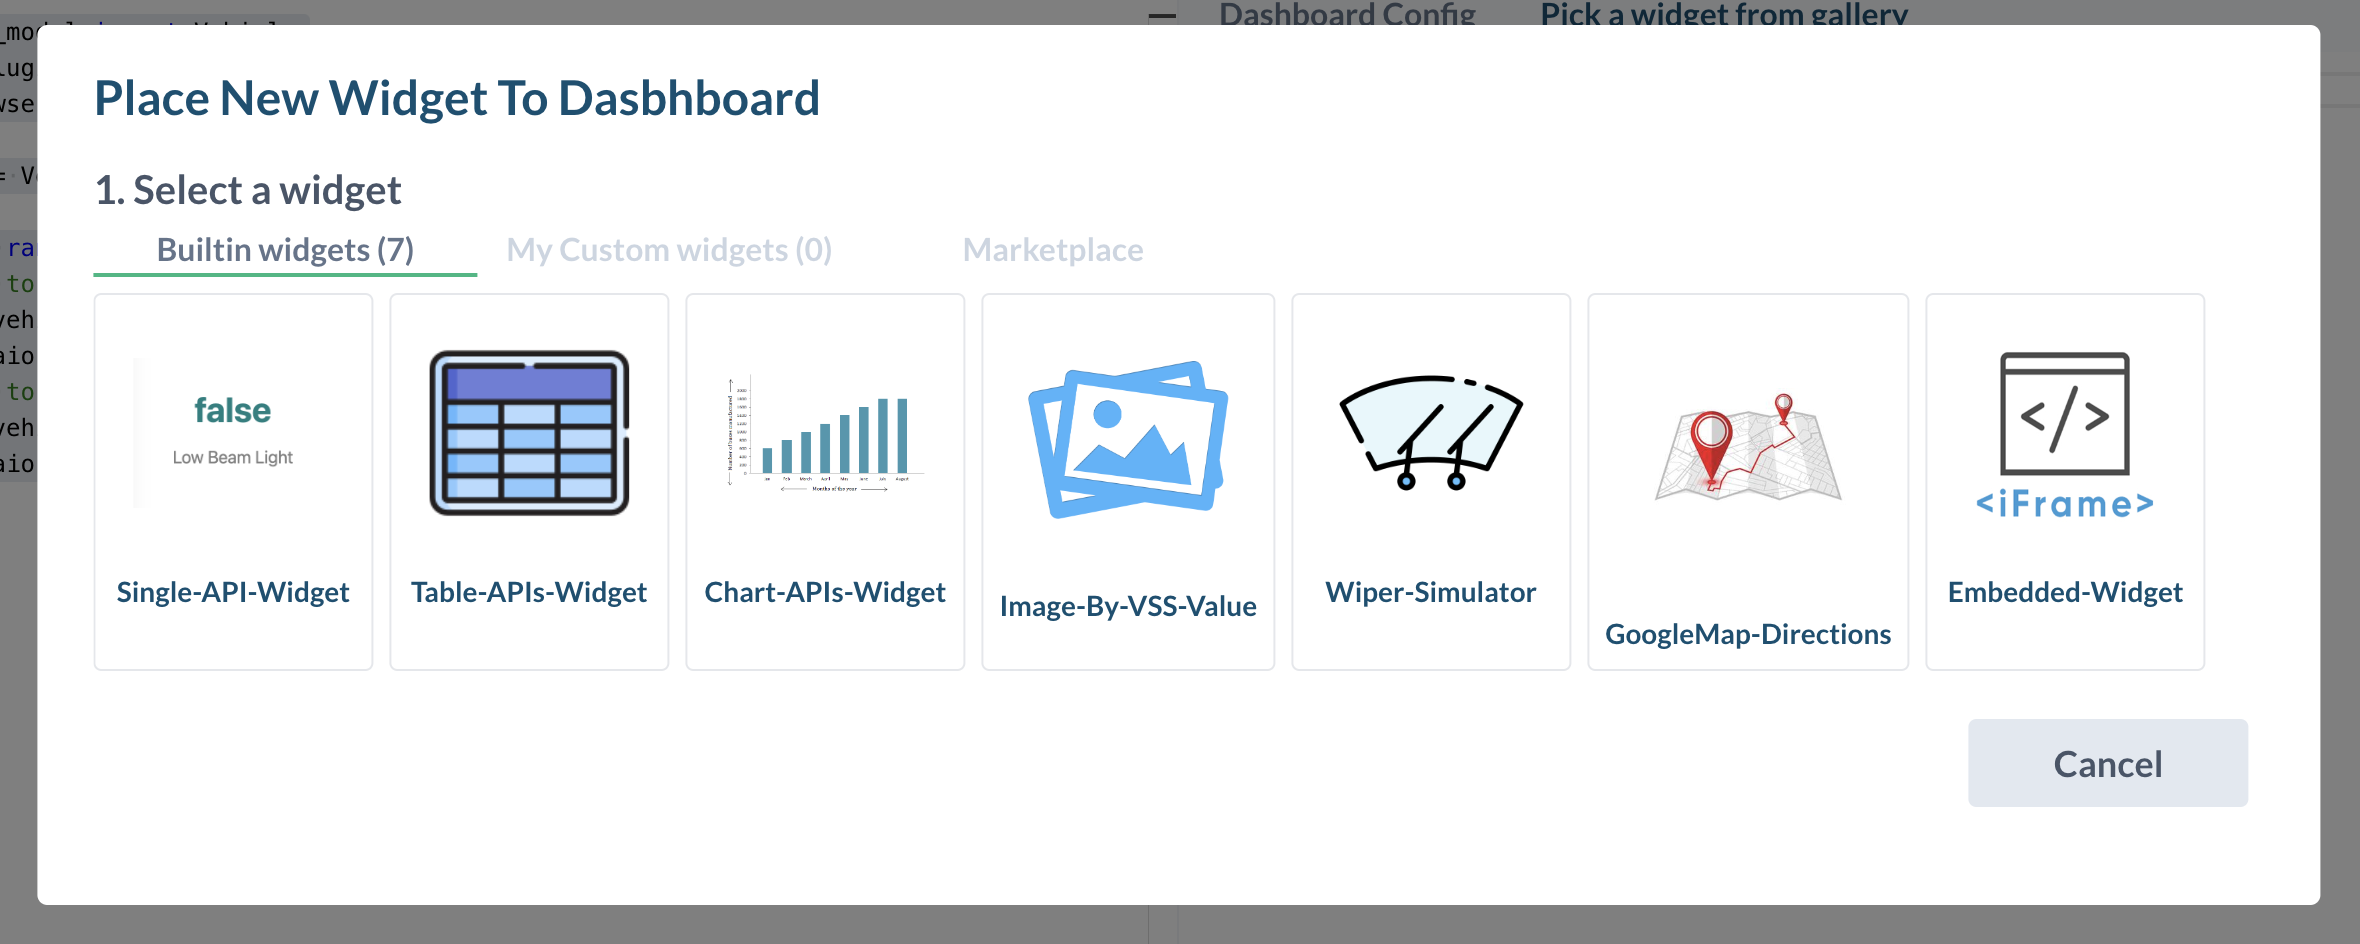
- Single-API-Widget: show value of a single API, very simple widget to check you API value
- Table-APIs-Widget: a table show value of a list of API
- Chart-APIs-Widget: a simple chart, can be in bar or line,
- Image-By-VSS-Value: each API value mapping to an image, image will change base on api value
- Wiper-Simultor: an wiper animation simulator, when you set wiper mode, the animation with reflect the state of wiper
- GoogleMap-Direction: select a start point and end point, and base on your GPS API, the car will move on the maps
- Embedded-Widget: using iframe to embedded an external site, may use with our Web Studio to edit the external site
The rest of this section will show you how to config above widgets:
Single-API-Widget
This is them simplest widget to getting started. The widget will only show realtime value of an API. This is the options you can alter.
The option string should be an valid json string
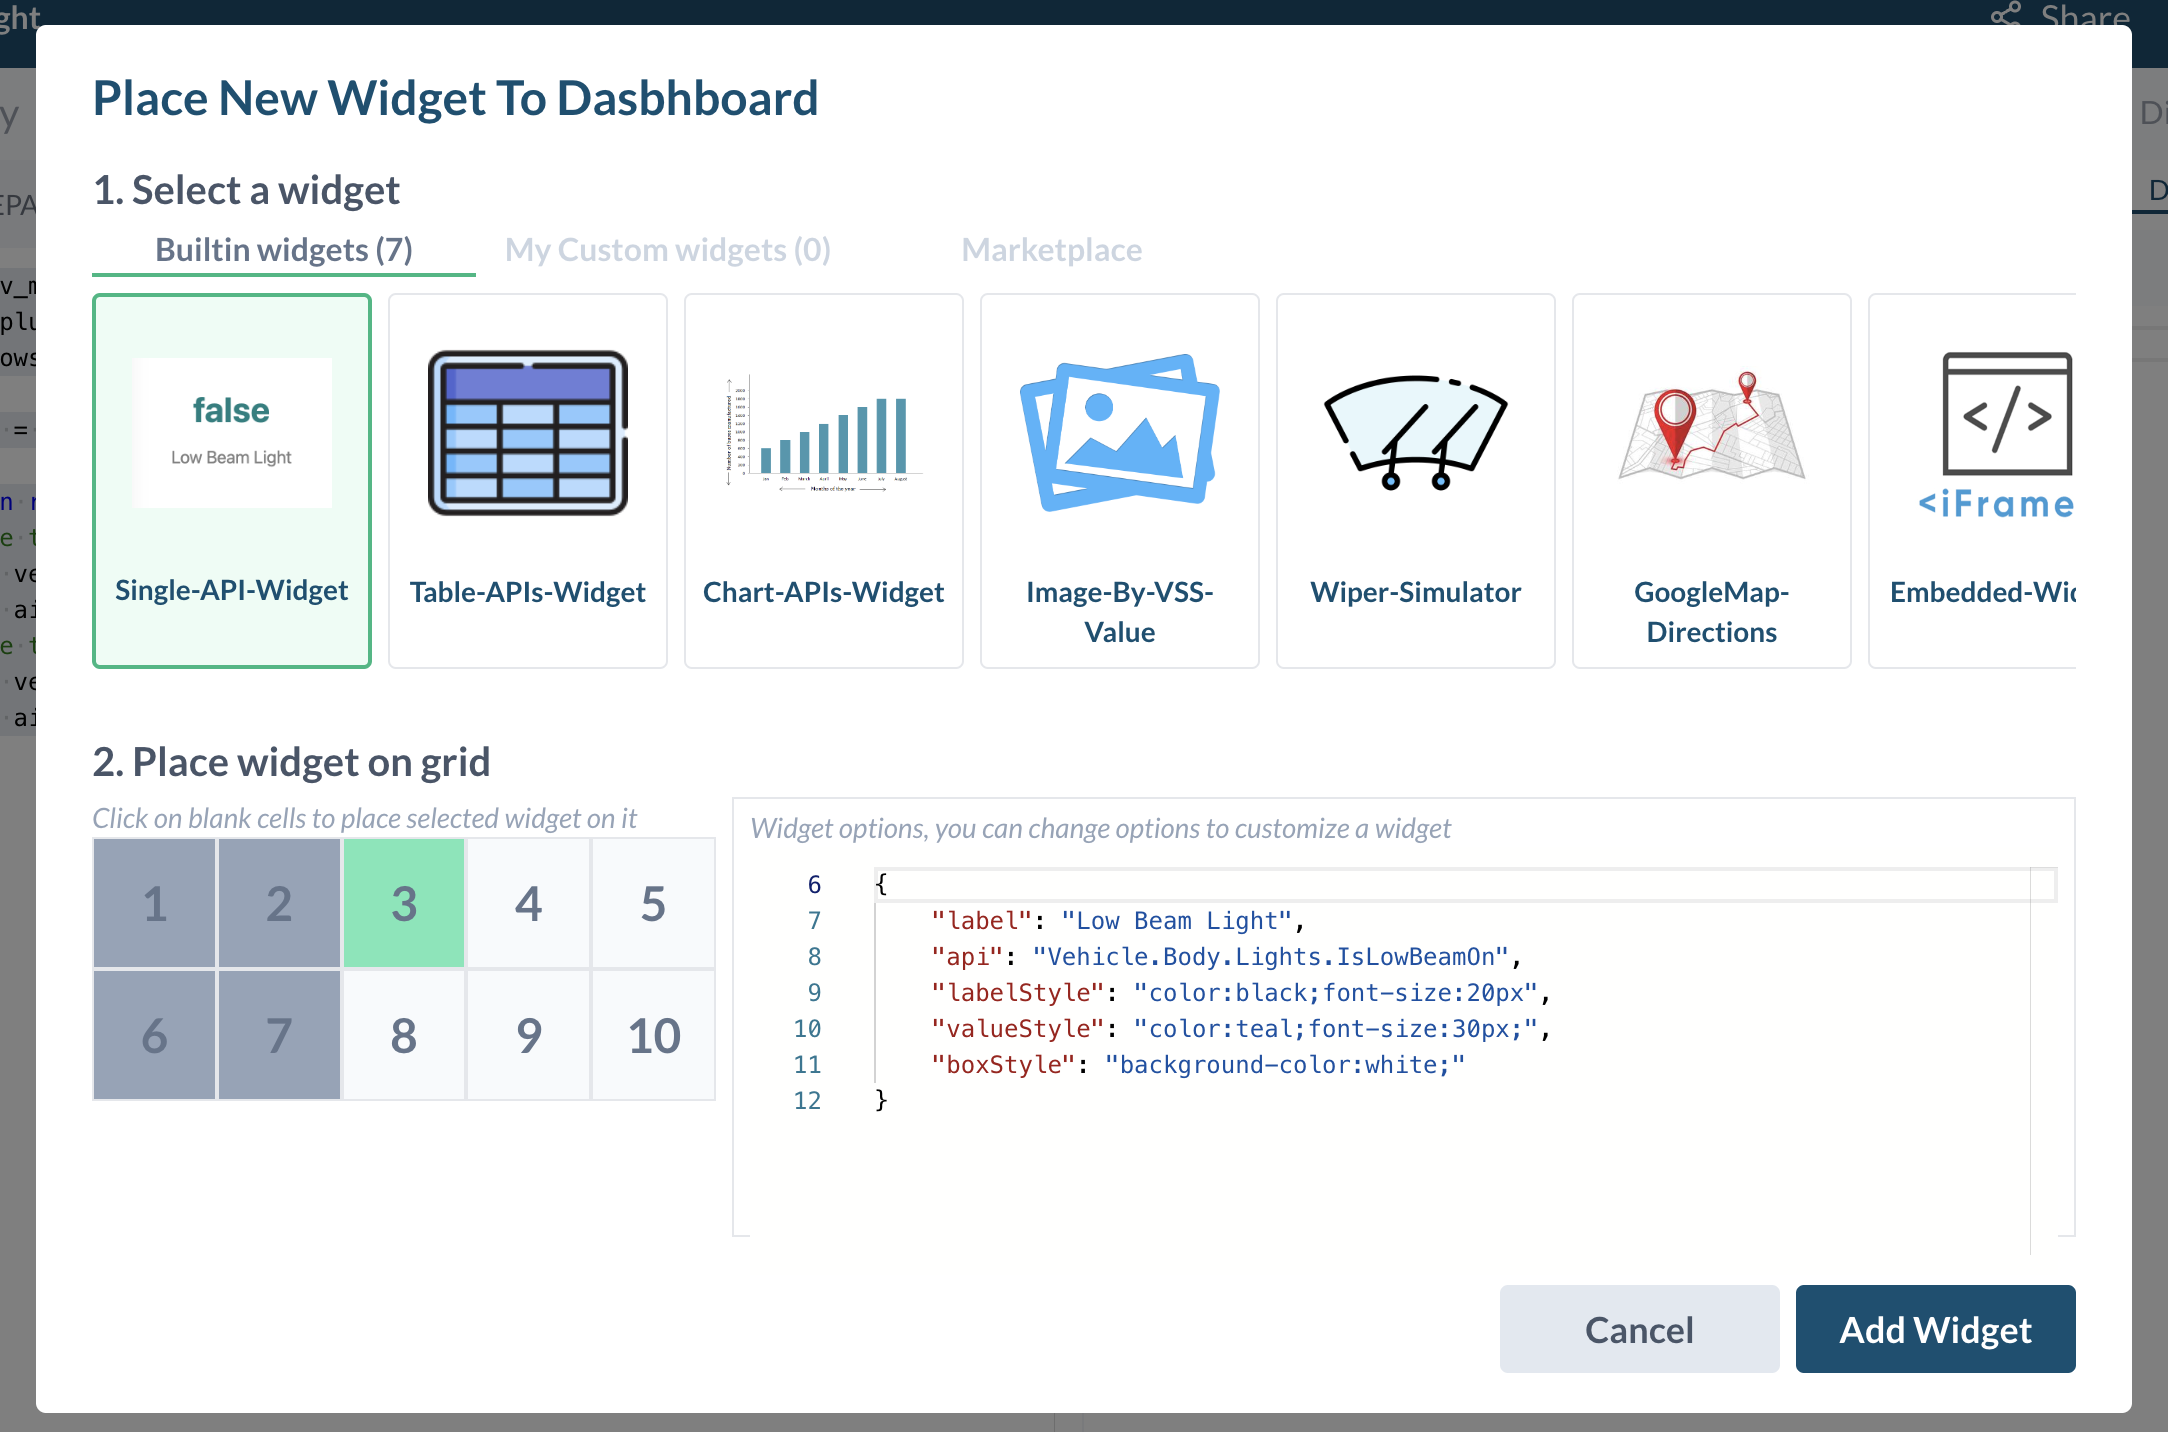
- label: The widget provide two boxes: the upper for value text and the bottom for label text. If label is empty, it will be completely remove, give all space for value text.
- api: Vehicle API you want to show value
- labelStyle: css style string for the label box
- valueStyle: css style string for the value box
- boxStyle: css style string for the parent box(the whole widget box)
Let make a simple example, change the options to below string:
{
    "label": "Vehicle Speed (km/h)",
    "api": "Vehicle.Speed",
    "labelStyle": "color:teal;font-size:22px",
    "valueStyle": "color:orange;font-size:80px;font-weight:700;",
    "boxStyle": "background-color:white;"
}
The we have the result like below
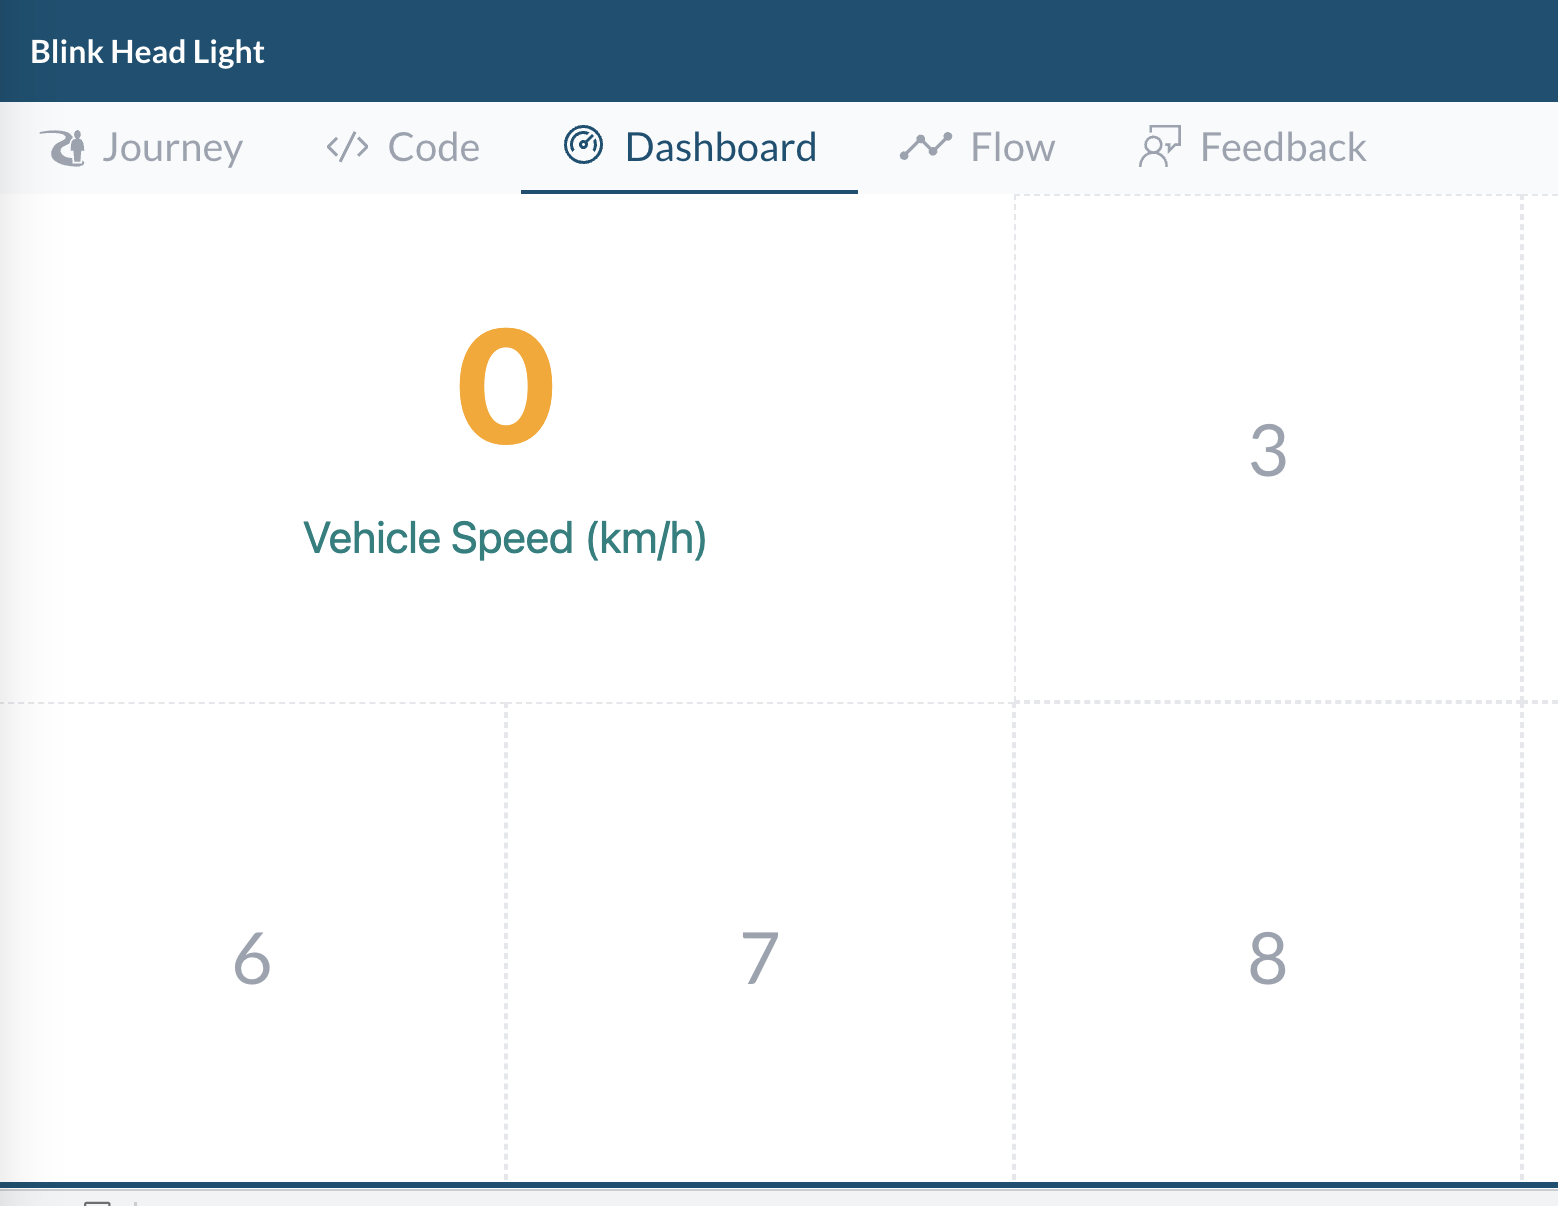
Table-APIs-Widget
A simple table show APIs current value. You just need to provide the list of api you want to monitor in the options string:
{
    "apis": [
        "Vehicle.Body.Lights.IsLowBeamOn",
        "Vehicle.Speed"
    ]
}
Below image show how the table render with above options:
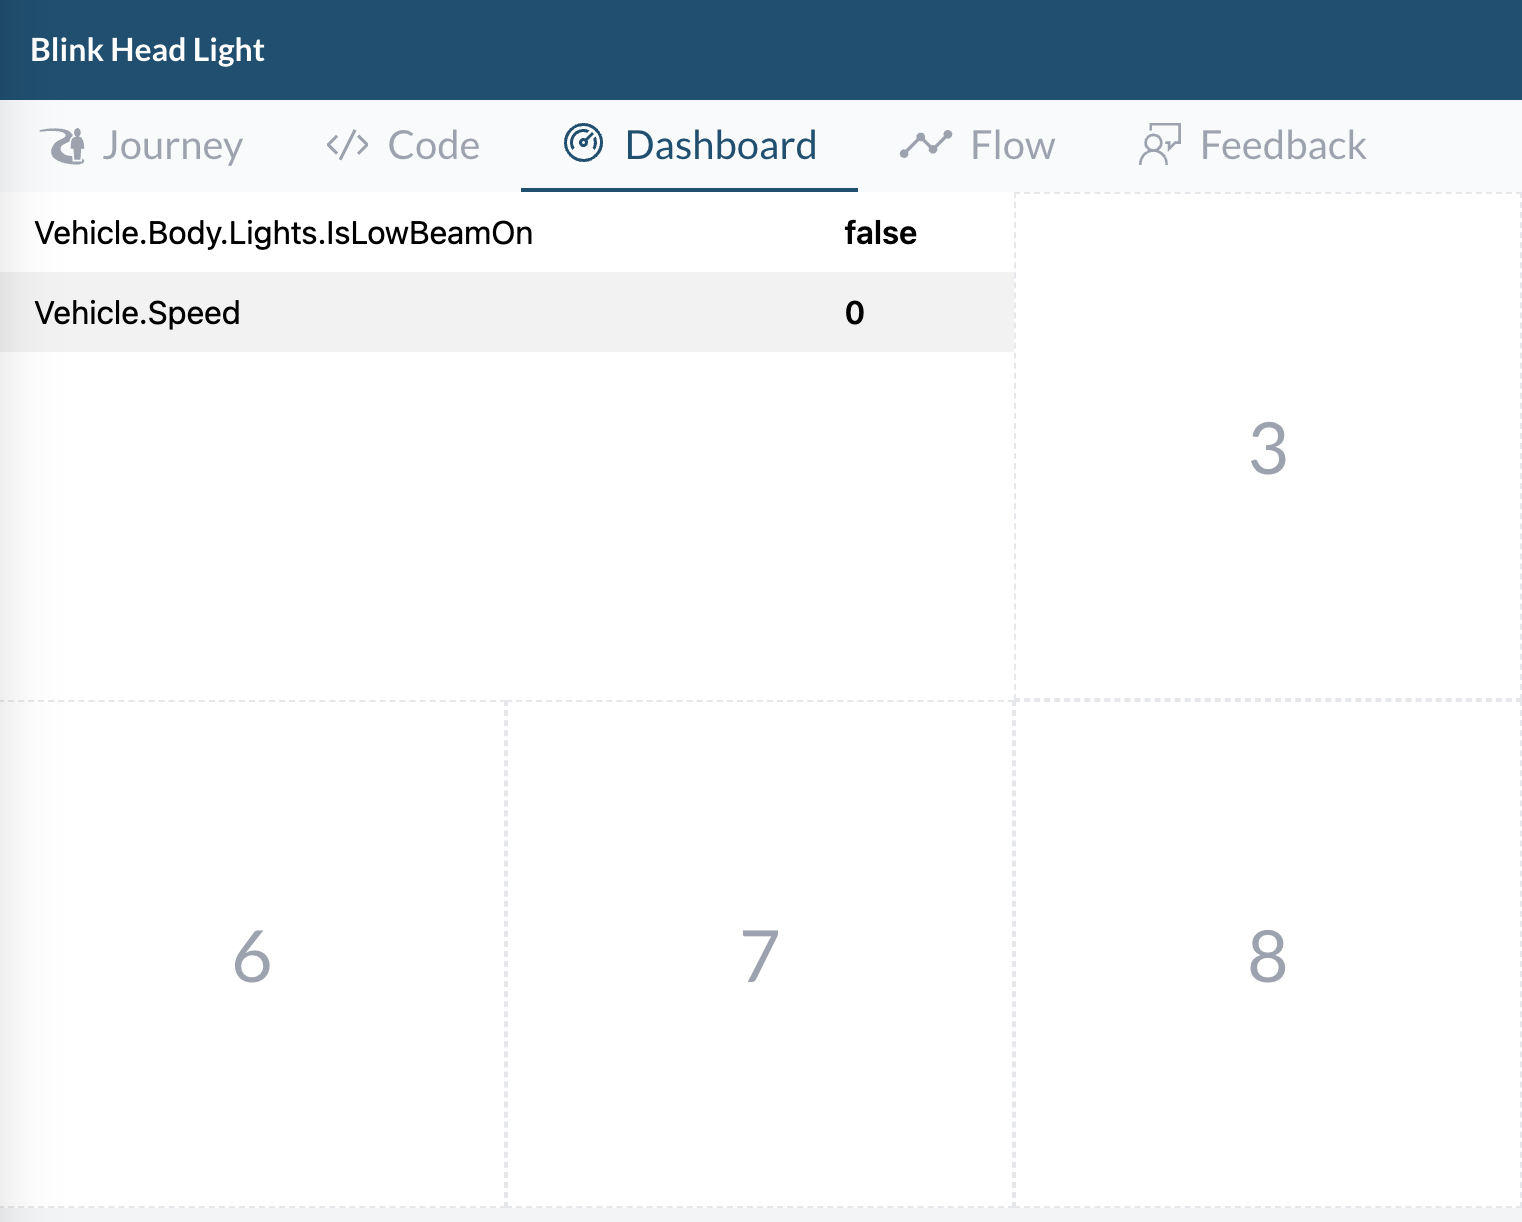
Chart-APIs-Widget
Simple line or bar chart, show recent value of some APIs
Let try with this config:
{
    "chartType": "line",
    "num_of_keep_item": 30,
    "chart_tick": 500,
    "signals": [
        {
            "api": "Vehicle.Cabin.HVAC.Station.Row1.Left.Temperature",
            "color": "red"
        },
        {
            "api": "Vehicle.Cabin.HVAC.Station.Row1.Left.FanSpeed",
            "color": "orange"
        }
    ]
}
We monitoring the value of Row1.Left.Temperature and Row1.Left.FanSpeed, for each API, you can specify color.
- chartType: could be line or bar
- chart_tick: mean how frequenly a new value be recorded and add to chart, unit is milisecond.
- num_of_keep_item: maximum value record be keep in chart The chart will show data of the last num_of_keep_item*chart_tick milisecond.
With above setting, we will have result as below:

Image-By-VSS-Value
We ussually using image to demostate the state of something, this widget could be useful for that case. The widget will continuously read API value, and each value mapping to an image, image will change base on API value
Let try with this config:
{
      "api": "Vehicle.Body.Lights.IsLowBeamOn",
      "valueMaps": [
          {
              "value": false,
              "img": "https://bestudio.digitalauto.tech/project/Ml2Sc9TYoOHc/light_off.png"
          },
          {
              "value": true,
              "img": "https://bestudio.digitalauto.tech/project/Ml2Sc9TYoOHc/light_on.png"
          }
      ]
}
Very simple, when LowBeam value if true, we display light_on.png, else we display light_on.png The widget is not limit for boolean, you can use with API return interger value
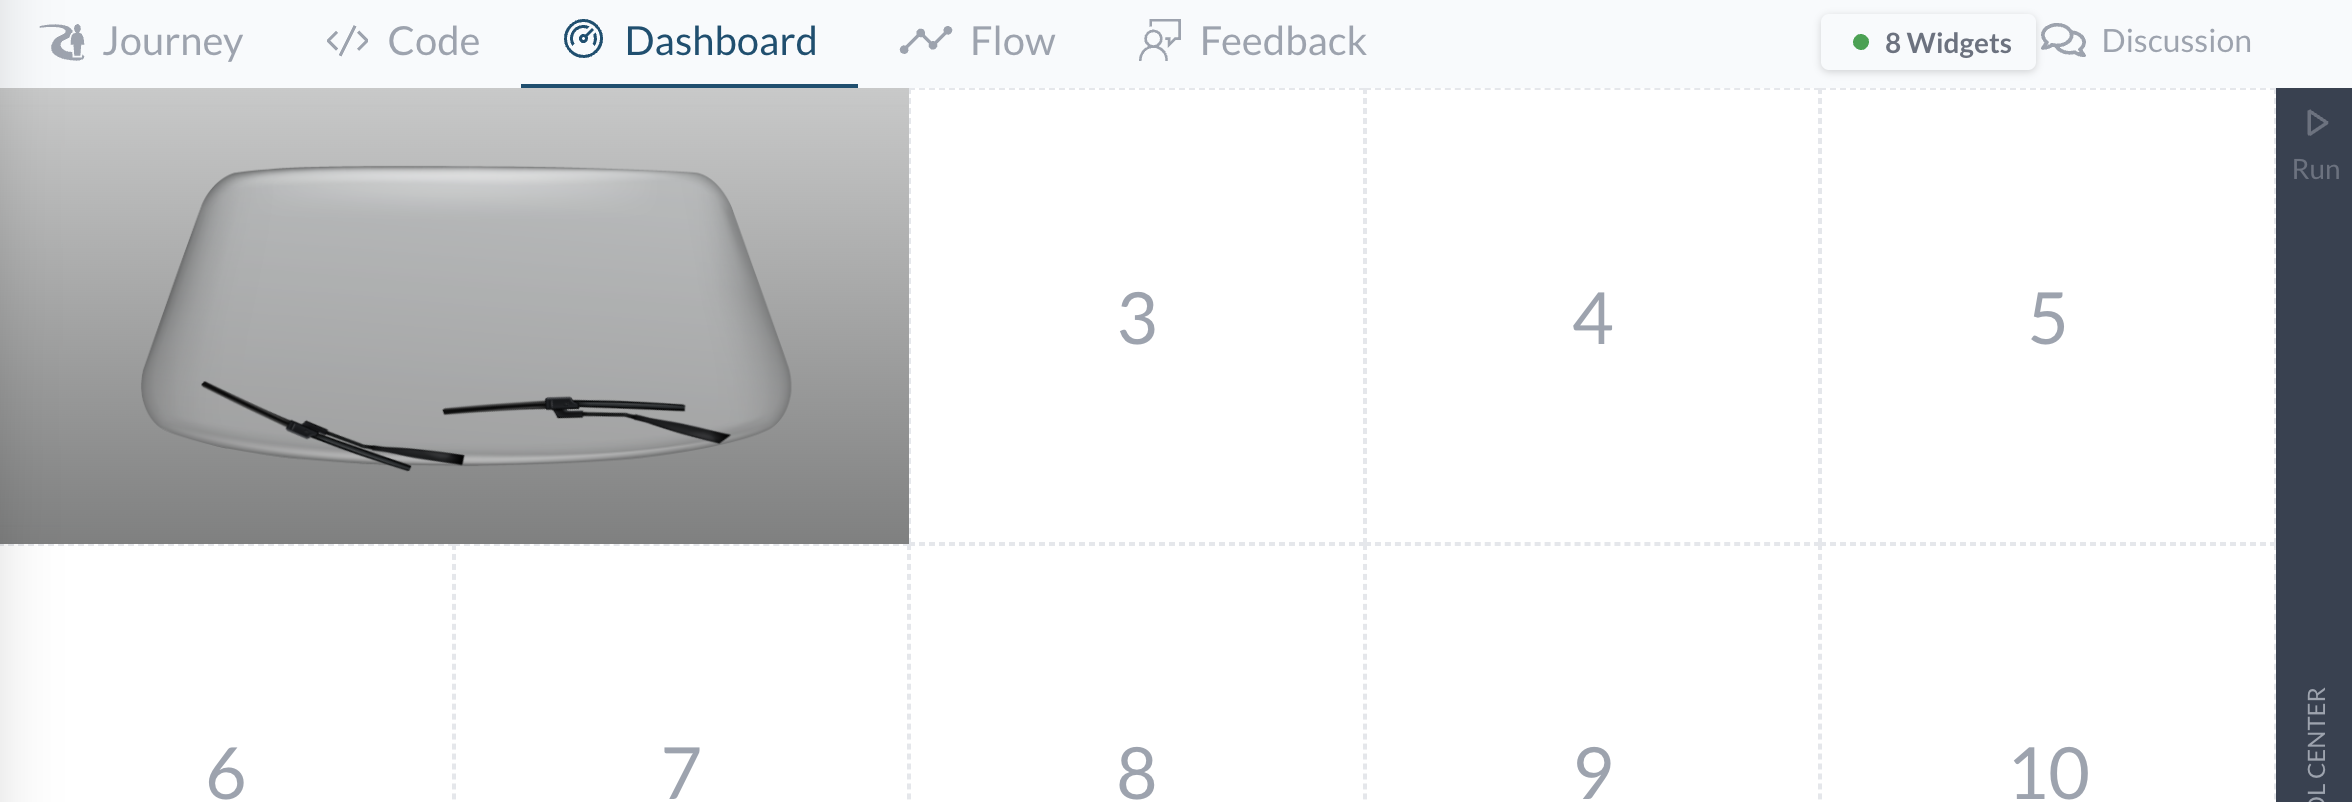
Wiper-Simulator
This widget is quite solid, no need to input option. The widget alway linking with API: Vehicle.Body.Windshield.Front.Wiping.Mode
Let try some code and config as image below, then run the Dashboard, you will see the config wiper run 5s then off.
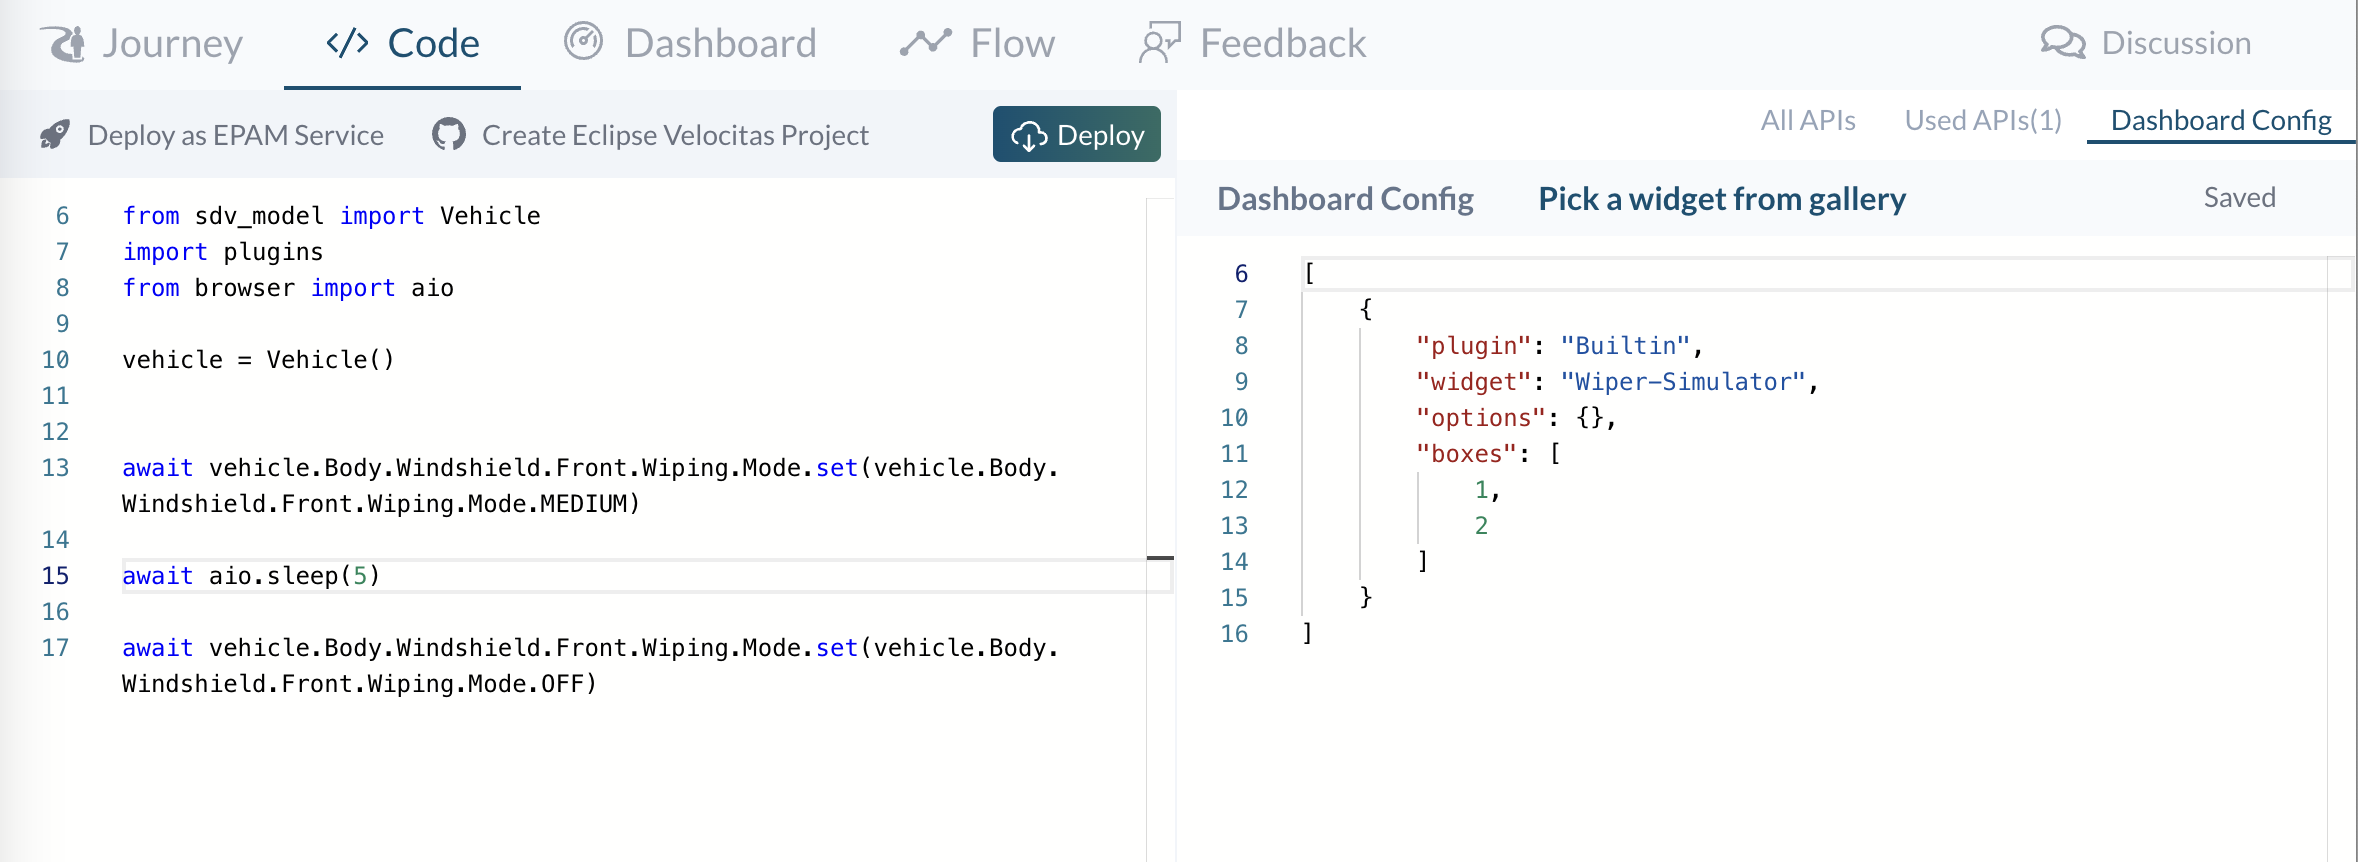
This is the result:
GoogleMap-Direction
This widget render maps in direction mode, you can specify start point and end point. Thenm when the app running, position of your can will read from posision API and render you car on maps. In option, you also can specify the url of the image for the car icon you want.
{
    "directions": [
        {
            "lat": 48.149497,
            "lng": 11.523194
        },
        {
            "lat": 50.445168,
            "lng": 11.020569
        }
    ],
    "icon": ""
}
And here is how it look like

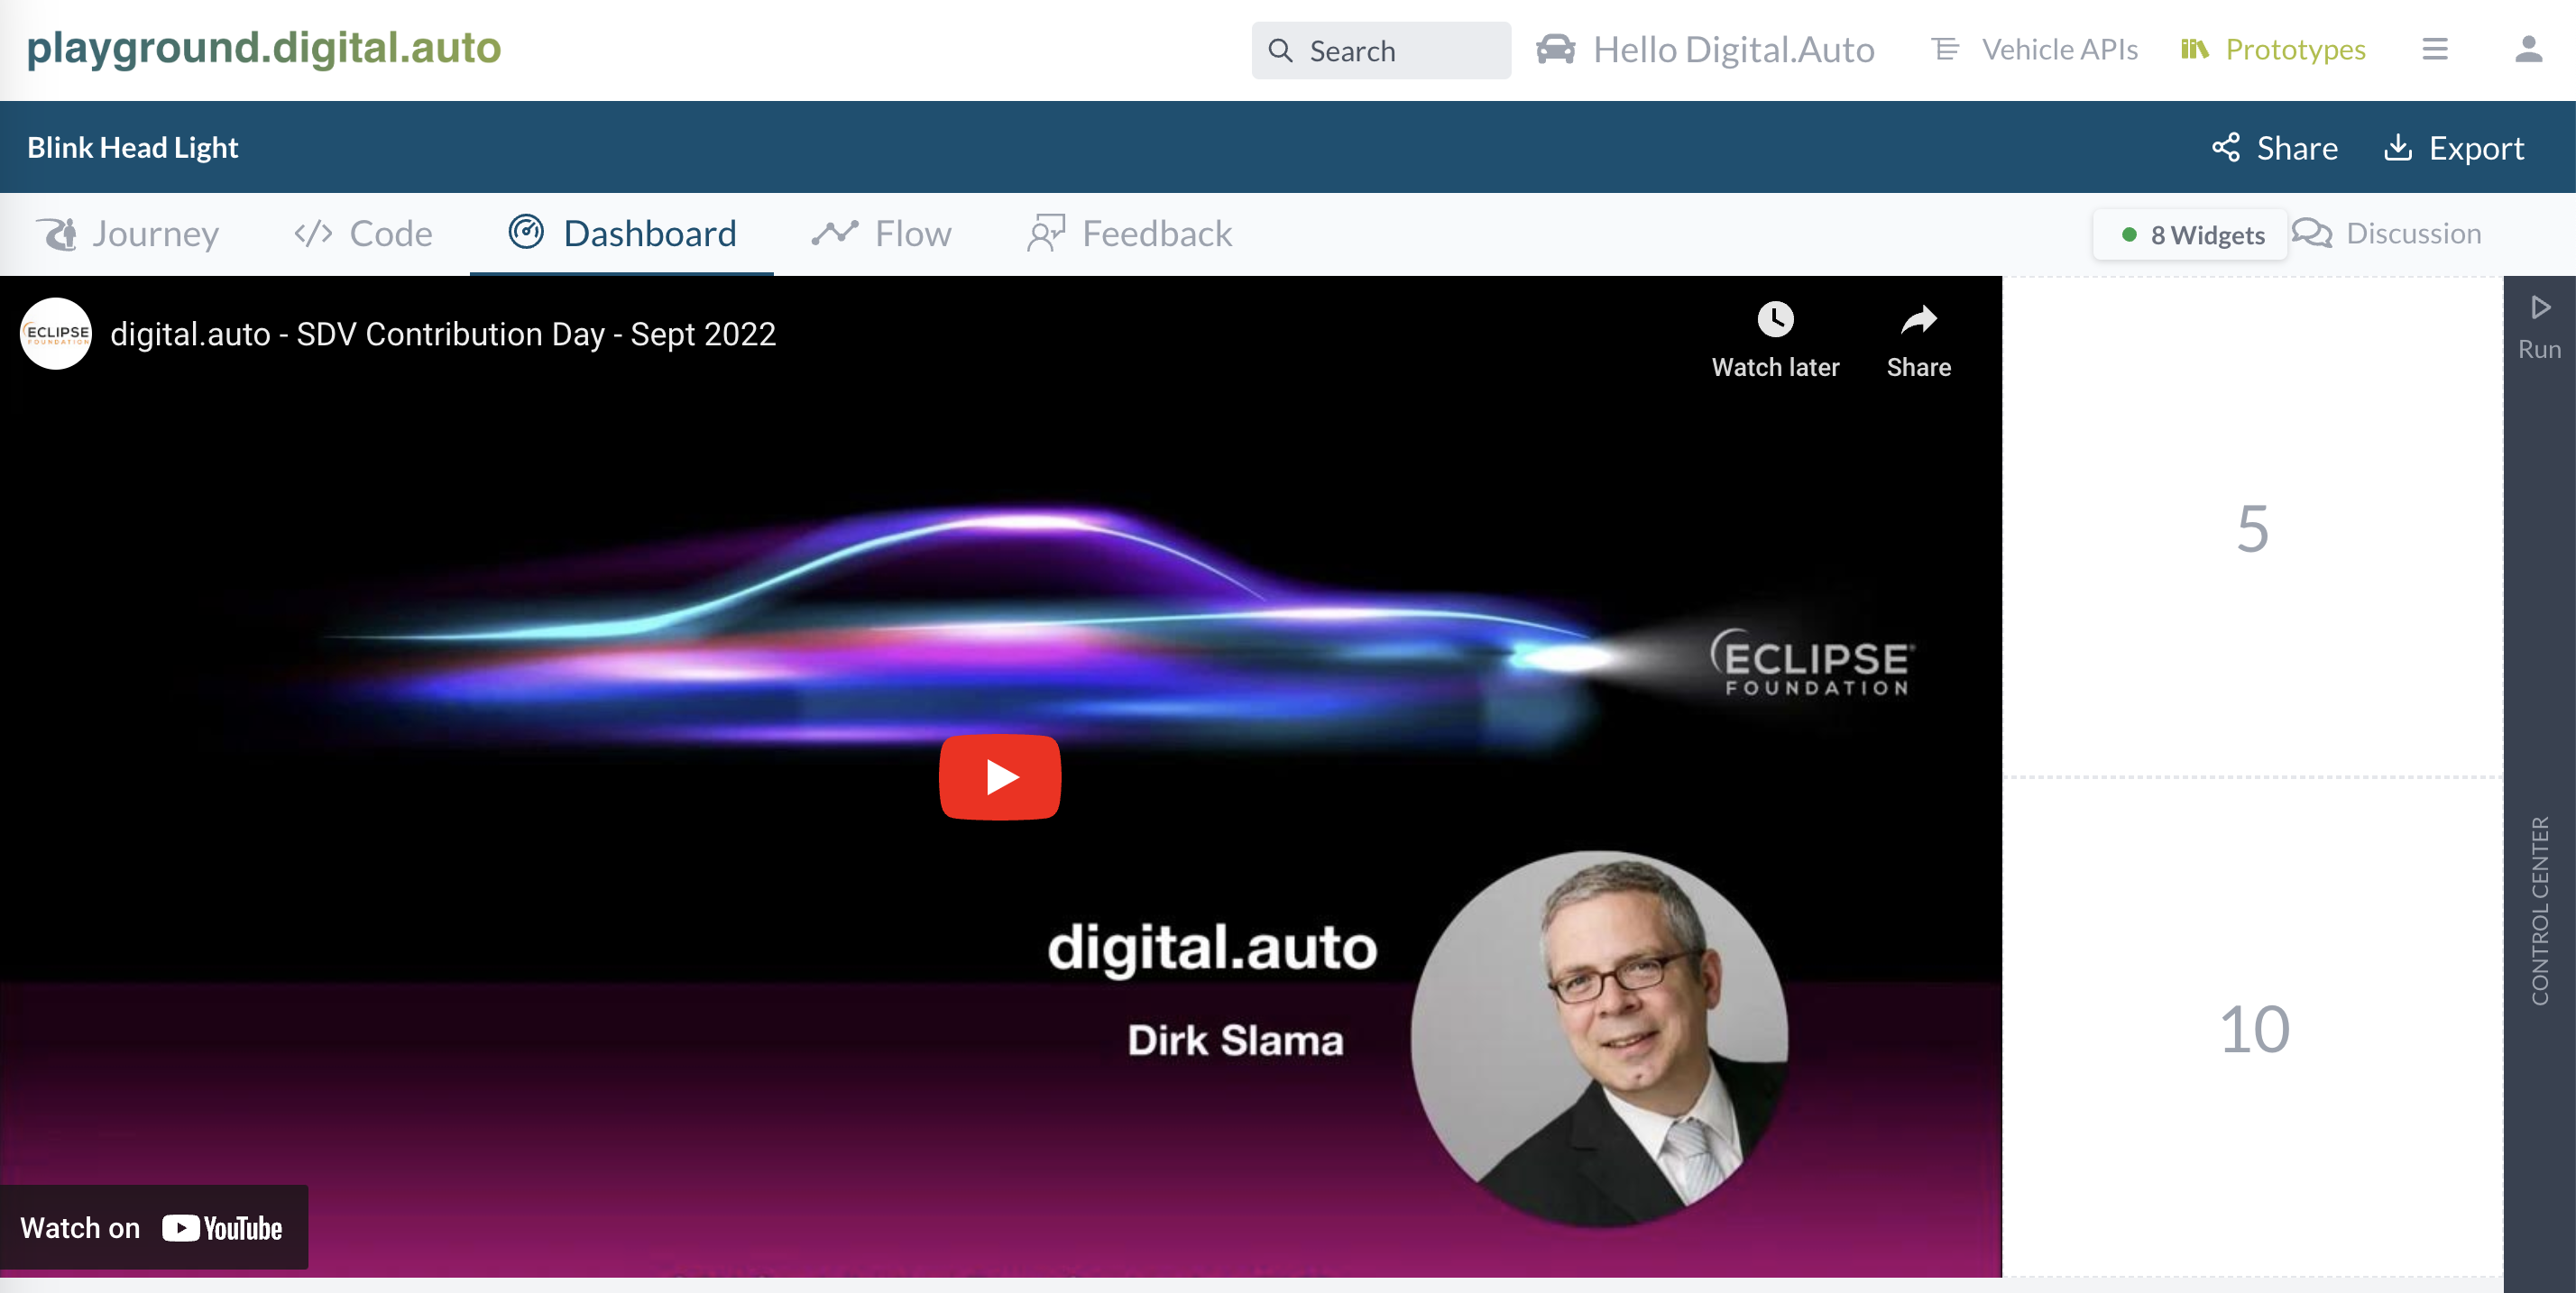
Embedded-Widget
Indeed, this widget need you provile url of another website, then if will using iframe to embedded that site to the widget box.
The only require option is url of the external site. Let’s try to embedded an Youtube video to our playground.
{
    "url": "https://www.youtube.com/embed/ypR2cpdh6JA?si=S1jxtr4g1wXeZWQk"
}
And here is the result
Embedded-Widget is the most powerful widget, digital.auto come up with a Web Studio at the address https://studio.digitalauto.tech With the WebStudio, you can write some HTML/CSS/JS code to build up a beautify widget and ’embbeded’ it to the playground. Follow the instruction here to see how to create your own widget and resuse it on multiple prototype.
Happy coding!