Create 'Hello World' Prototype
A software engineer typically starts programming journey by printing “hello world” on the terminal. An embedded software engineer typically begins first MCU programming by blinking a LED. That’s a good moment to remember. In this section, to get started with digital.auto playground, we do the same basis but memorable thing - blinking your vehicle headlight.
Before going to detail, here is a summary of what we shall do in this section:
- Create an account if you don’t have one. Or you can login by Github.
- Create a Vehicle Model (aka Model).
- Create a Prototype.
- On above prototype, write a simple code to blink the headlight.
- Configure the dashboard to show the status of headlight.
- Go to dashboard, enjoy the result.
It takes 5 minutes to complete the entire process.
1. Login
Visit digital.auto playground at https://playground.digital.auto If you don’t have an account, you can login by github or register new account, reference registration guide for more detail
2. Create a Vechicle Model
In digital.auto, model is the umbrebla for everything you do. One model contains a list of vehicle APIs, and a collection of prototypes. In short, model has its own API list, and some protypes shall use that API list.
As a free user, you can create up to 3 models. Create a new one if you haven’t had yet.
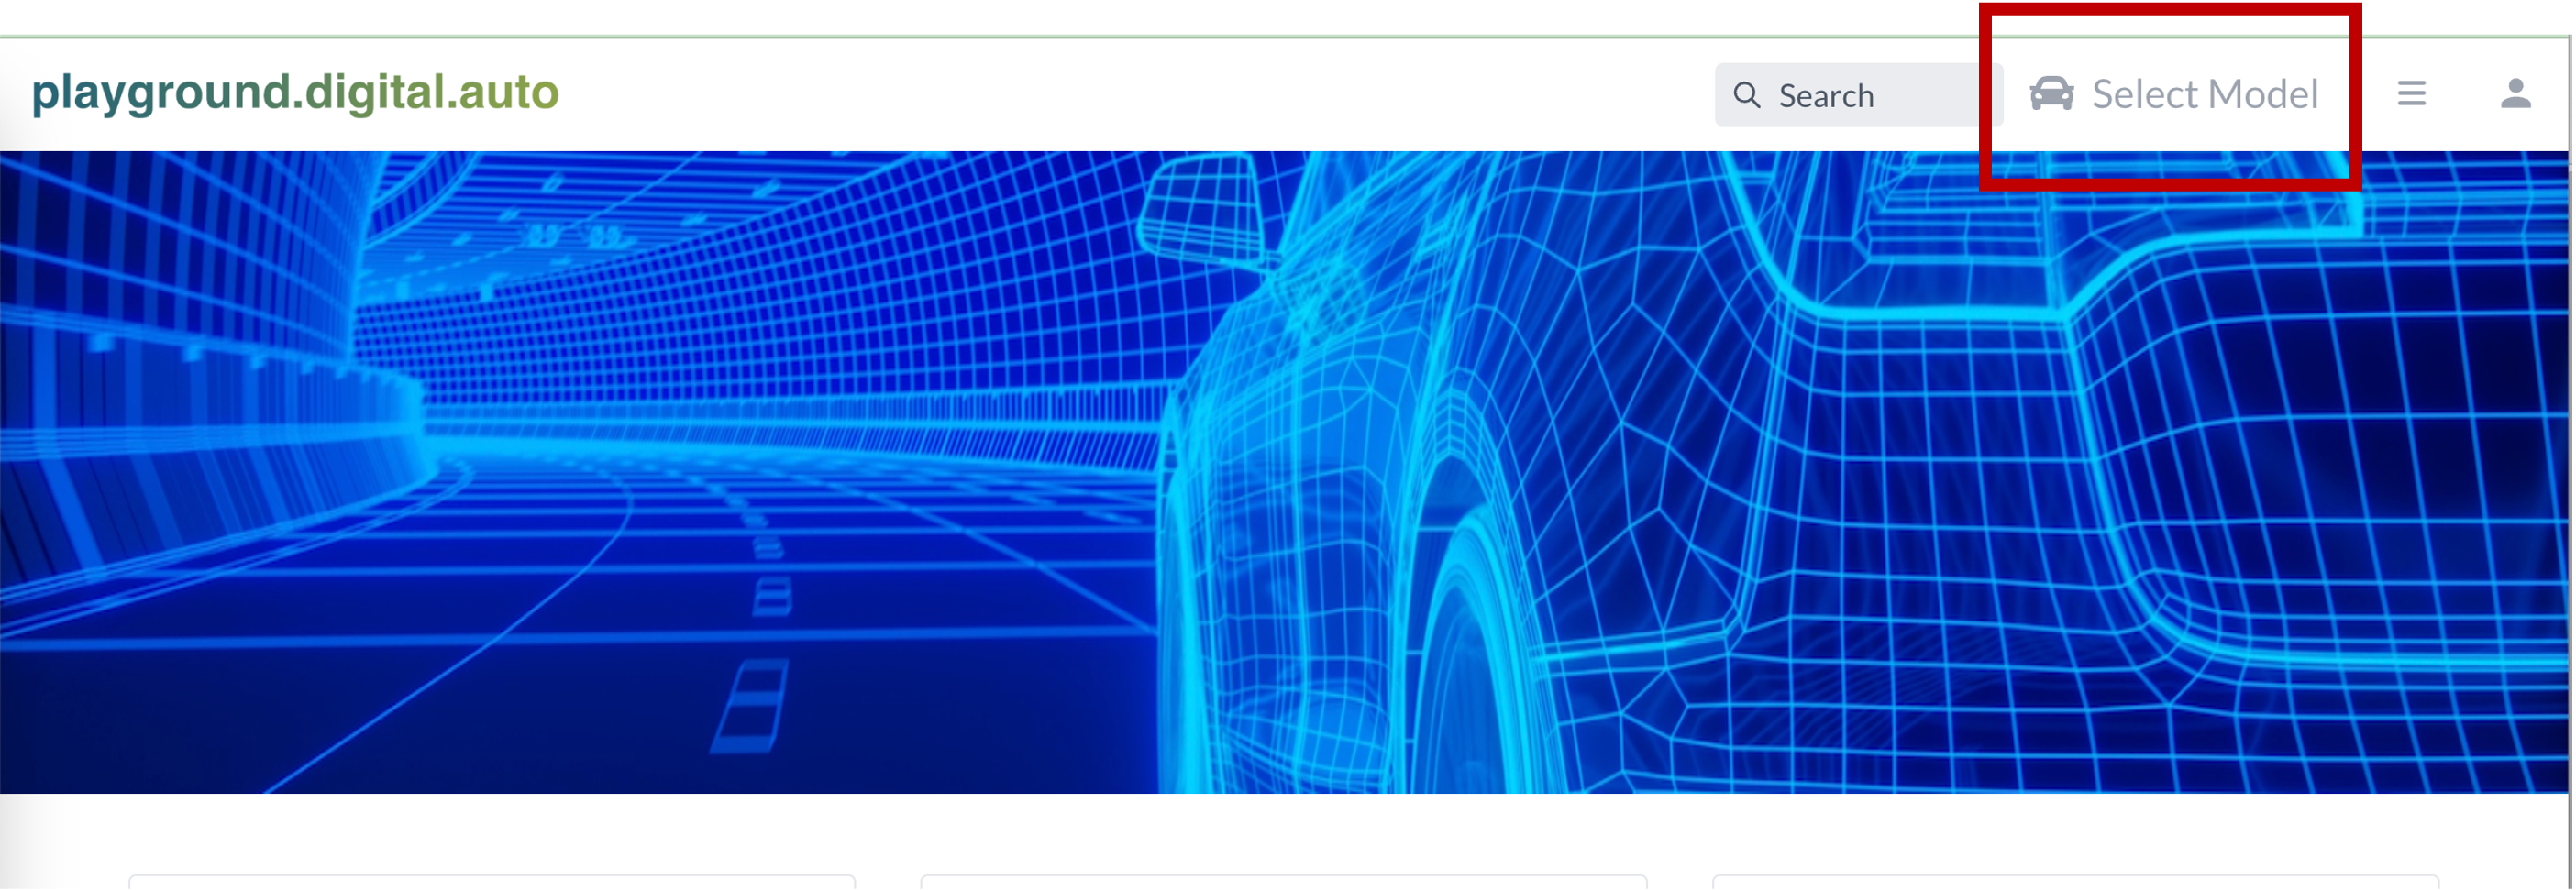
If you have a model, click on it to select and go to step 3. If not, click Create New Model.

On Create Prototype Panel, enter a name. For API, leave it as is. And for visibility, select Pulic option if you want to share your model to community and everyone can see it. Select private option if you only want you or your team in contributor list to get access and other users shall not see it.

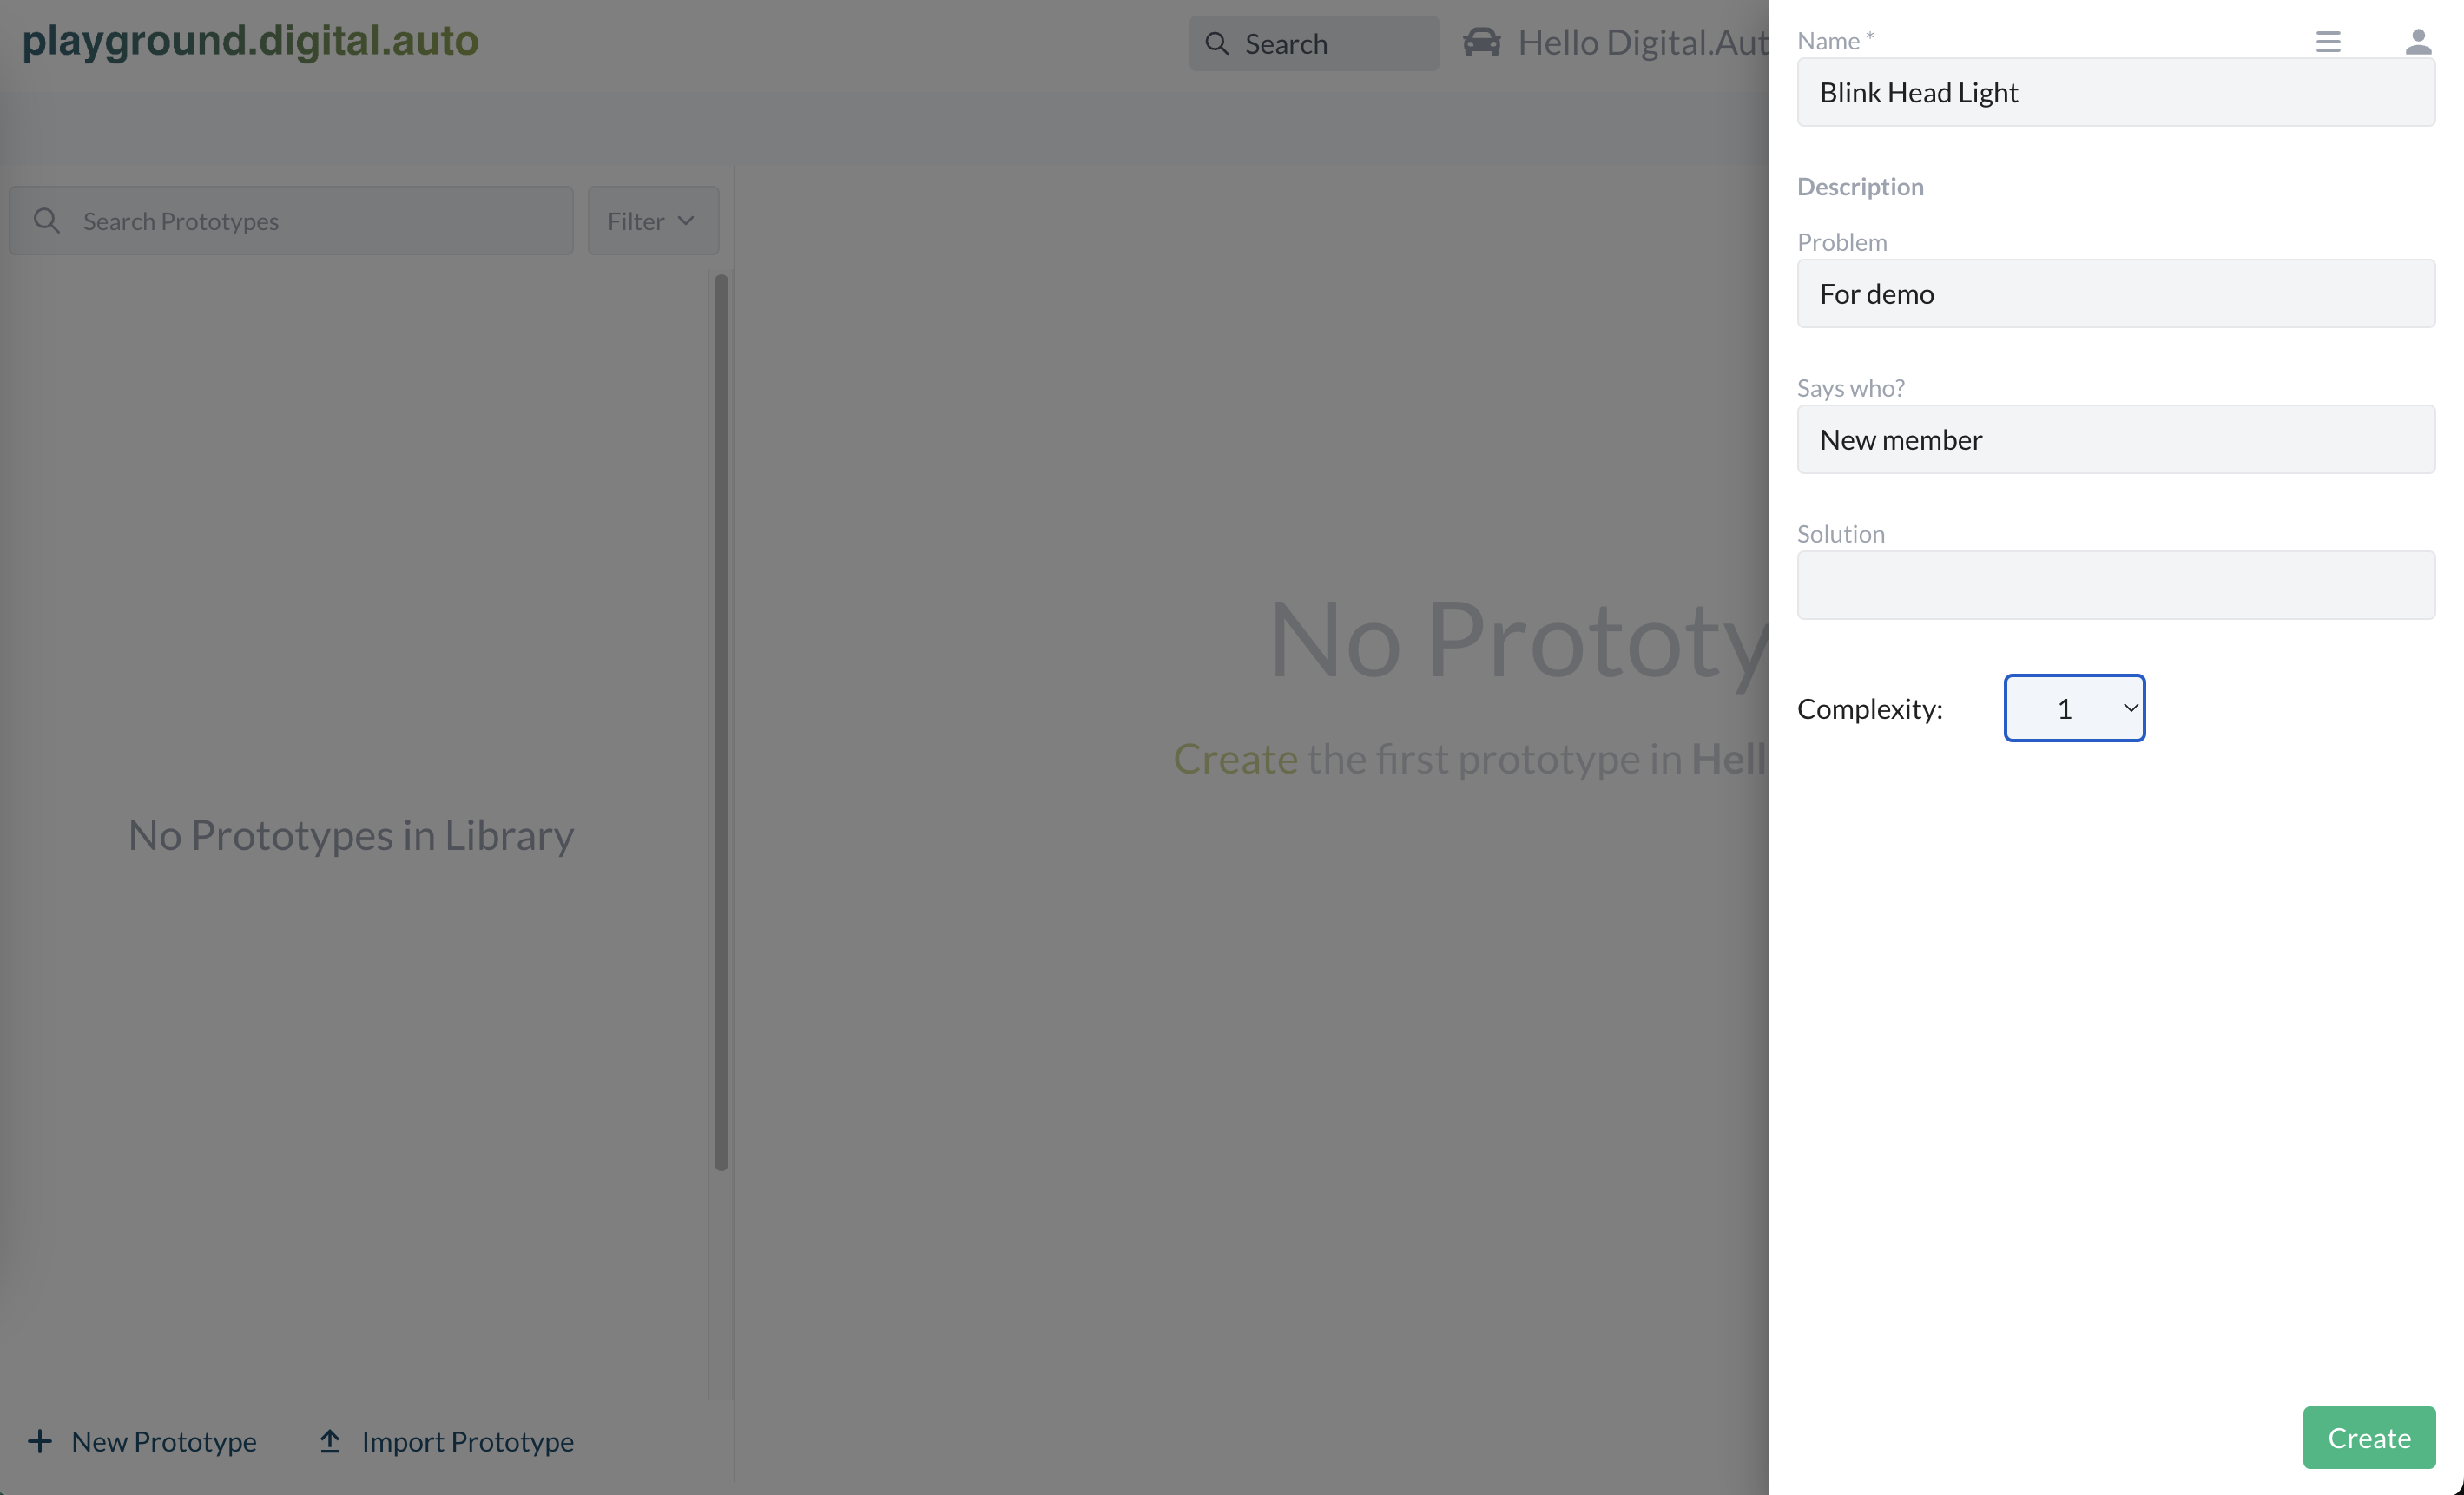
3. Create a new Prototype
First, click on Prototype list, we are going to create a new prototype now.

Click + New Prototype at bottom left corner, then give it a name.

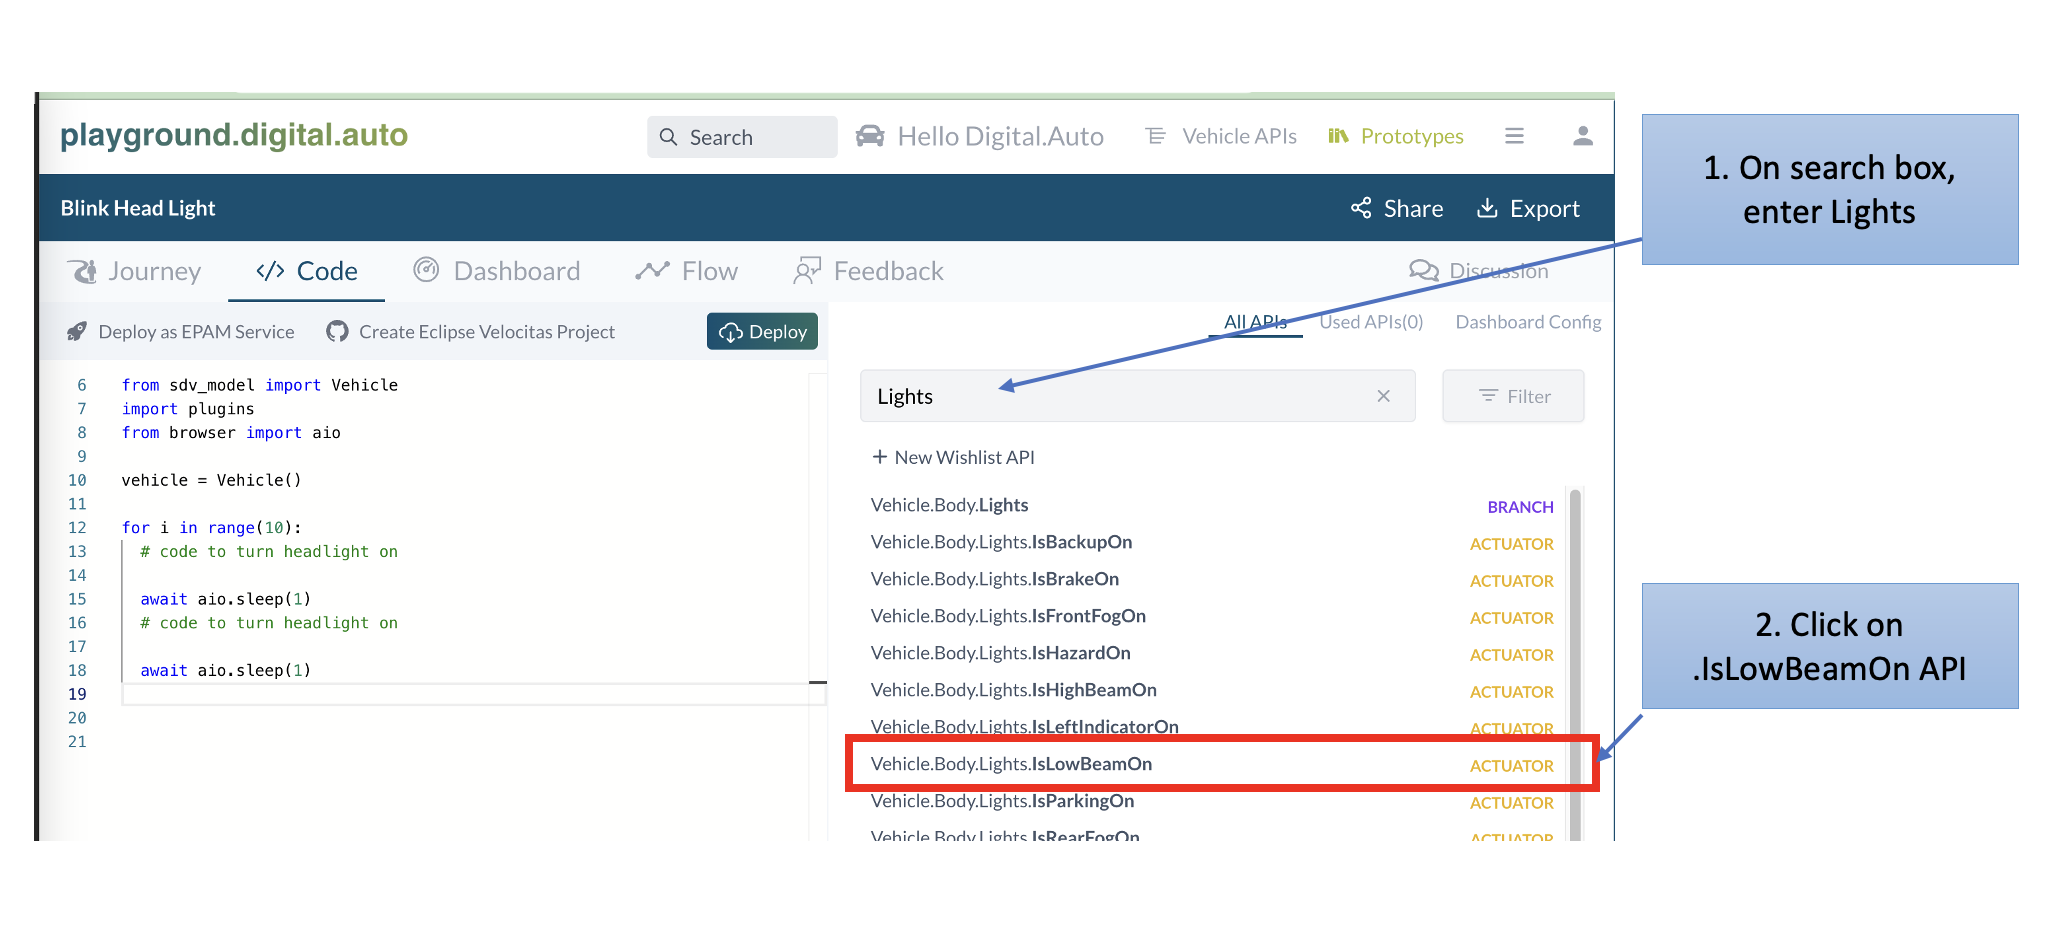
4. Write simple headlight-blinking code
In prototype view, click on Tab Code. You shall find some initial code already created by default.

Let add some simple code as follows:
for i in range(10):
  # code to turn headlight on

  await aio.sleep(1)
  # code to turn headlight on

  await aio.sleep(1)
You can guess, we just loop for ten times to turn headlight on/off. And await aio.sleep(1) is a simple method to sleep for 1 second. Now you need to add lines of code to turn headlight on and off.
On the right panel, with APIs tab, search for Vehicle.Body.Lights.IsLowBeamOn
On new popup, we have sample code for Get API value, Set API value, and Subscribe for value changed. Click copy on Set function.
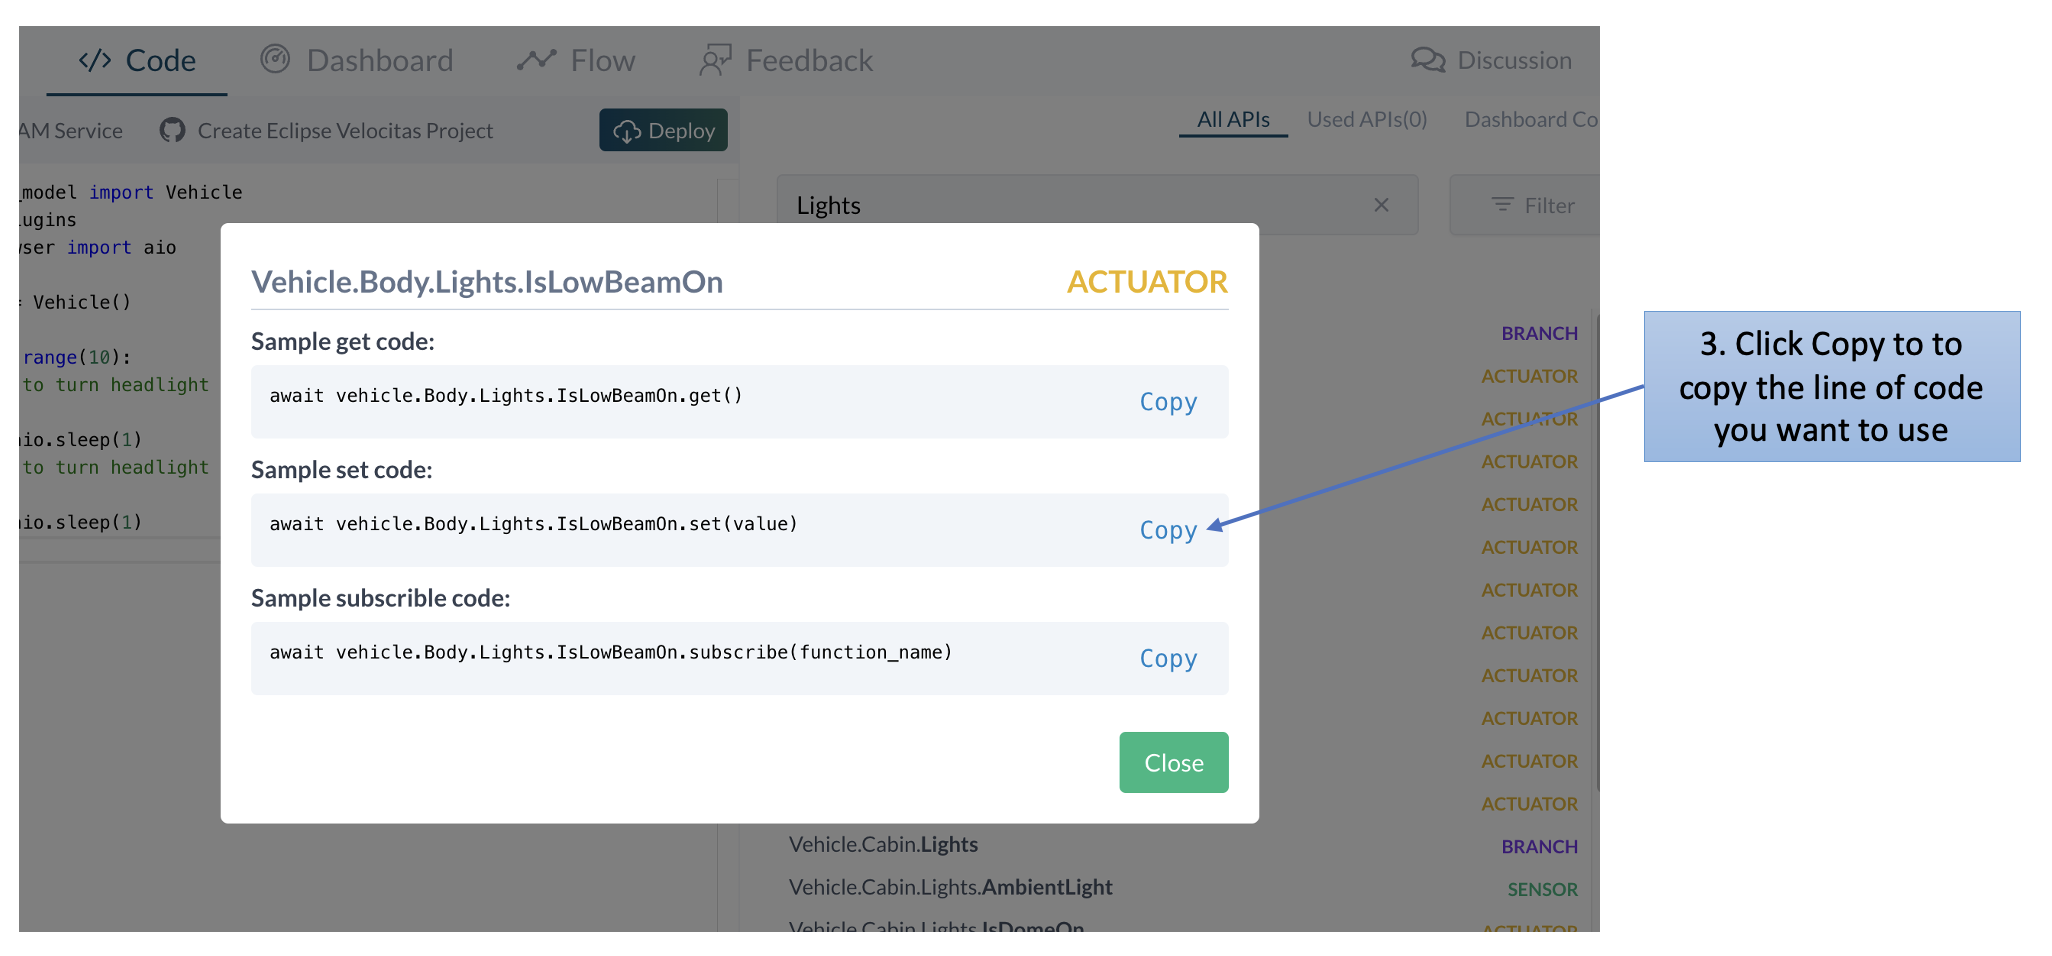
Back to python code, paste it to the placehoder and change value as follows:
for i in range(10):
  # code to turn headlight on
  await vehicle.Body.Lights.IsLowBeamOn.set(True)
  await aio.sleep(1)
  # code to turn headlight on
  await vehicle.Body.Lights.IsLowBeamOn.set(False)
  await aio.sleep(1)
That’s it for the code.
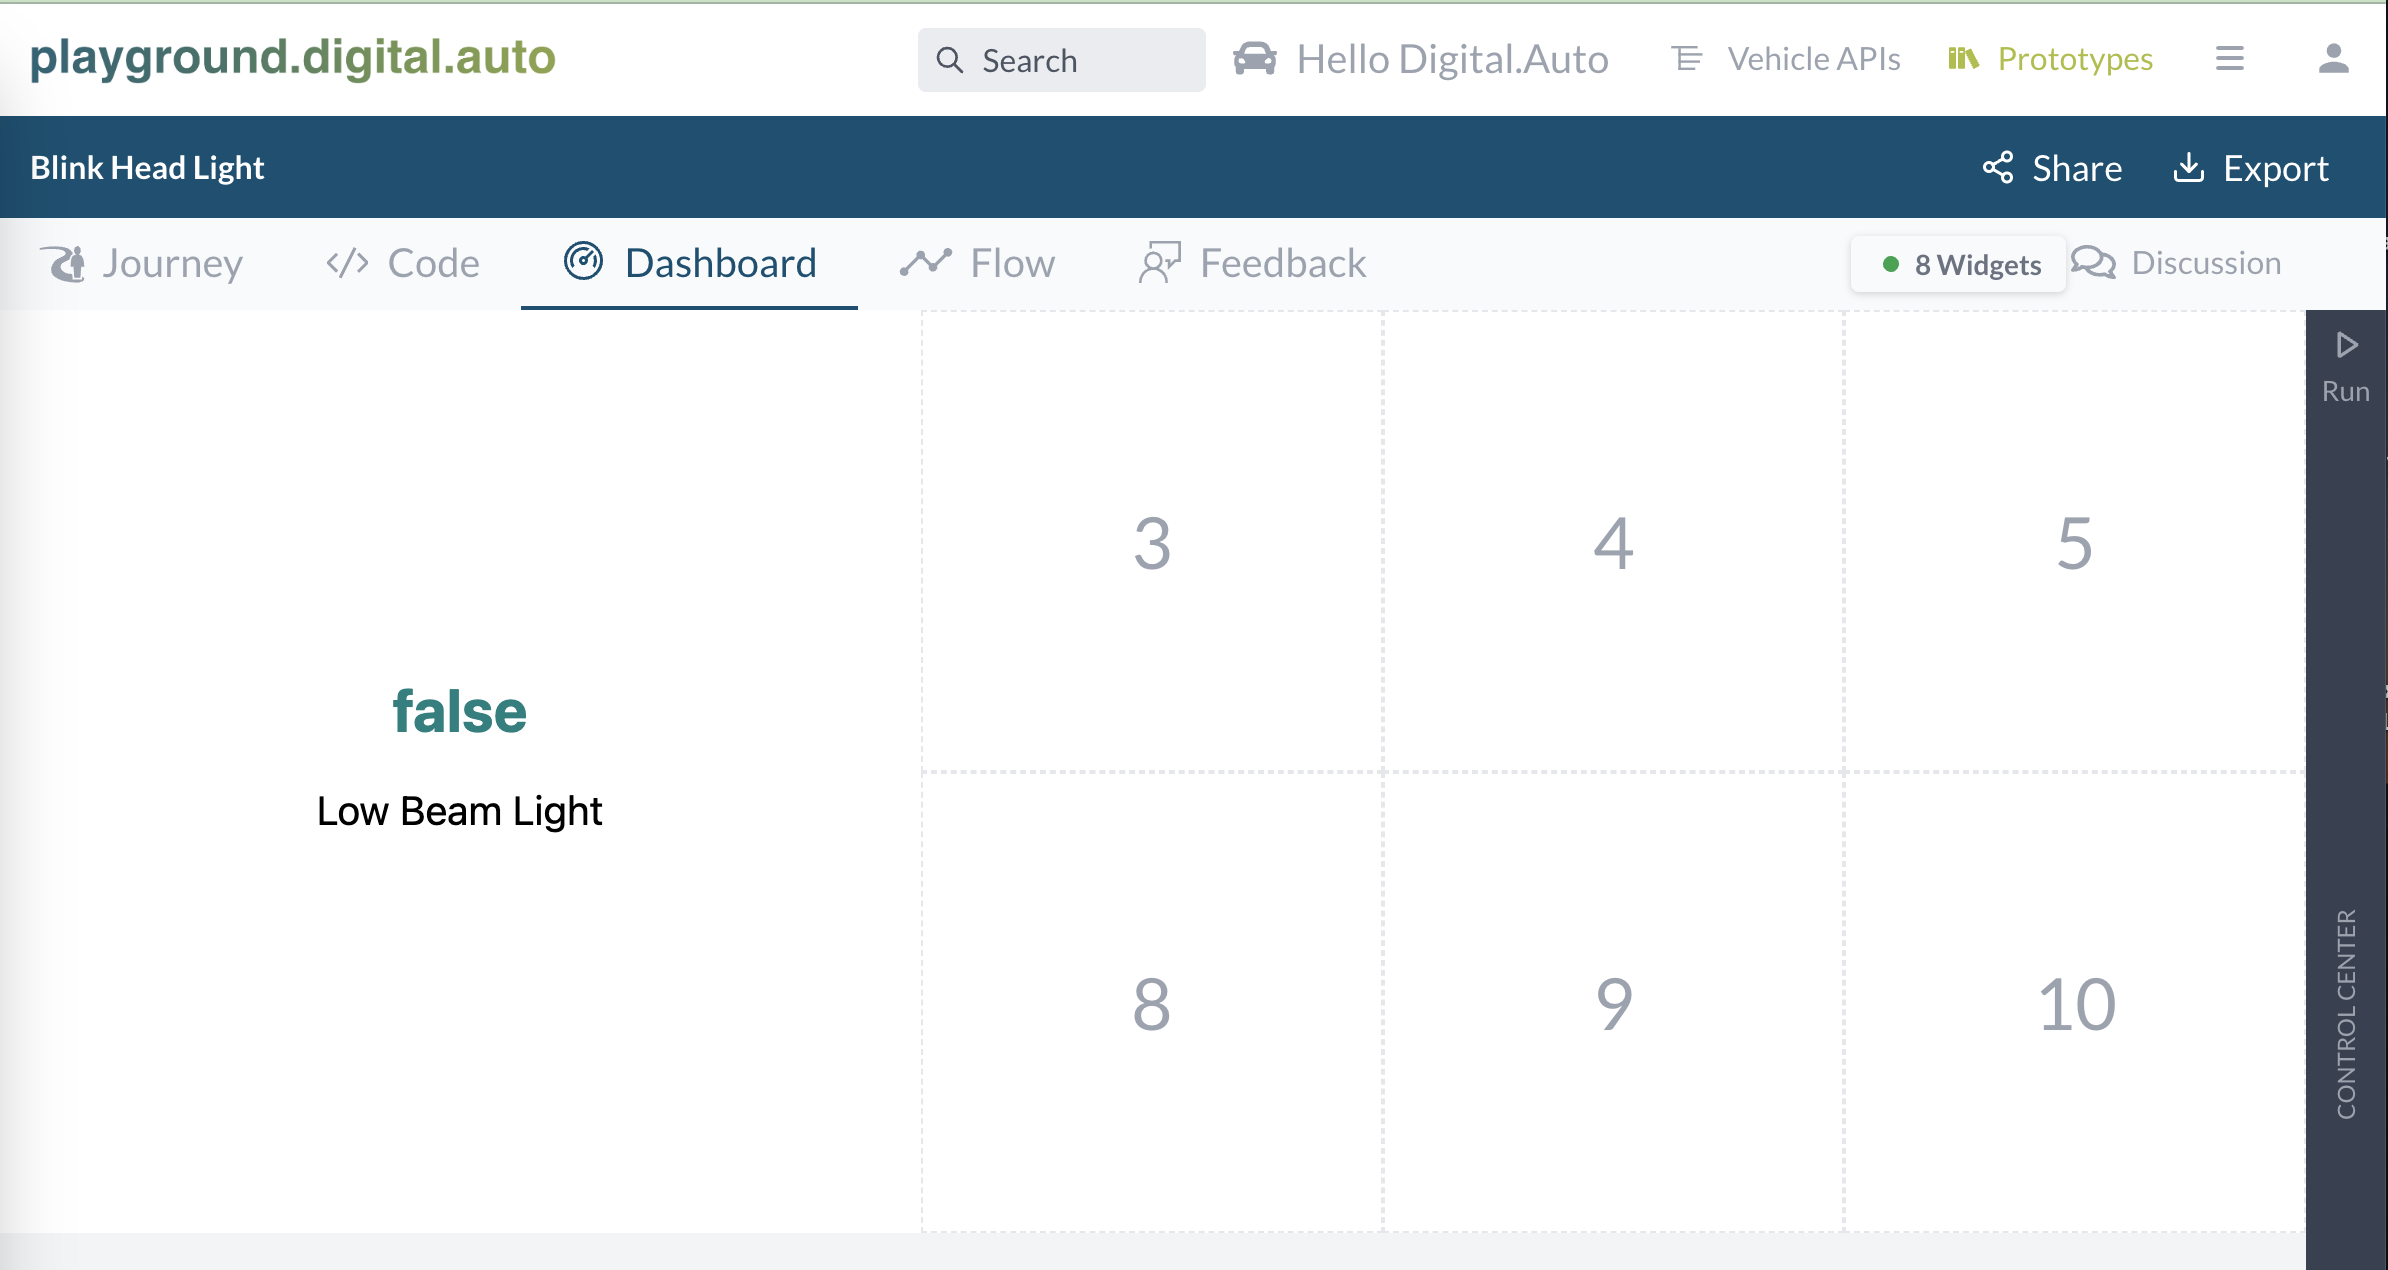
5. Configure the dashboard
Now it’s time to configure the dashboard to show the headlight status when we run the python code.


6. Run the code
Go to dashboard tab, click run button and watch the result
Voila! You are done with your first prototype. Don’t worry if you don’t understand in detail. On next tutorials we shall go in depth on each point.