Using 'General 3D Car Model' Widget
Introduction
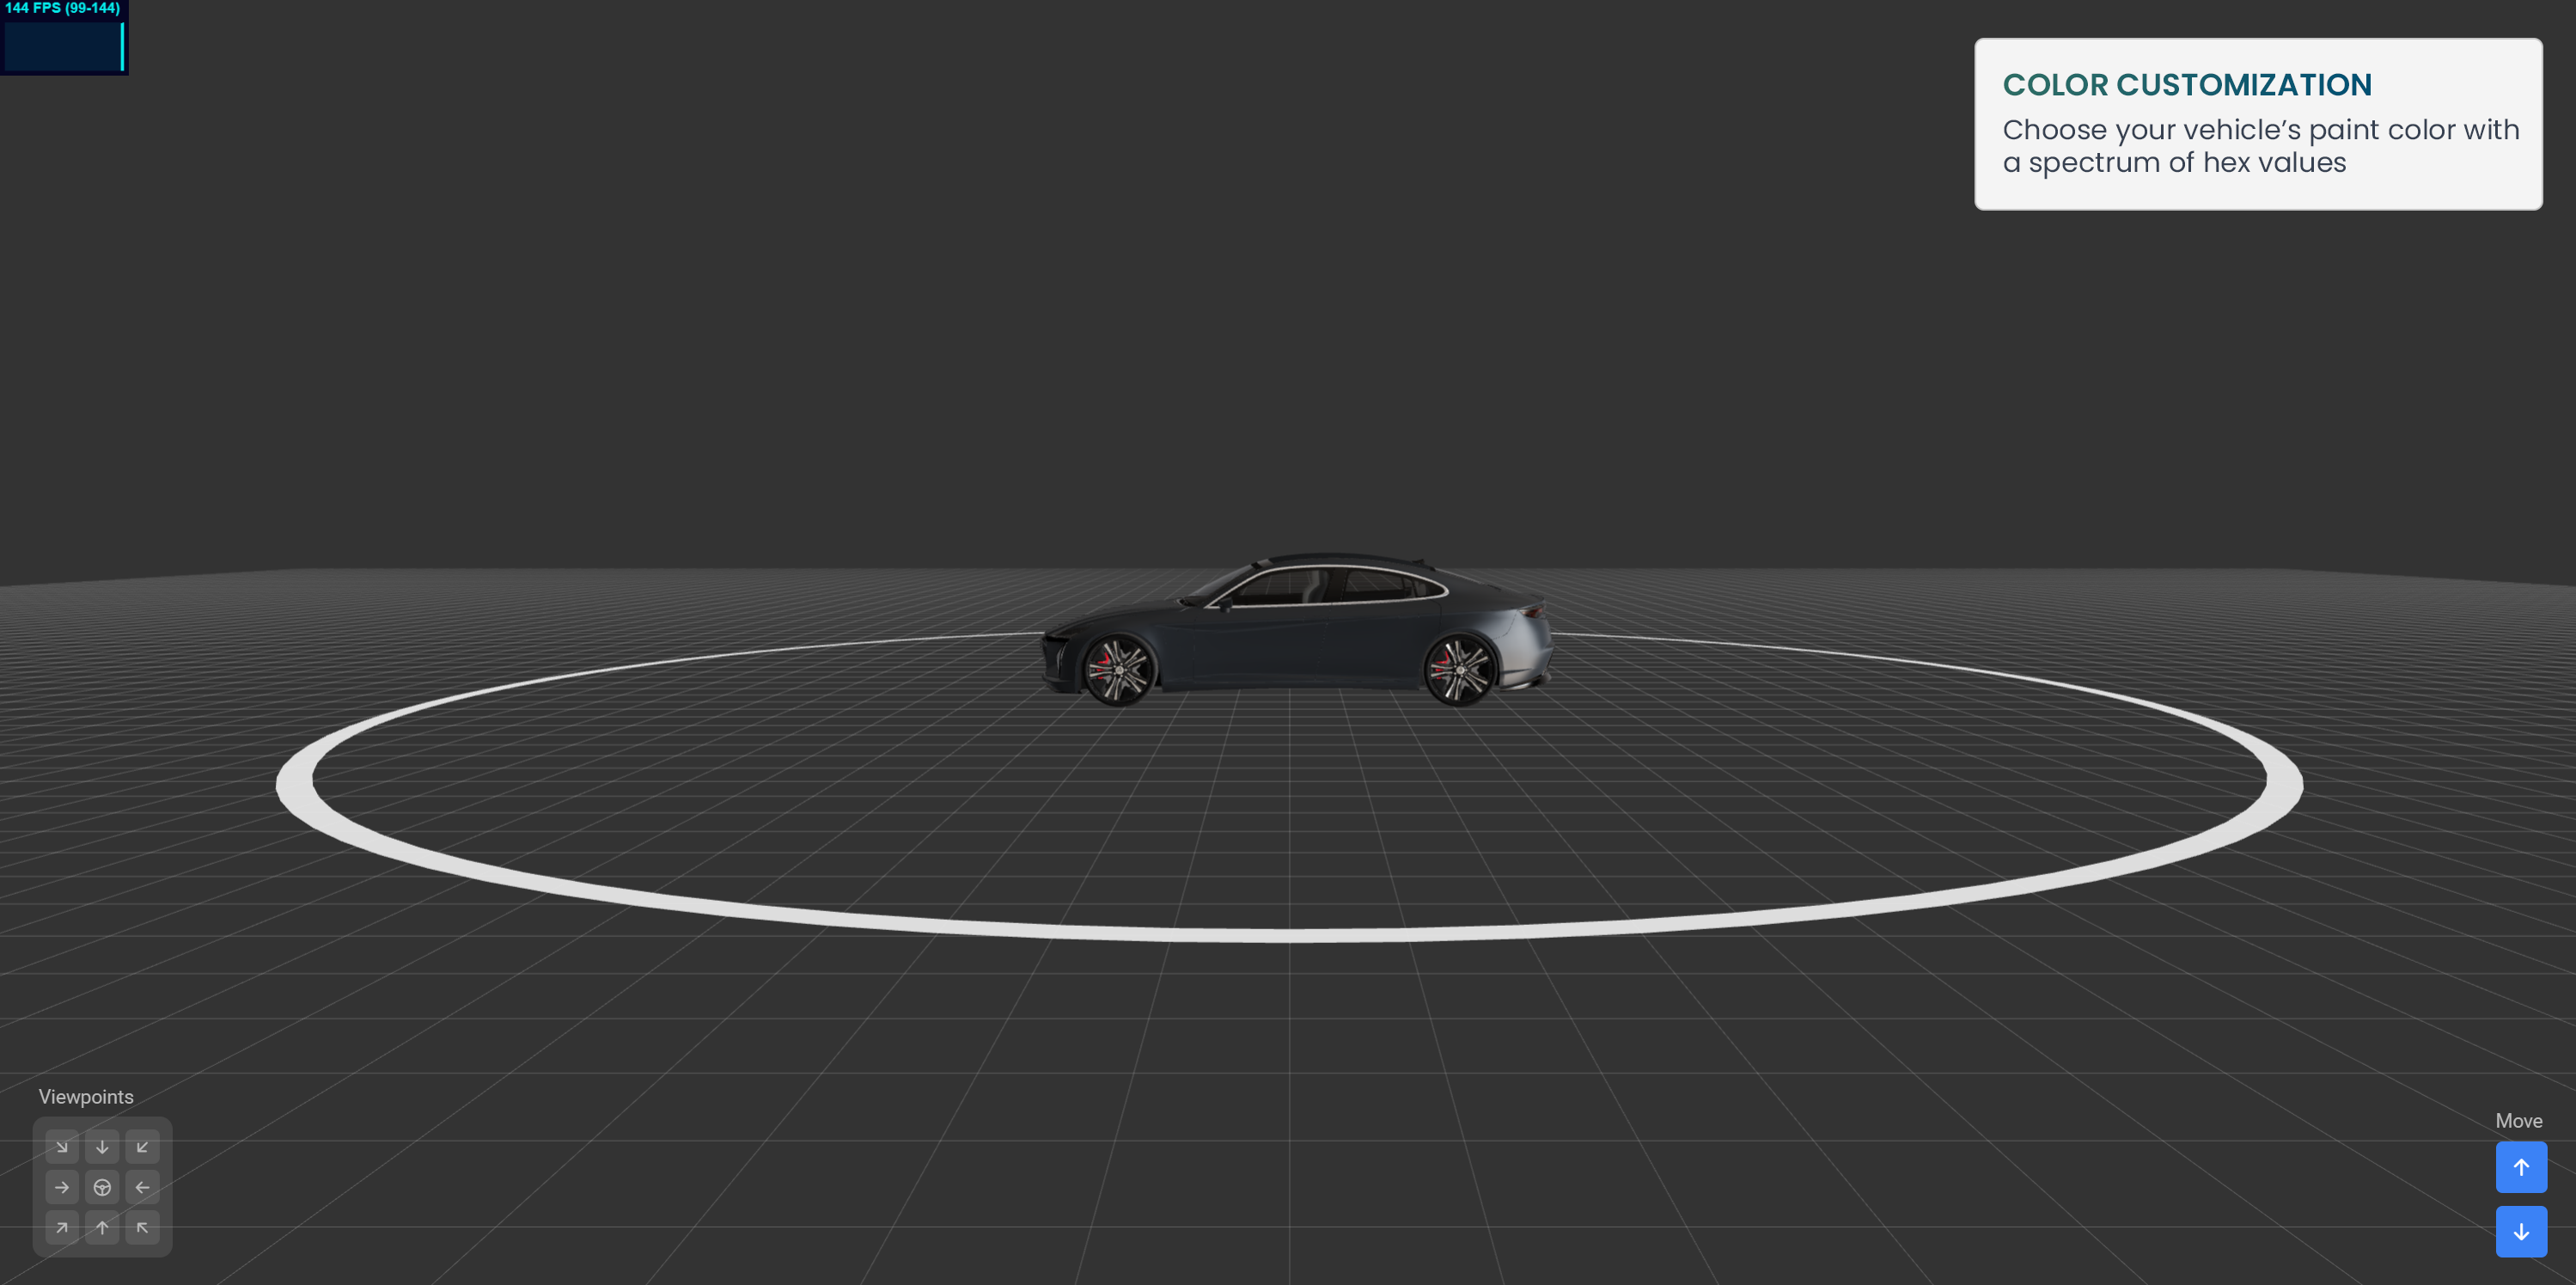
General 3D Car Model widget is designed to enhance your experience in developing software for software-defined vehicles (SDV). It allows you to interact with a realistic 3D model of a sedan, complete with customizable features via Vehicle APIs. This guide will walk you through the steps to integrate and use this widget in your SDV applications.
Here’s a quick overview of what we’ll cover:
1. Adding the widget to your dashboard from the Marketplace
2. Configuring the widget
3. Running code and interacting with the 3D environment
4. Exploring the features in-depth
1. Add widget to dashboard from Marketplace
Start by selecting the widget from our marketplace. Make sure to allocate at least 6 cells on your dashboard for an optimal visual experience.
Dashboard Configuration:
Choose a minimum of 6 cells for placement.
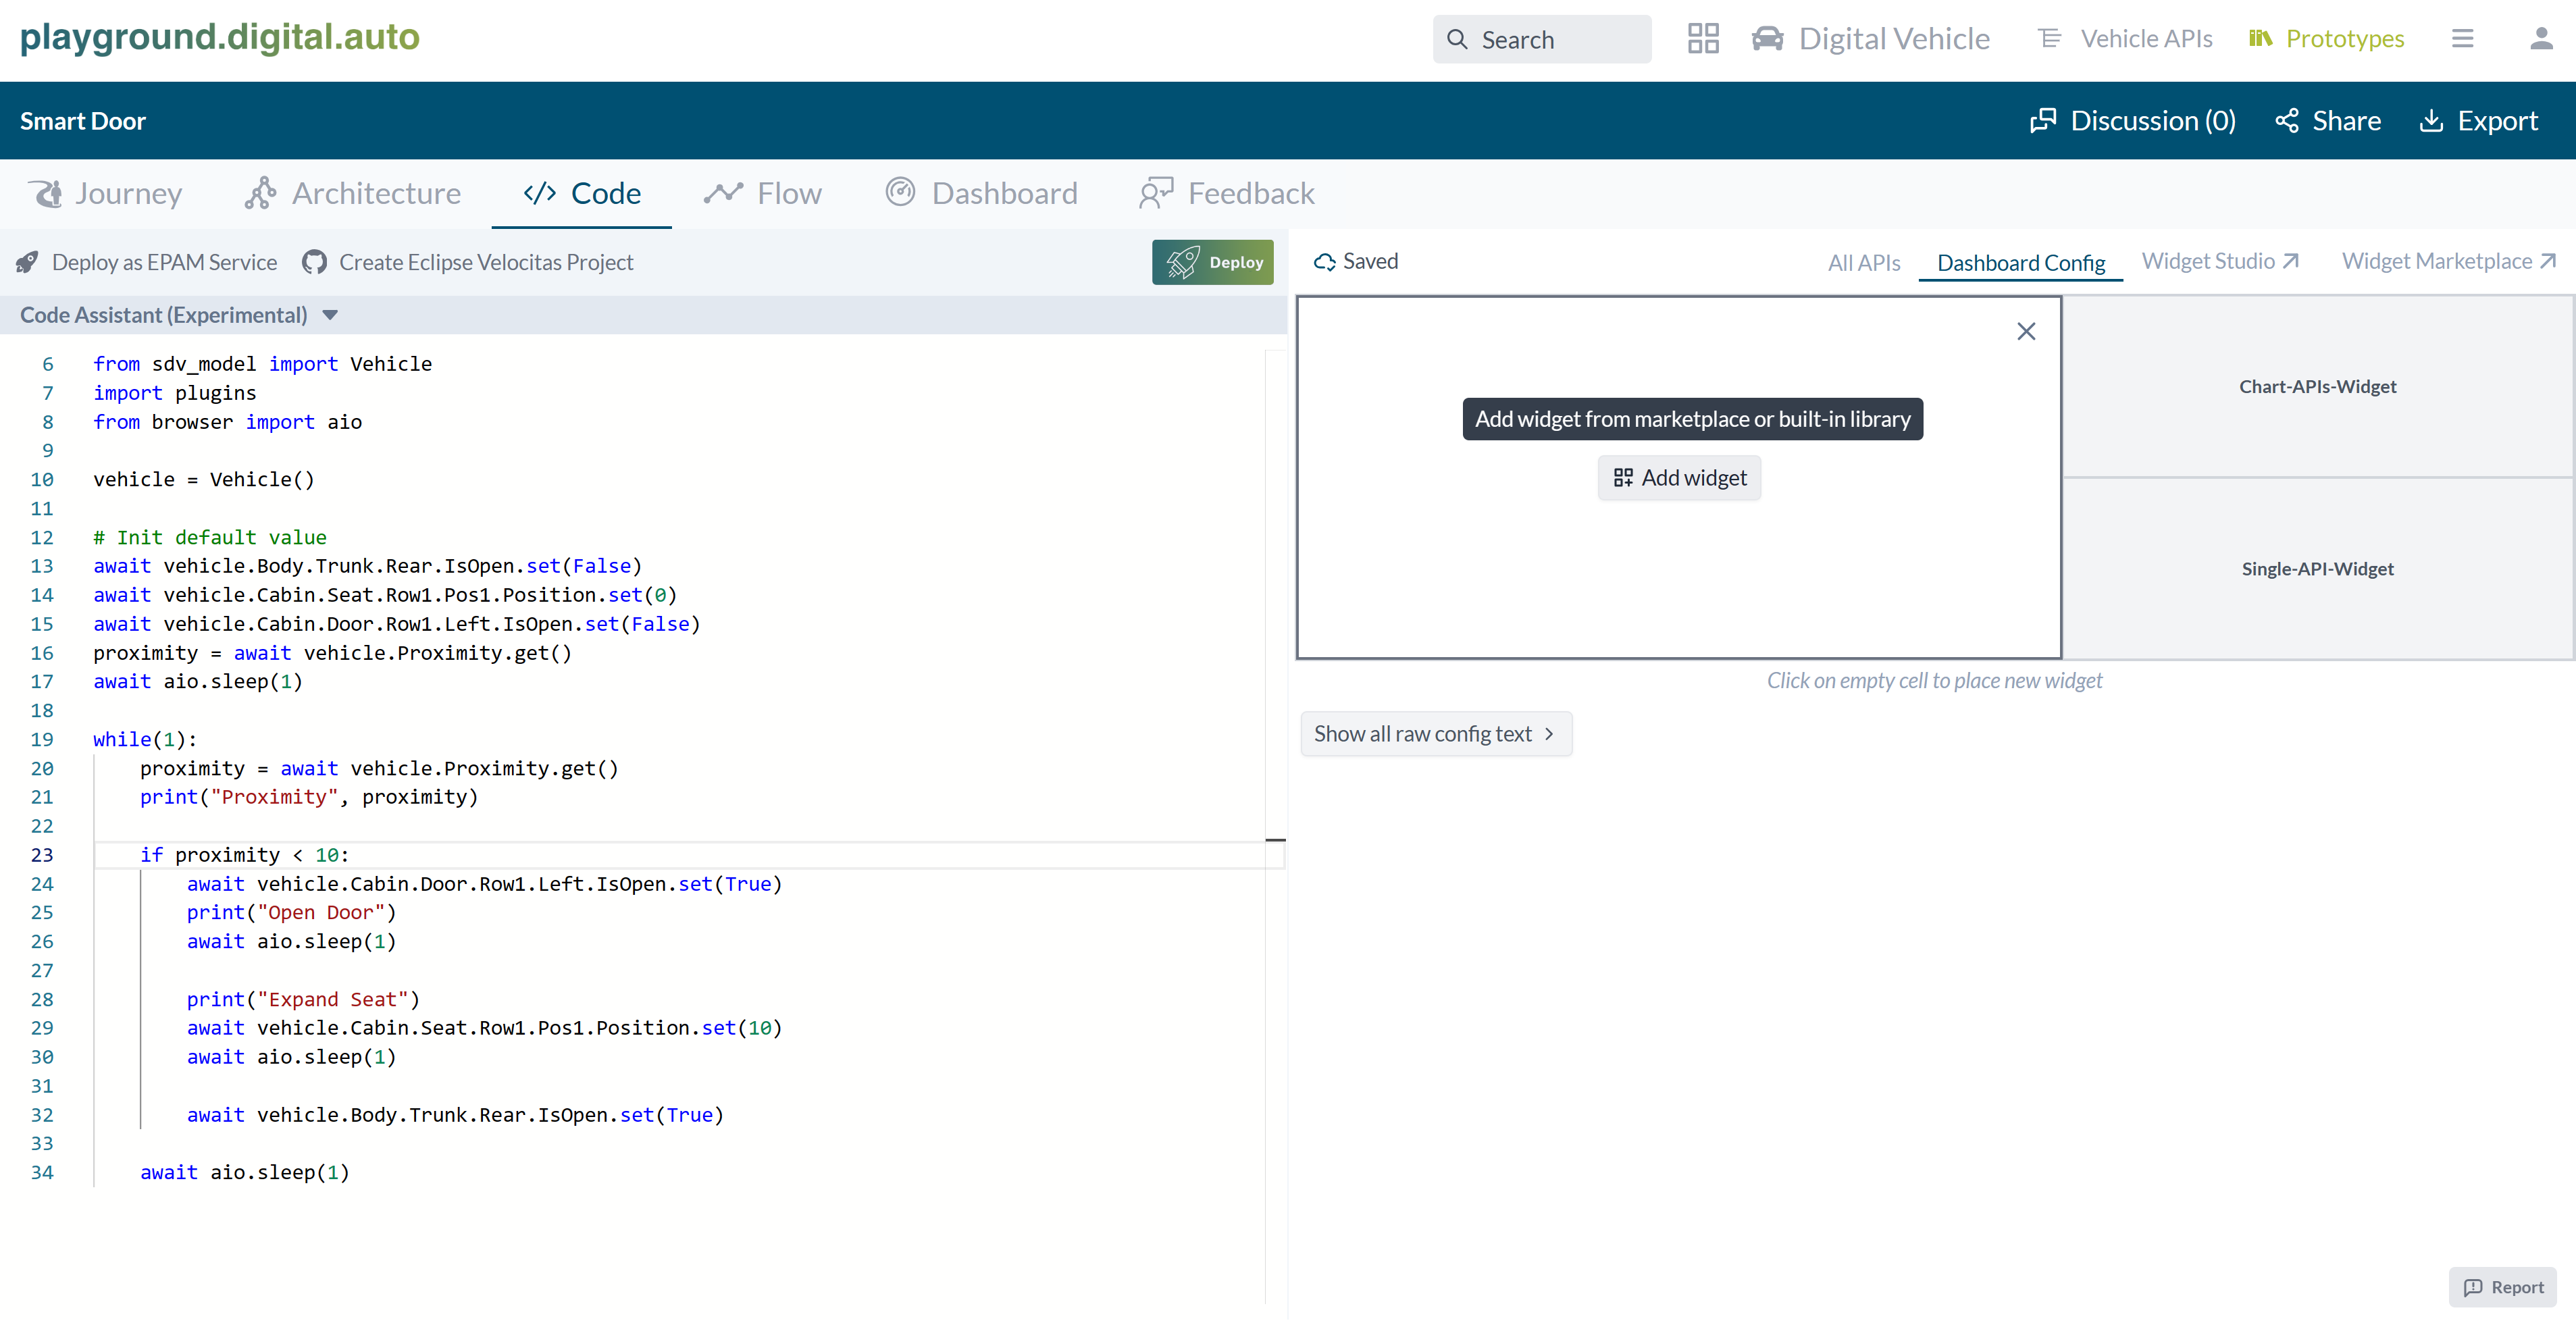
Adding the Widget:
Select ‘General 3D Car Model’ from the marketplace.
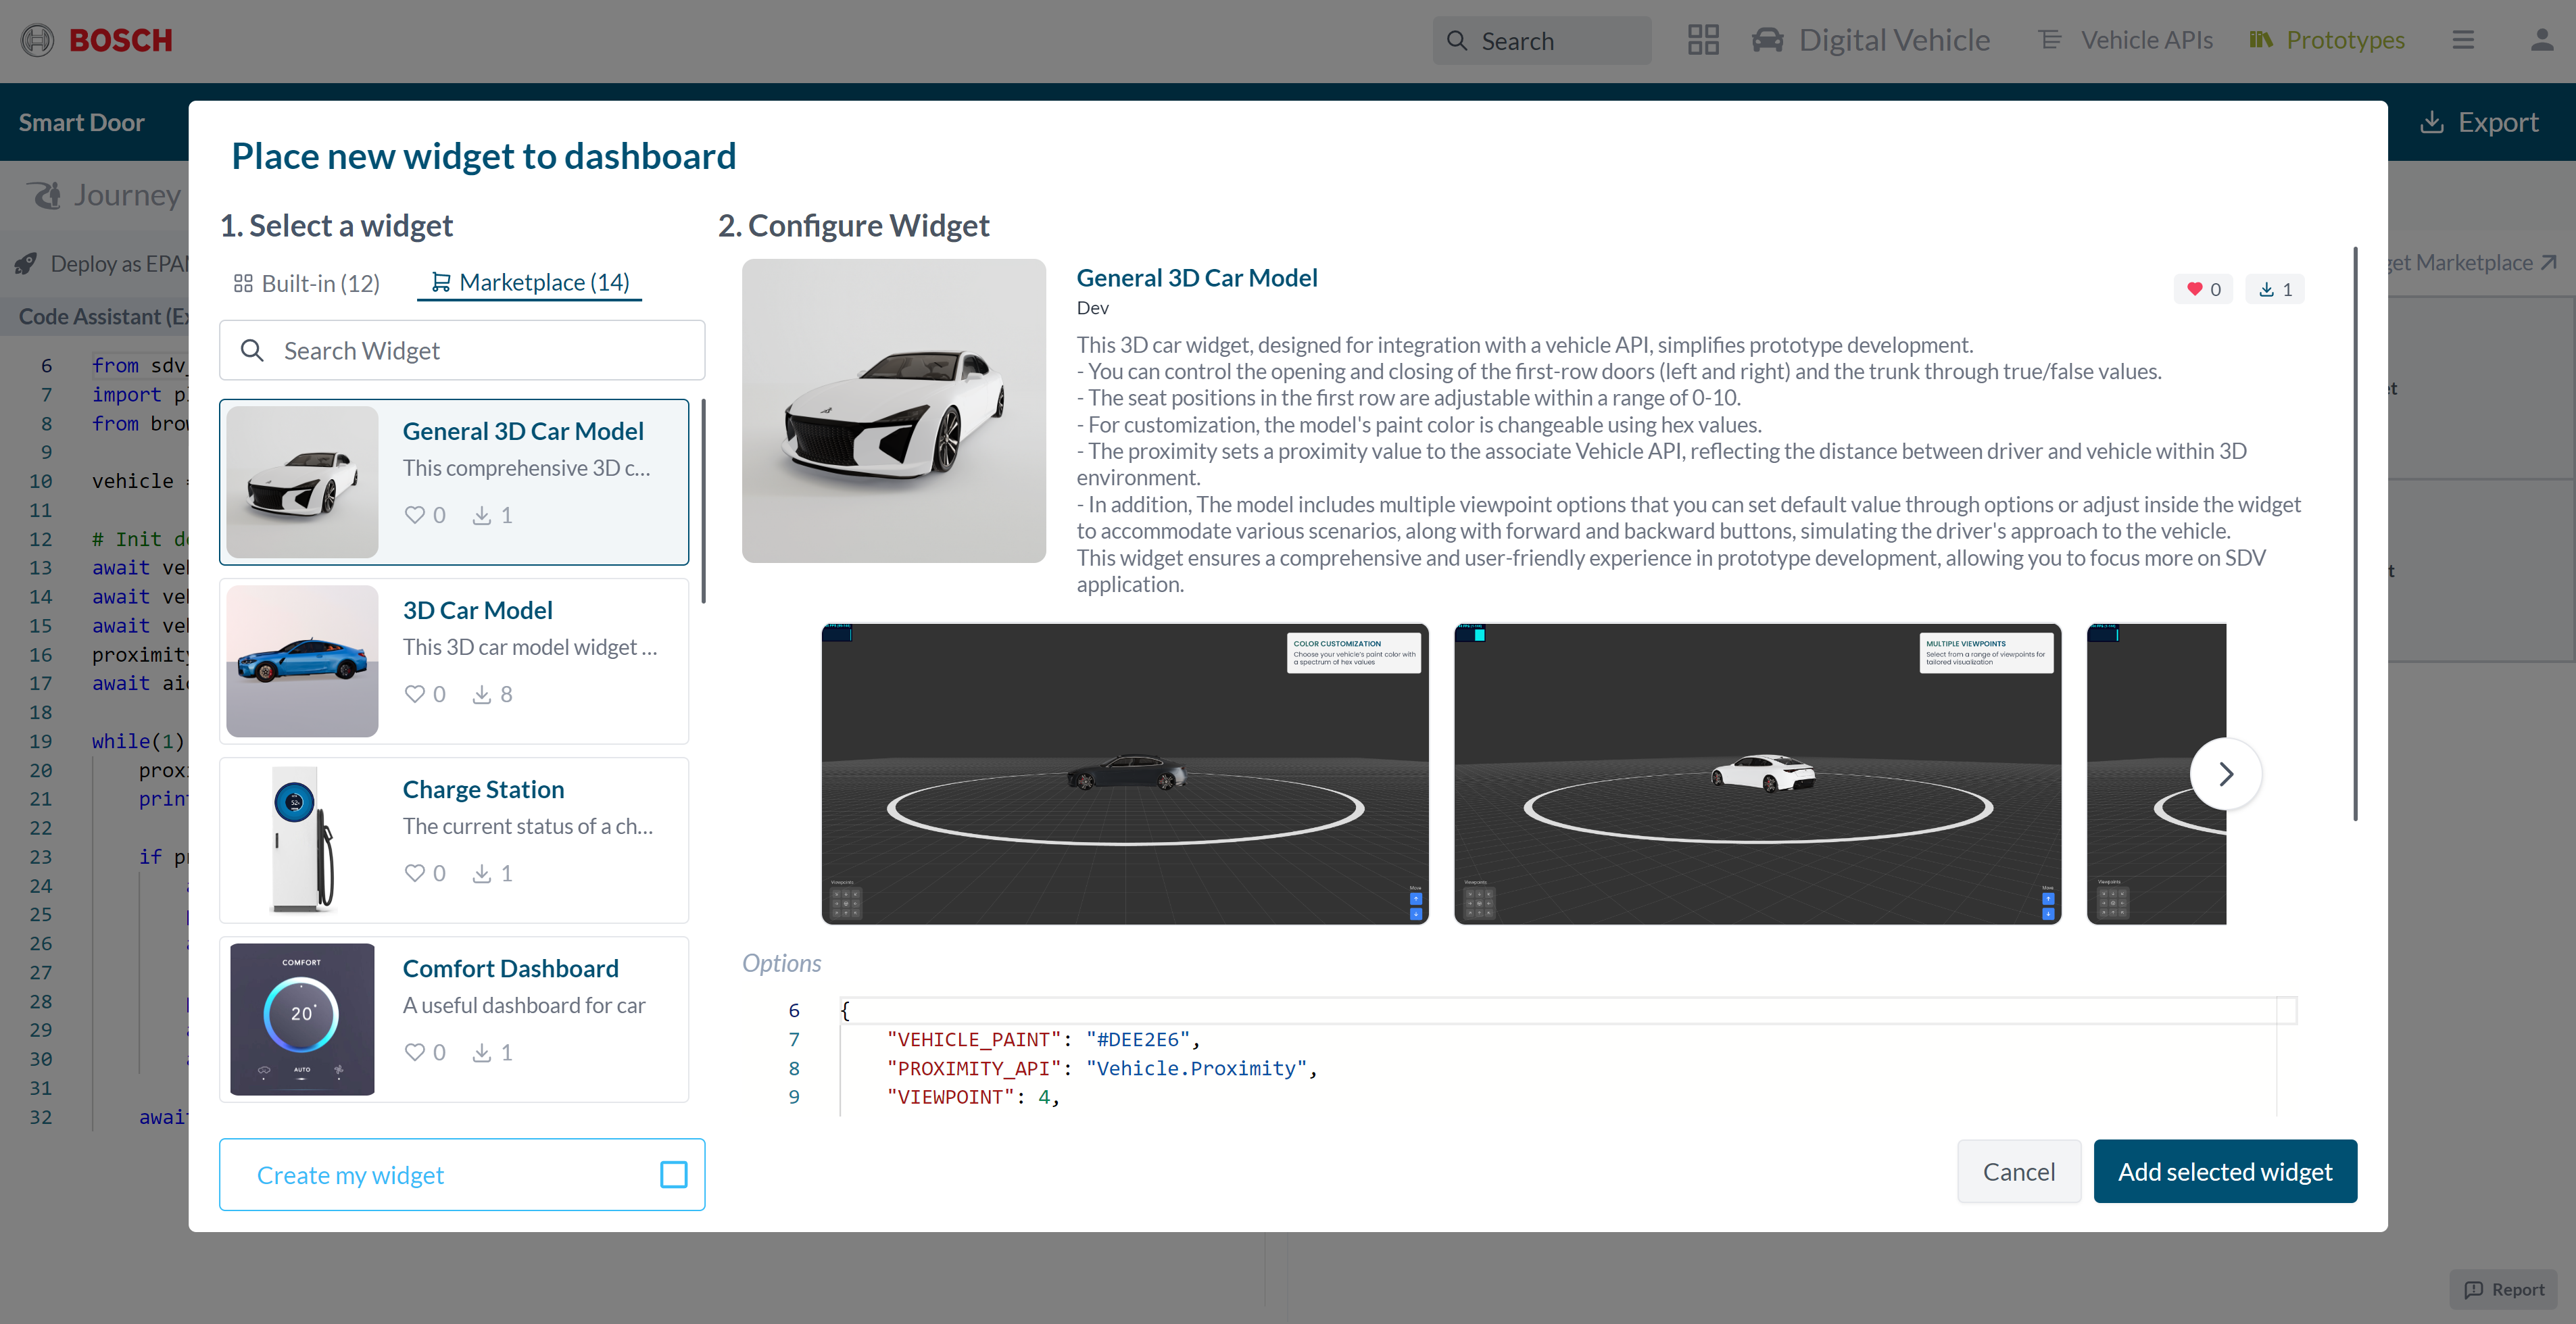
2. Configuring the widget
The widget comes with default options. For example, VEHICLE_PAINT lets you change the car’s color using hex values. The PROXIMITY_API should be linked with your Vehicle API to reflect the driver-vehicle distance. The VIEWPOINT offers 9 perspectives, enhancing the 3D experience. The door, seat, and trunk features are tied to specific Vehicle APIs, which we’ll detail in Section 4.
Note: If there is no support for the proximity value you need to set up a wishlist API for the proximity value, using a float data type (e.g., Vehicle Proximity).
{
    "VEHICLE_PAINT": "#DEE2E6",
    "PROXIMITY_API": "Vehicle.Proximity",
    "VIEWPOINT": 4
}
The following is a Python SDV code snippet for a ‘Smart Door’ prototype, demonstrating the widget’s capabilities:Prototype Smart Door
from sdv_model import Vehicle
import plugins
from browser import aio

vehicle = Vehicle()

# Init default value
await vehicle.Cabin.Seat.Row1.Pos1.Position.set(0)
await vehicle.Cabin.Door.Row1.Left.IsOpen.set(False)
proximity = await vehicle.Proximity.get()
await aio.sleep(1)

while(1):
    proximity = await vehicle.Proximity.get()
    print("Proximity", proximity)

    if proximity < 10:
        await vehicle.Cabin.Door.Row1.Left.IsOpen.set(True)
        print("Open Door")
        await aio.sleep(1.5)

        print("Expand Seat")
        await vehicle.Cabin.Seat.Row1.Pos1.Position.set(10)
        await aio.sleep(1.5)

    await aio.sleep(1)
3. Run code and interact with 3D environment
Using the provided SDV Python code, you can experience the widget’s features firsthand.

Viewpoint Options: Choose from 9 viewpoints to customize your view from the driver’s perspective.
Controls: Use forward and backward buttons to simulate proximity changes.
Dashboard
Initial view with VIEWPOINT: 4, showing the driver’s door and the proximity level is shown in Line chart and Single API widgets
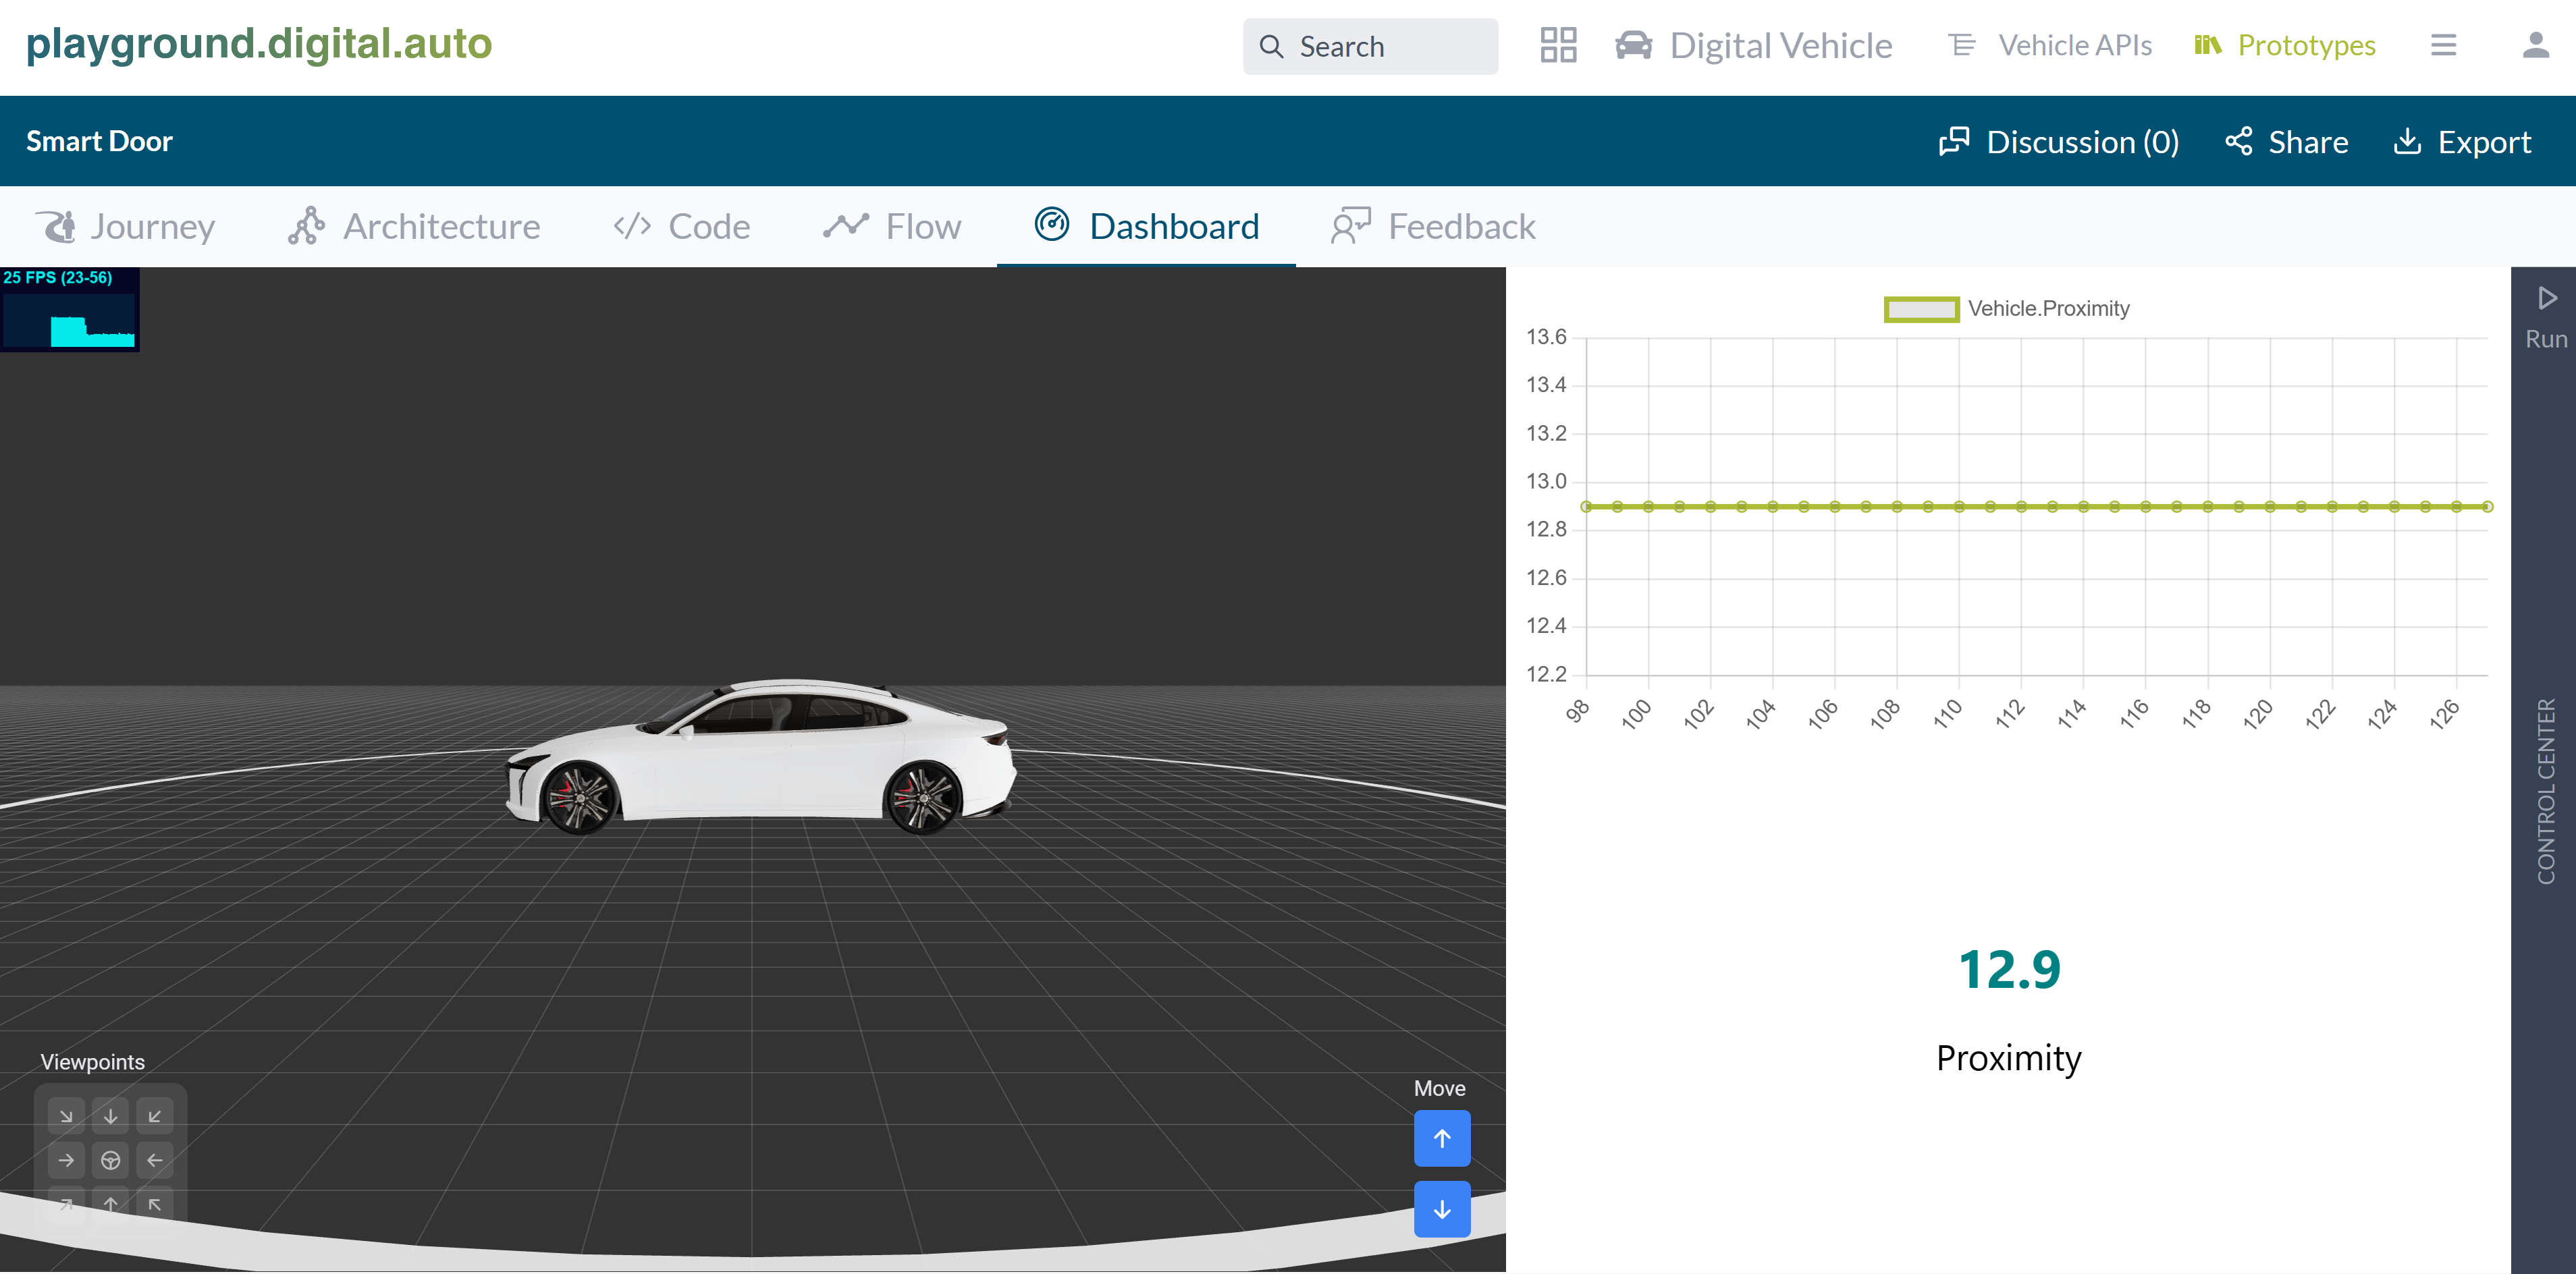
Running the code
When you press Run button. As you press forward and backward buttons simulate approaching the vehicle, watch the proximity level change and trigger door opening and seat adjustments based on your SDV Python code.

4. Deep Dive into Features
Let’s explore each feature in more detail:
4.1 Door Control

- Description: Control the opening and closing of the first-row doors (left and right)
- Operation: Use boolean values (true/false) to toggle the state of the doors
- Associate API:
- Left door:
Vehicle.Cabin.Door.Row1.Left.IsOpen - Right door:
Vehicle.Cabin.Door.Row1.Right.IsOpen
- Left door:
4.2 Trunk Control
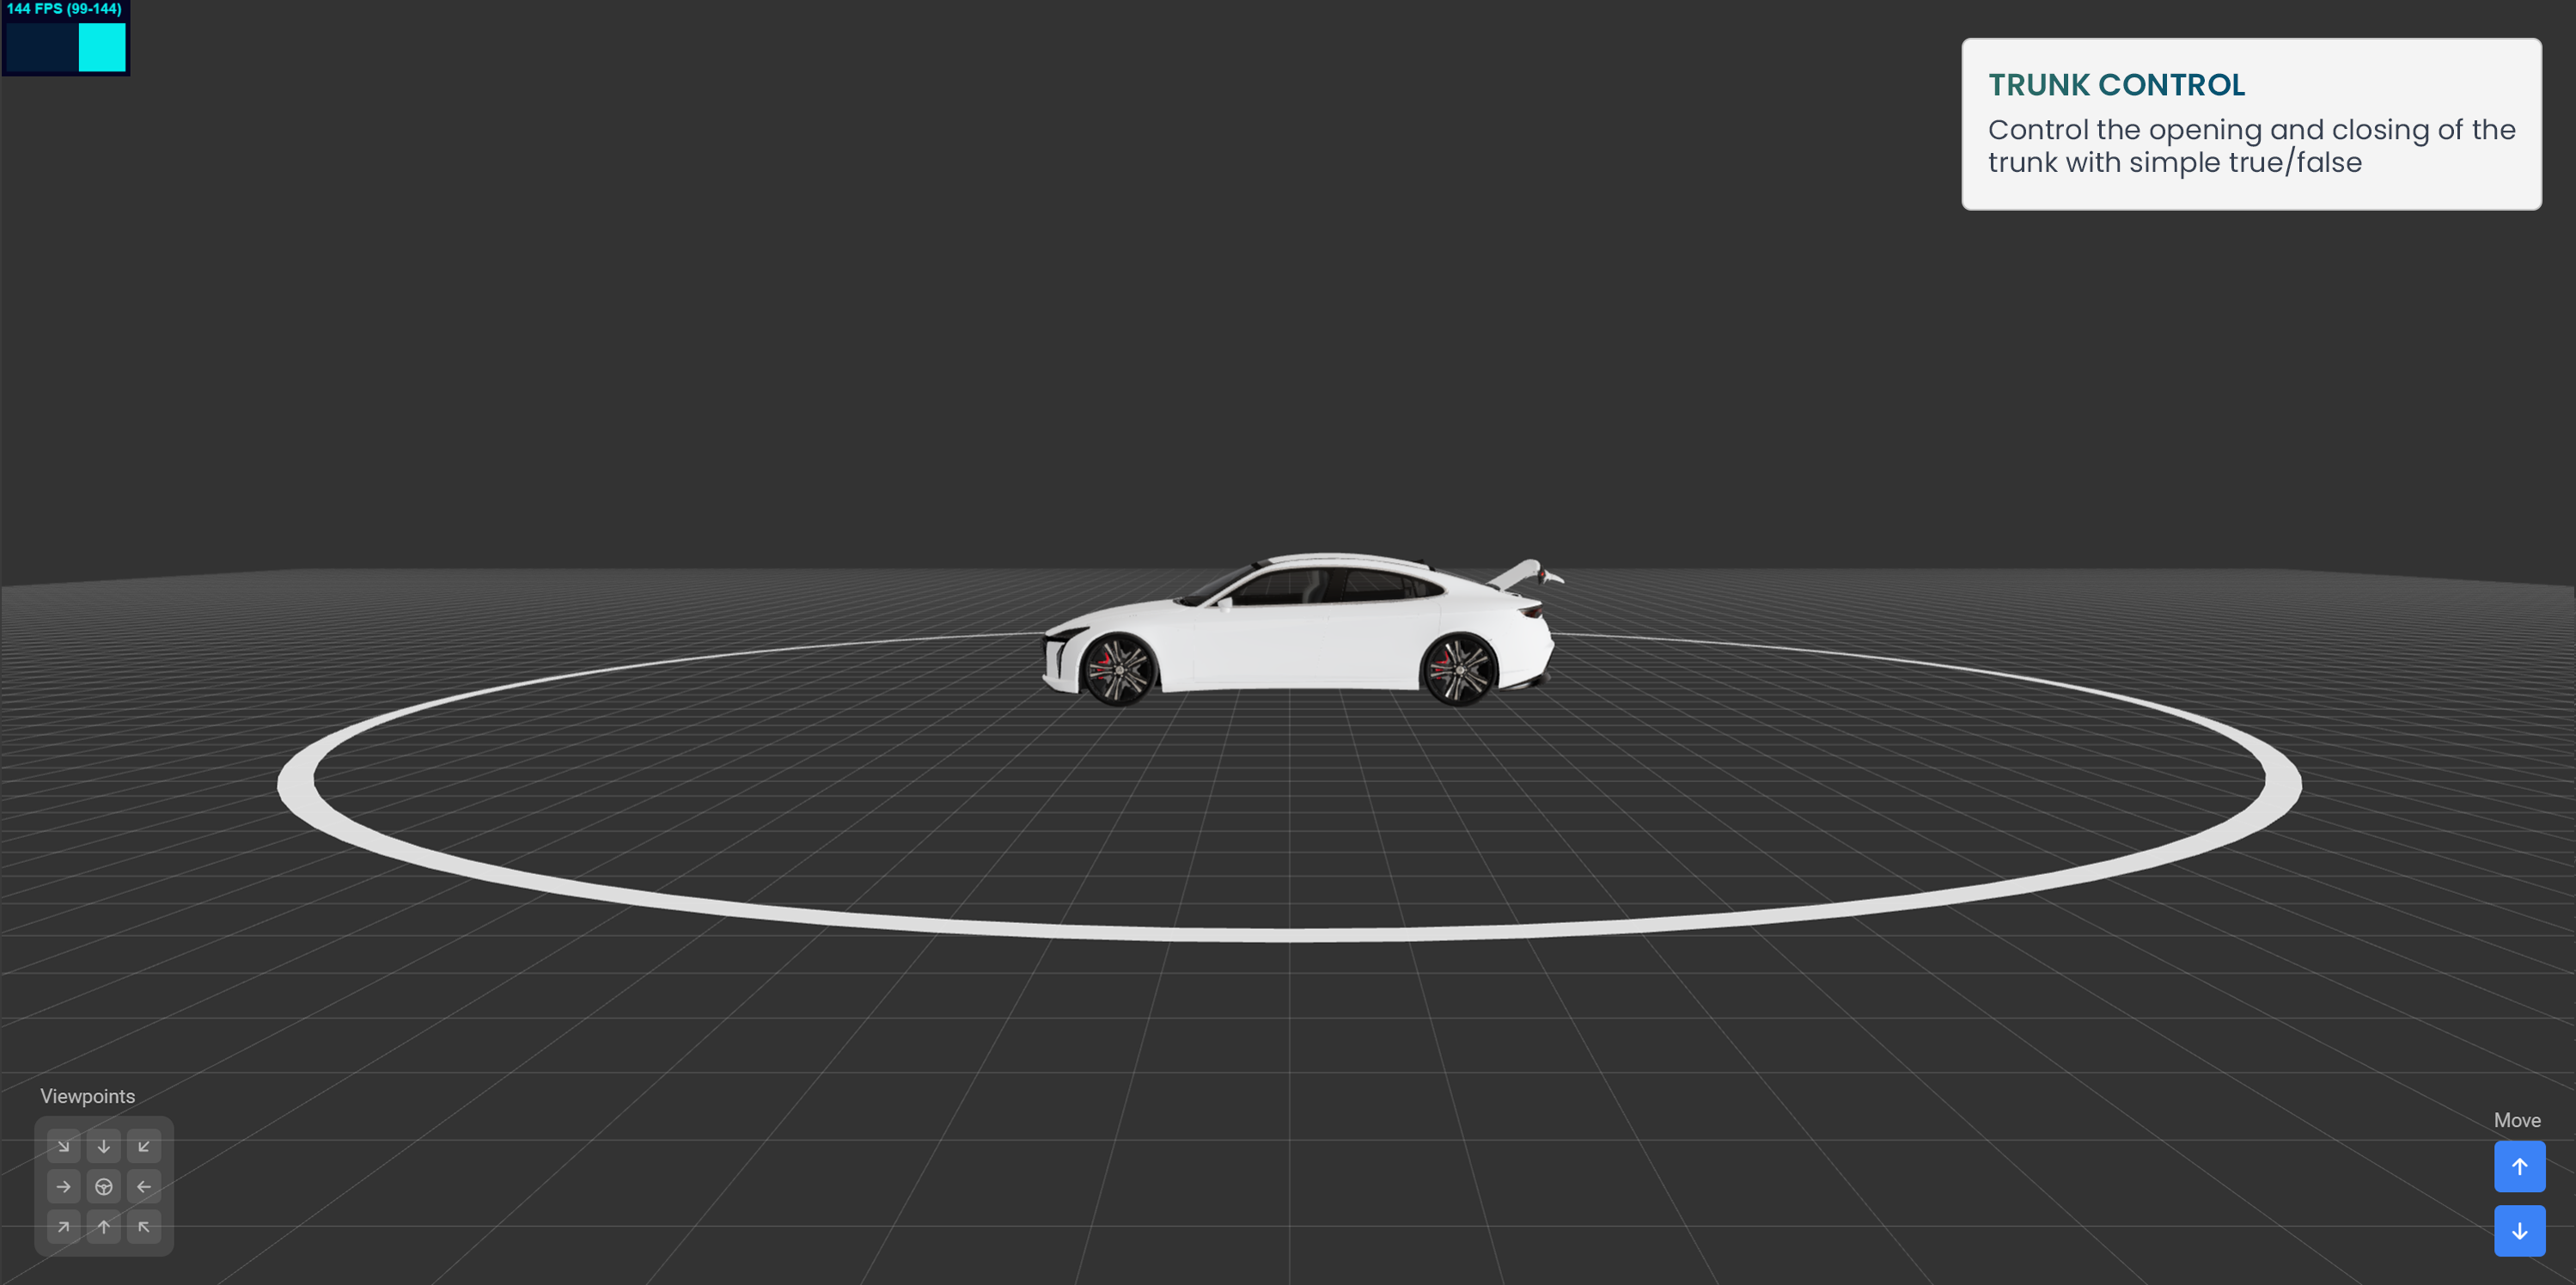
- Description: Control the opening and closing of the trunk
- Operation: Use boolean values (true/false) to toggle the state of the trunk
- Associate API:
Vehicle.Body.Trunk.Rear.IsOpen
4.3 Seat Adjustment

- Description: Adjust the position of the seats in the first row.
- Operation: Use int values from 0 to 10 to adjust the seat position (0: Close to driving wheel - 10: Far from driving wheel)
- Associate API:
- Left seat:
Vehicle.Cabin.Seat.Row1.Pos1.Position - Right seat:
Vehicle.Cabin.Seat.Row1.Pos2.Position
- Left seat:
4.4 Customization Options
- Change the car model color using hex values (e.g.: Indigo Blue: #005072, Platinum White: #DEE2E6, Obsidian Black: #212529, …)
This guide aims to provide you with a clear and straightforward understanding of how to use the ‘General 3D Car Model’ widget. Happy coding!