Use GenAI on playground
1. SDV ProtoPilot (GenAI Python)
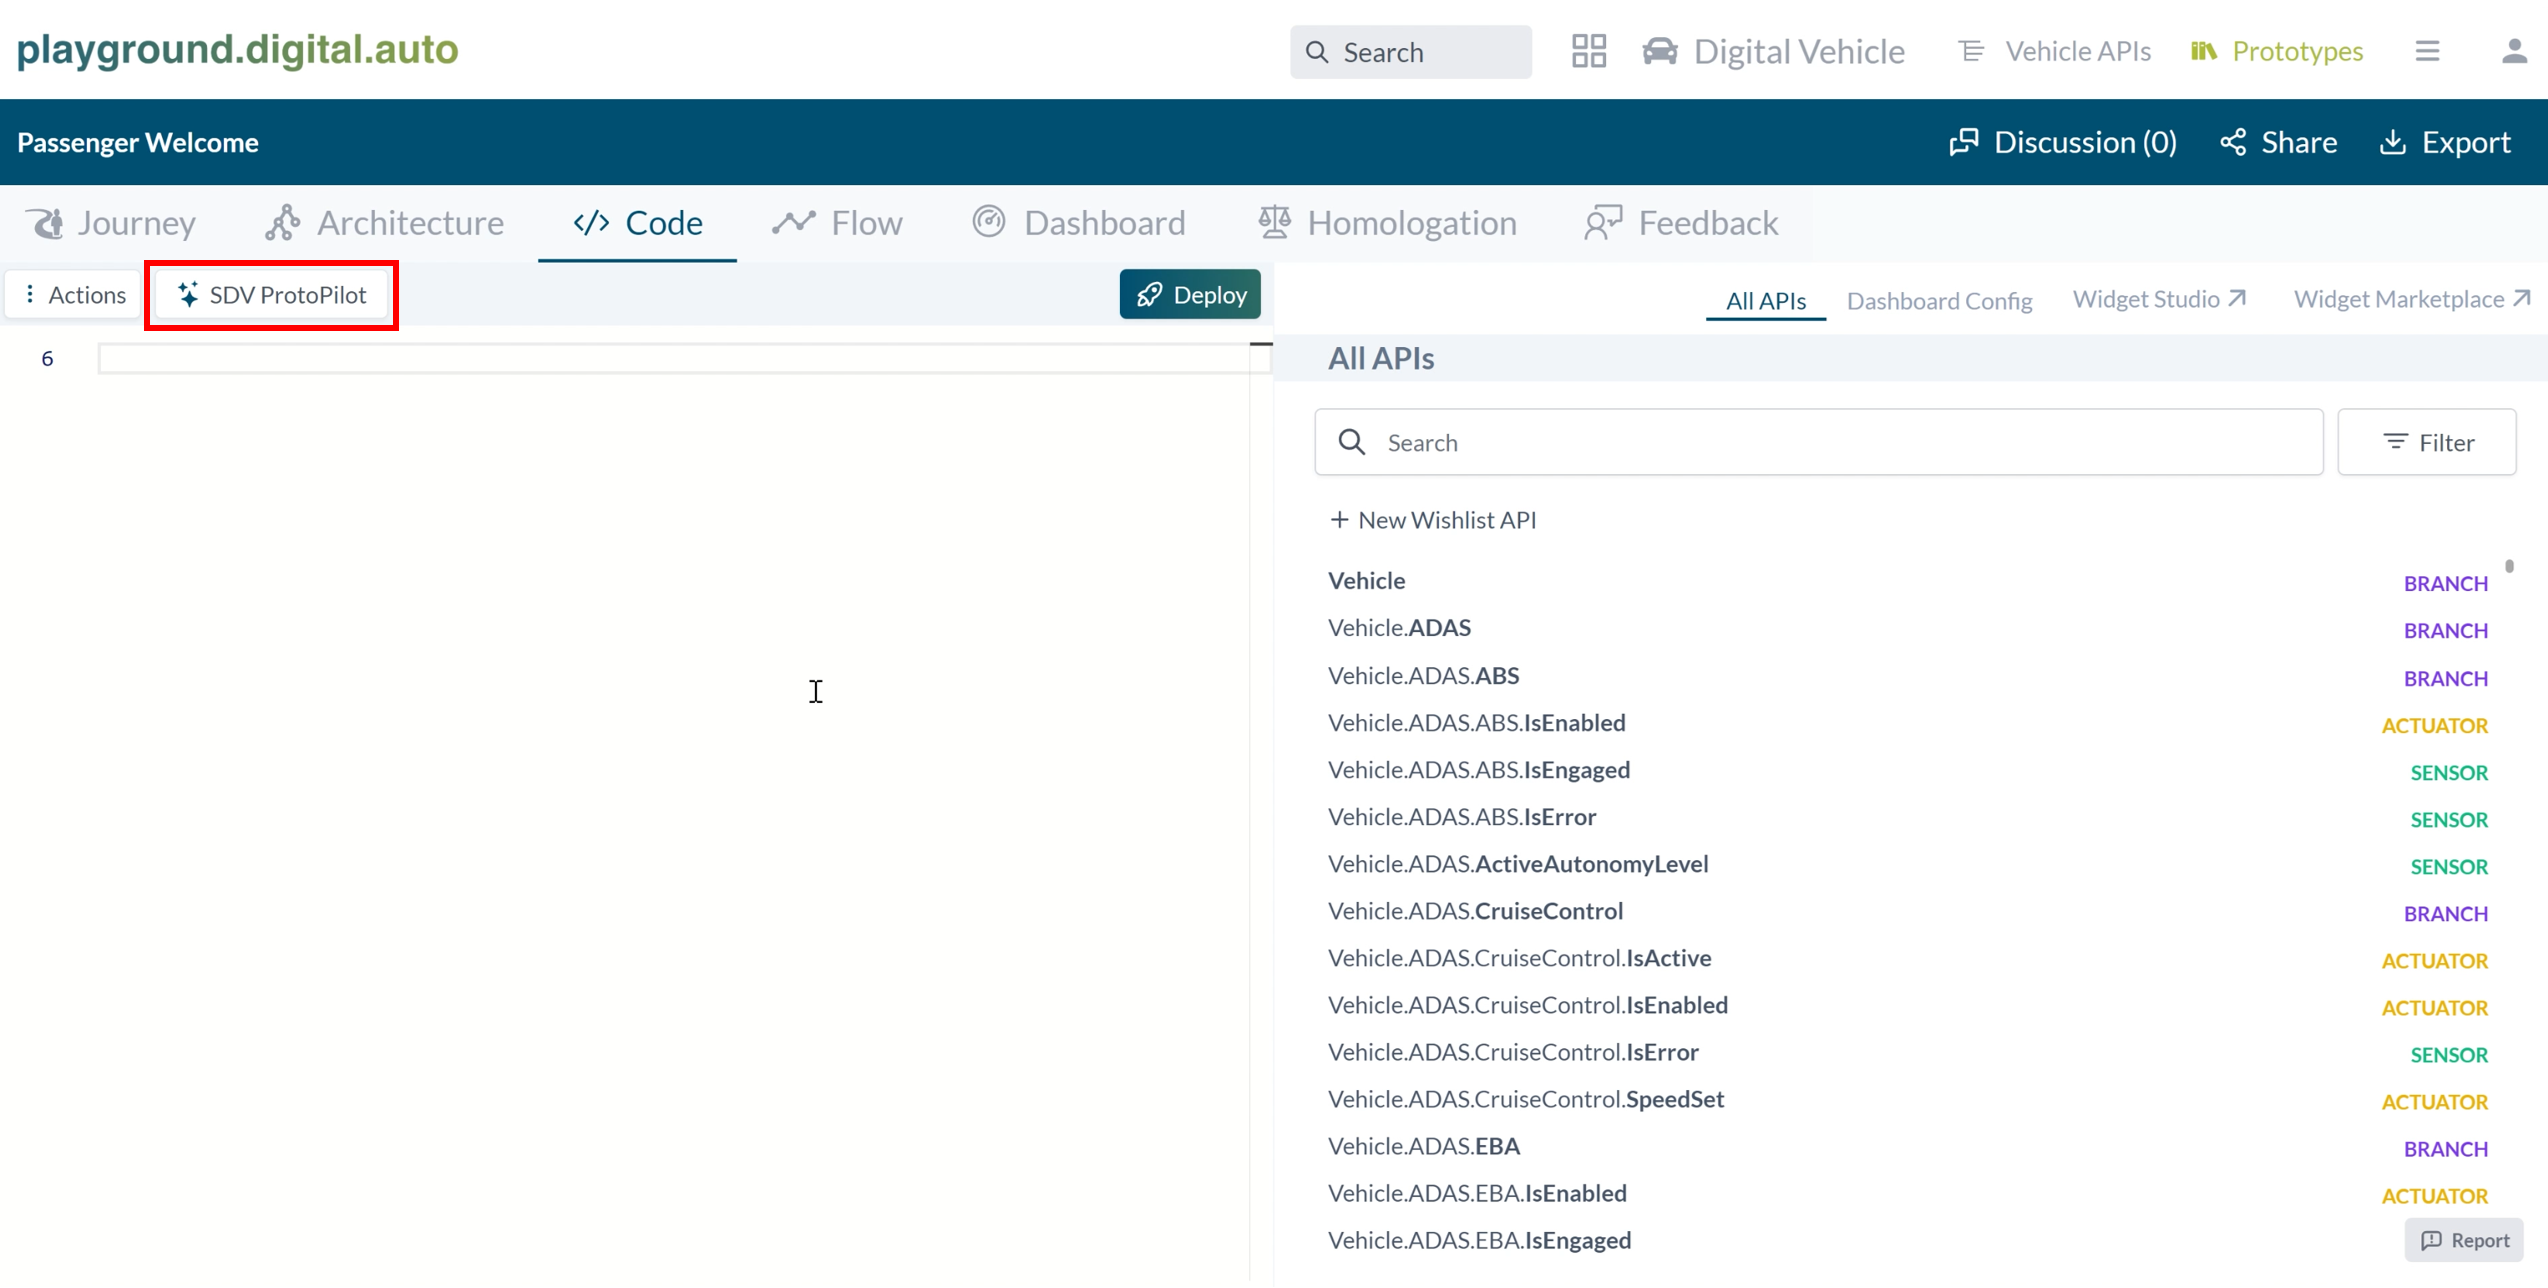
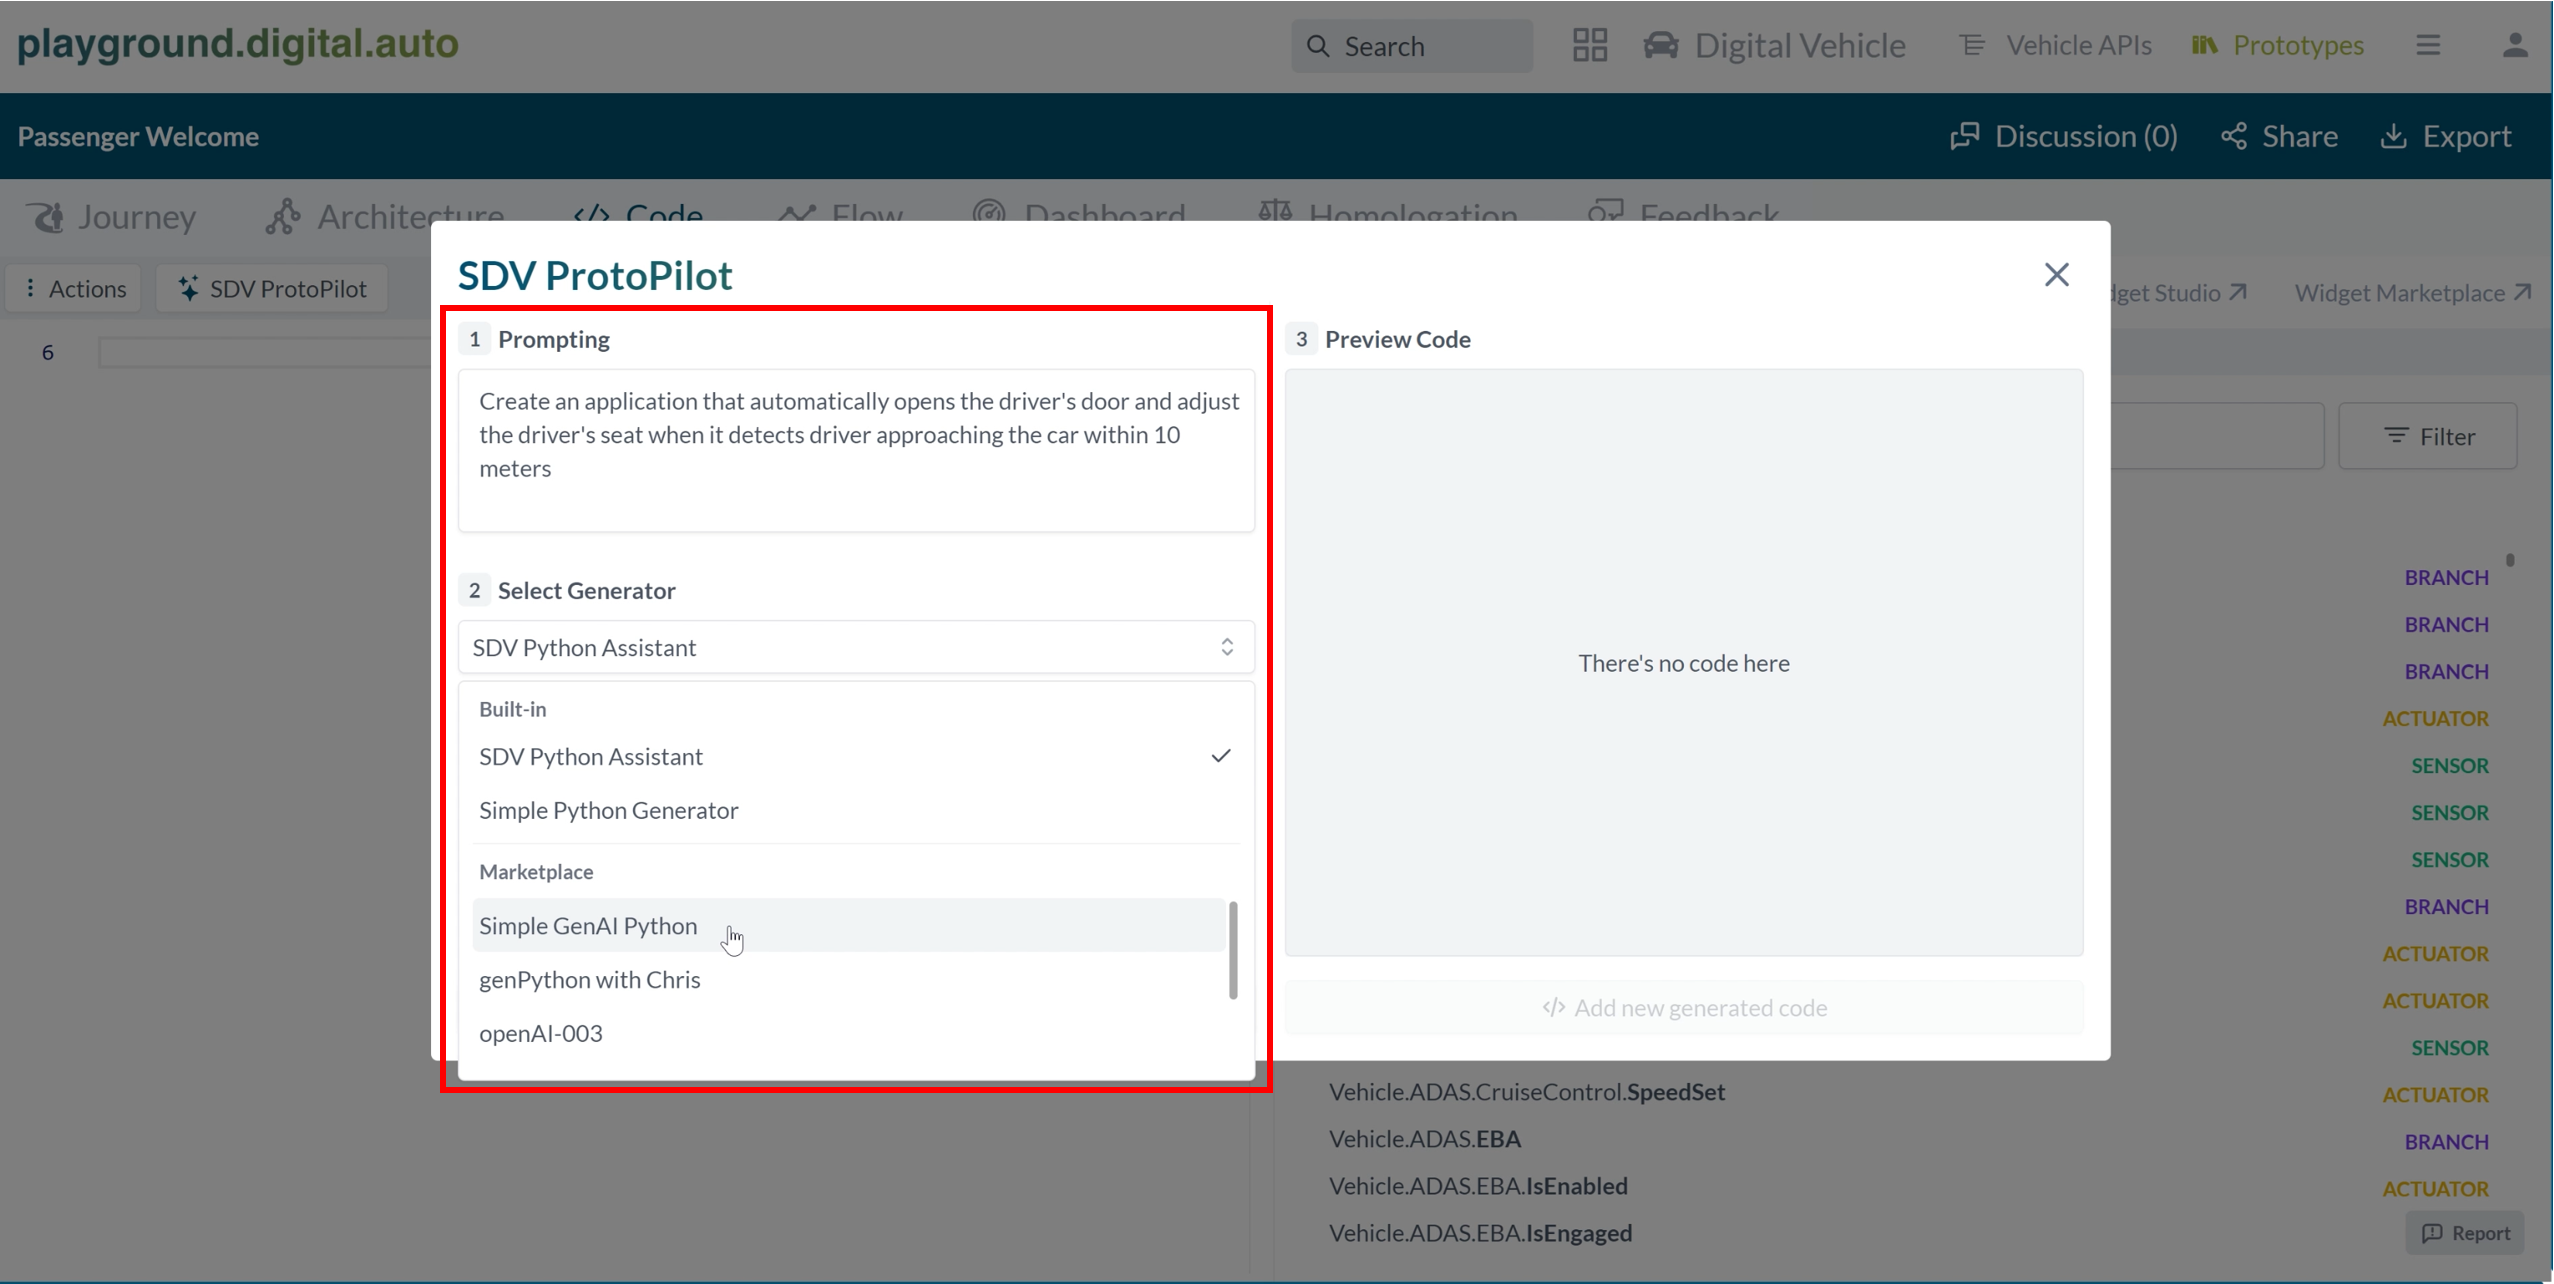
1. Click on the SDV Protopilot button. Then enter your input prompt and choose a generator.
2. Select a generator from the marketplace, your own generator will be displayed here after the admin approves it.
3. Input prompt and selected a generator, click on the “Generate” button and wait for the code to be generated.
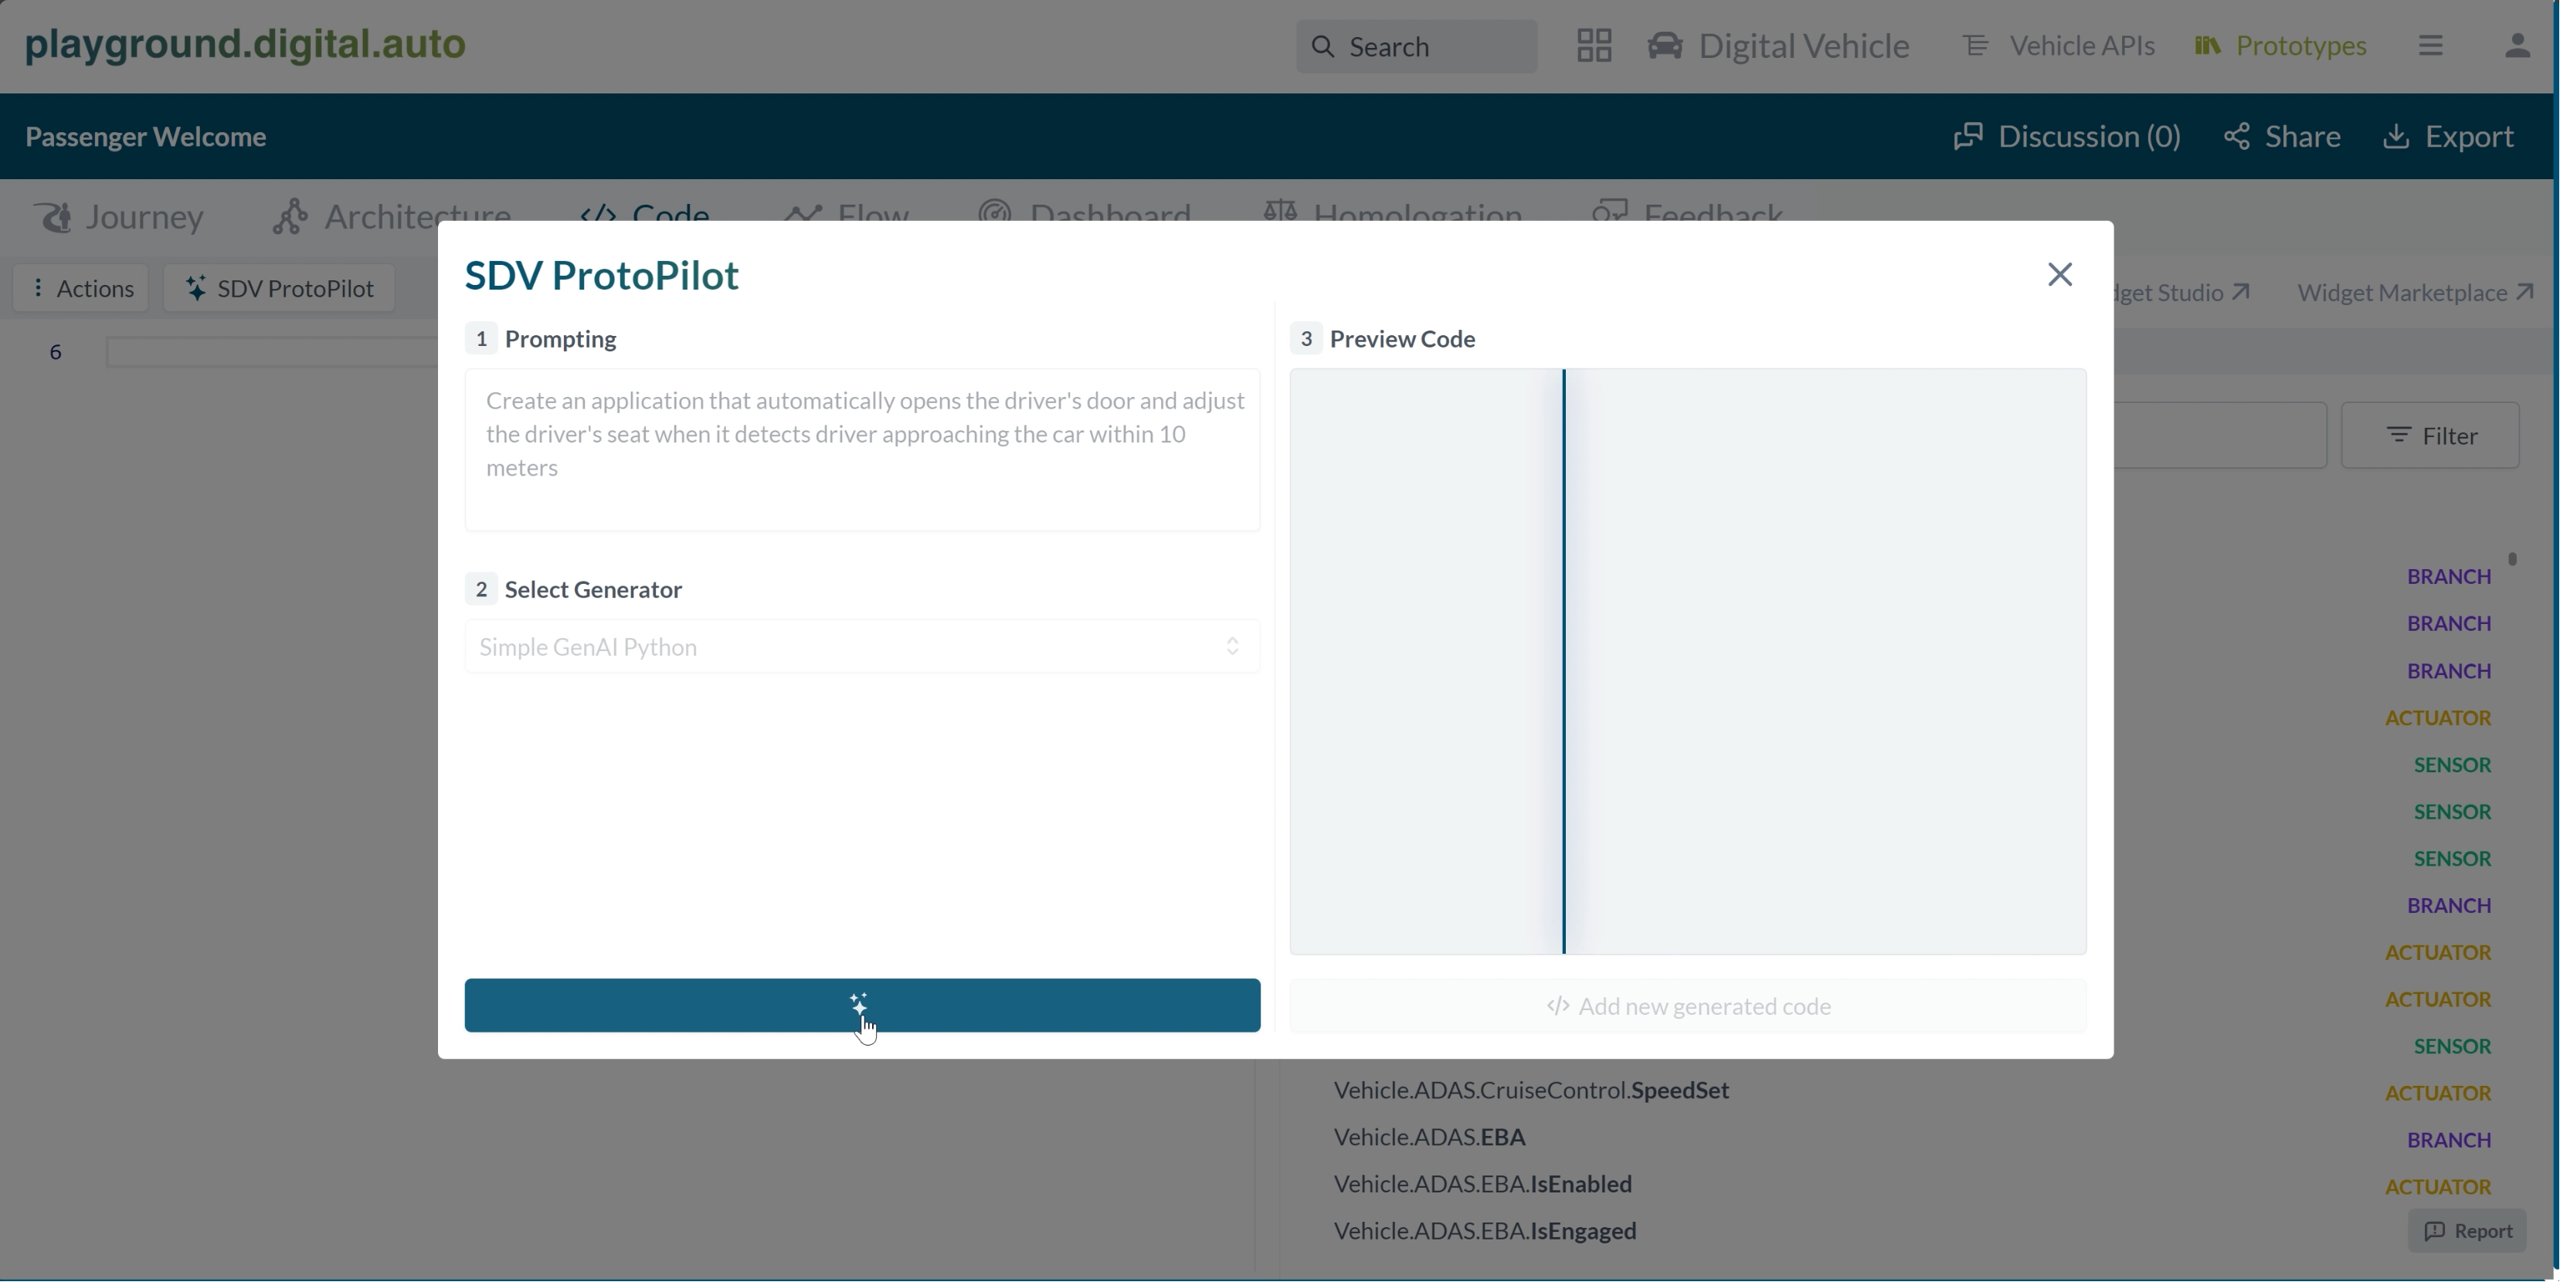
4. This may take from 30 to 90 seconds, depending on the complexity and quality of the generator. If the generator is well-trained and fine-tuned, it will produce the code faster and more accurately.

Click on the “Add new generated code” if you satisfy with the new generated code.

2. Dashboard ProtoPilot (GenAI Dashboard)
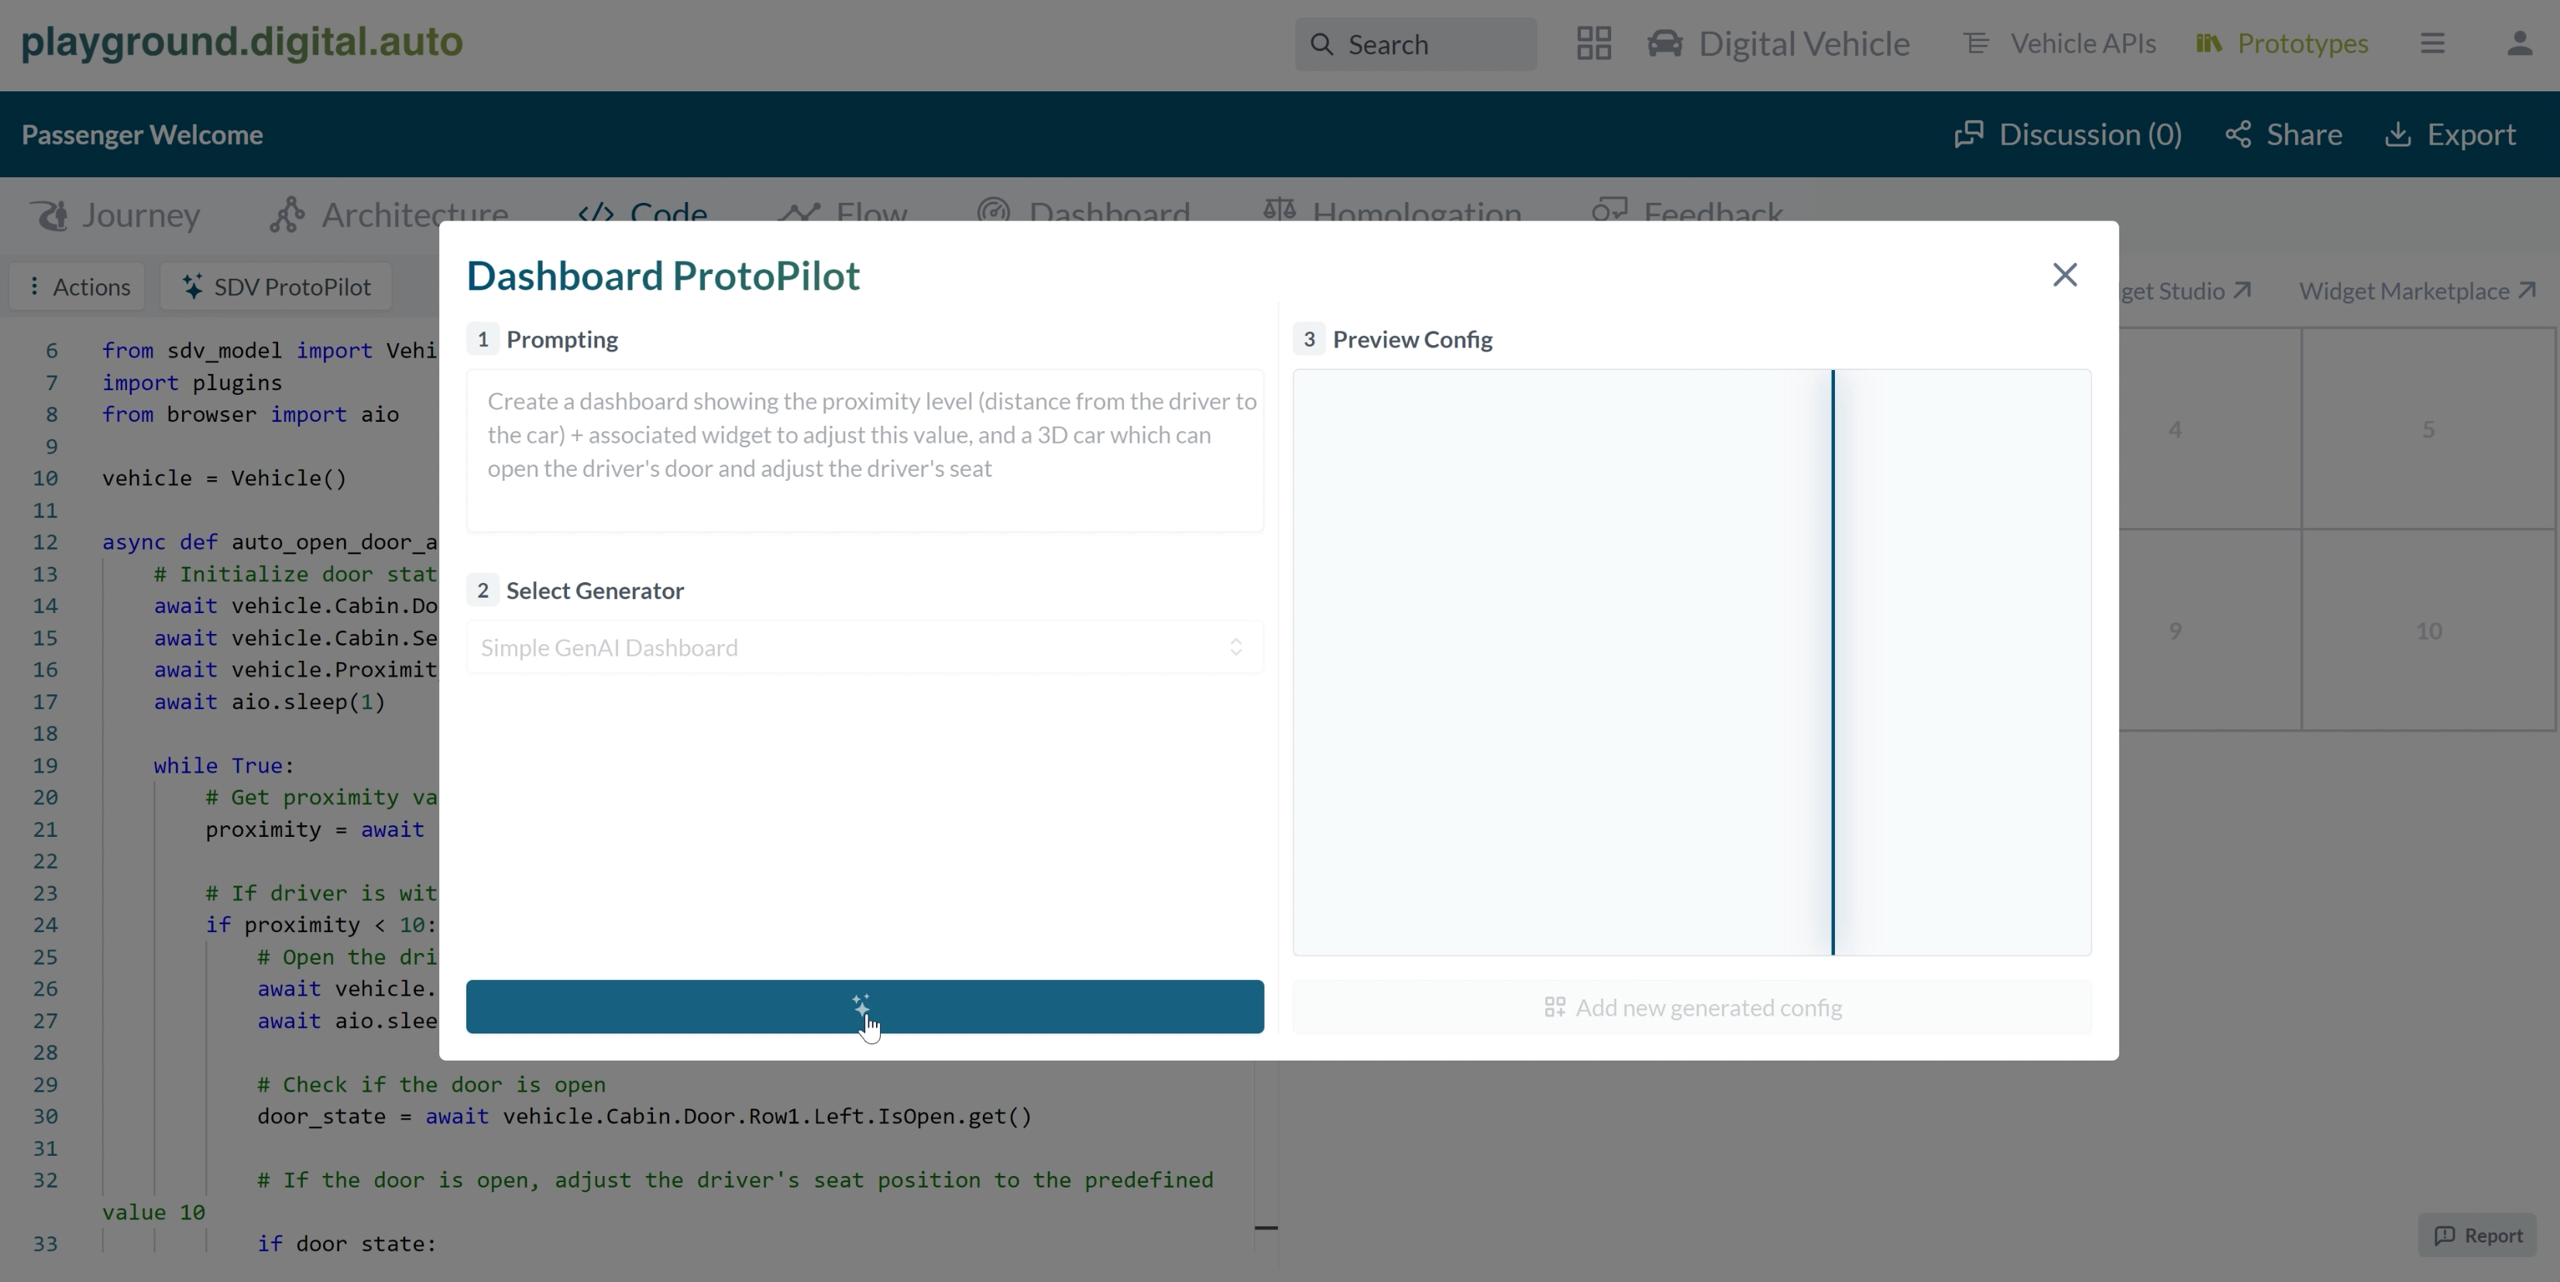
After you have generated the SDV Python code, you may want to visualize it and tell a story with it. For that, you can use the Dashboard Protopilot feature, which will help you pick and compose multiple widgets to create a dashboard for your code. The Dashboard Protopilot can use the built-in widgets in the model or the ones from the marketplace depend on how the model’s authors train/fine-tune/config it.
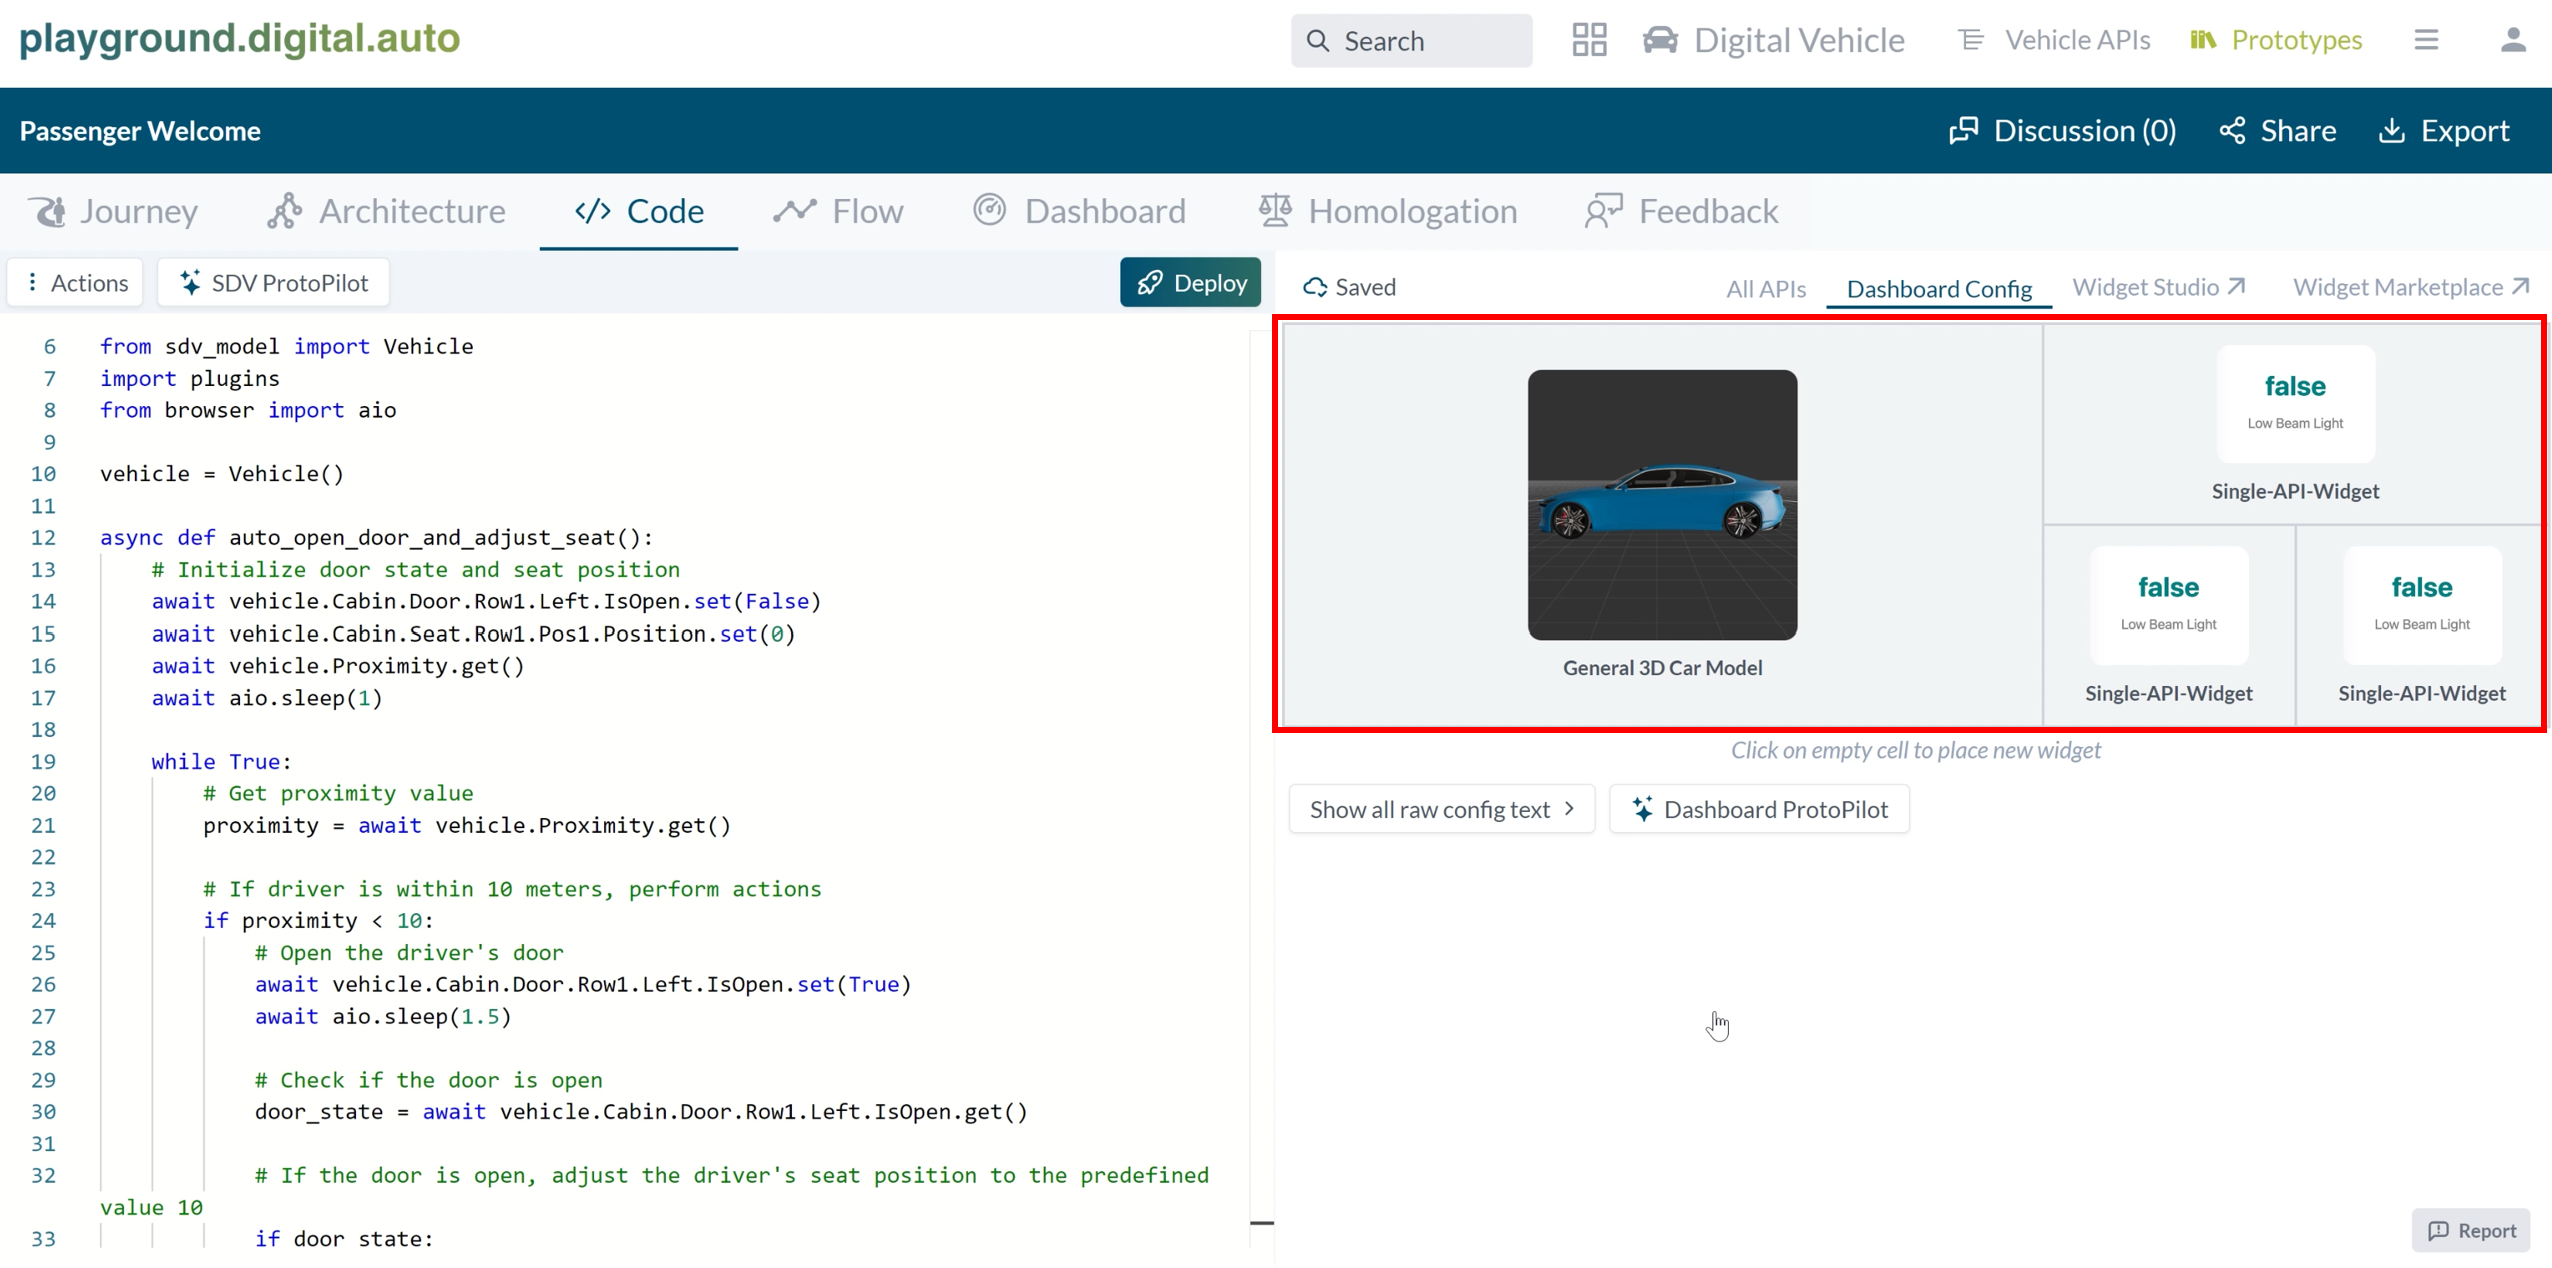
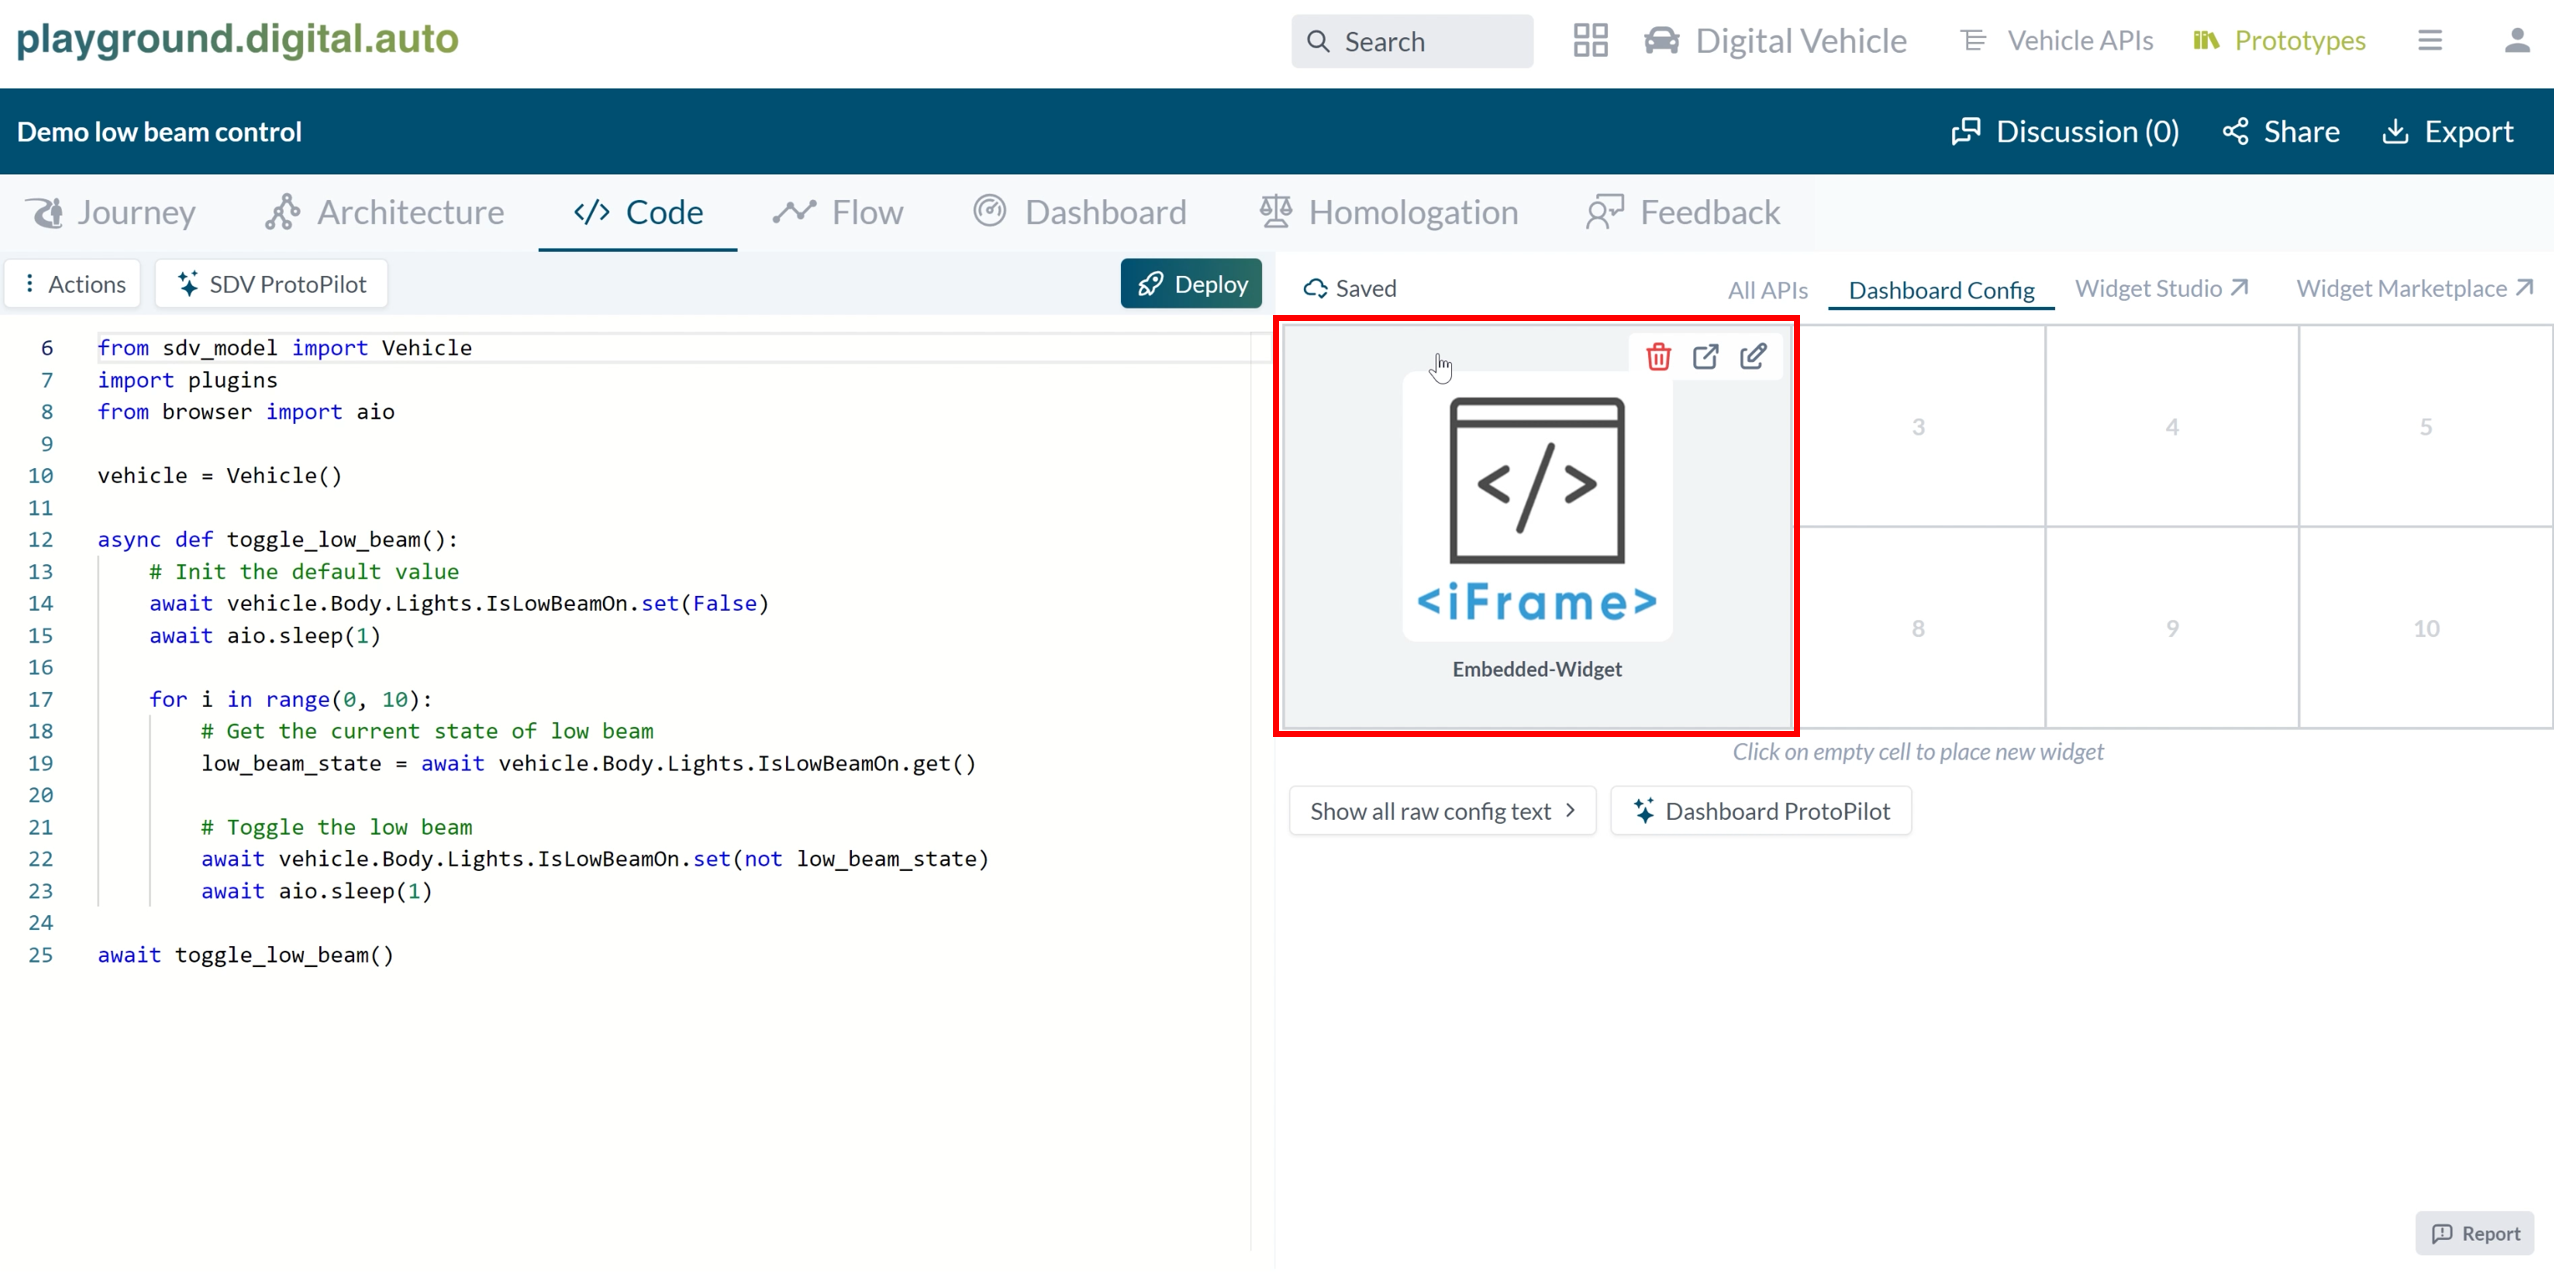
1. Go to the dashboard config tab and click the “Dashboard Protopilot” button.

2. Select a generator from the marketplace, your own generator will be displayed here after the admin approves it.

3. Input prompt and selected a generator, click on the “Generate” button and wait for the code to be generated.
4. When the dashboard is generated, you will see it on the right hand side of the popup window. You can also view the raw configuration by clicking the “View Dashboard” button
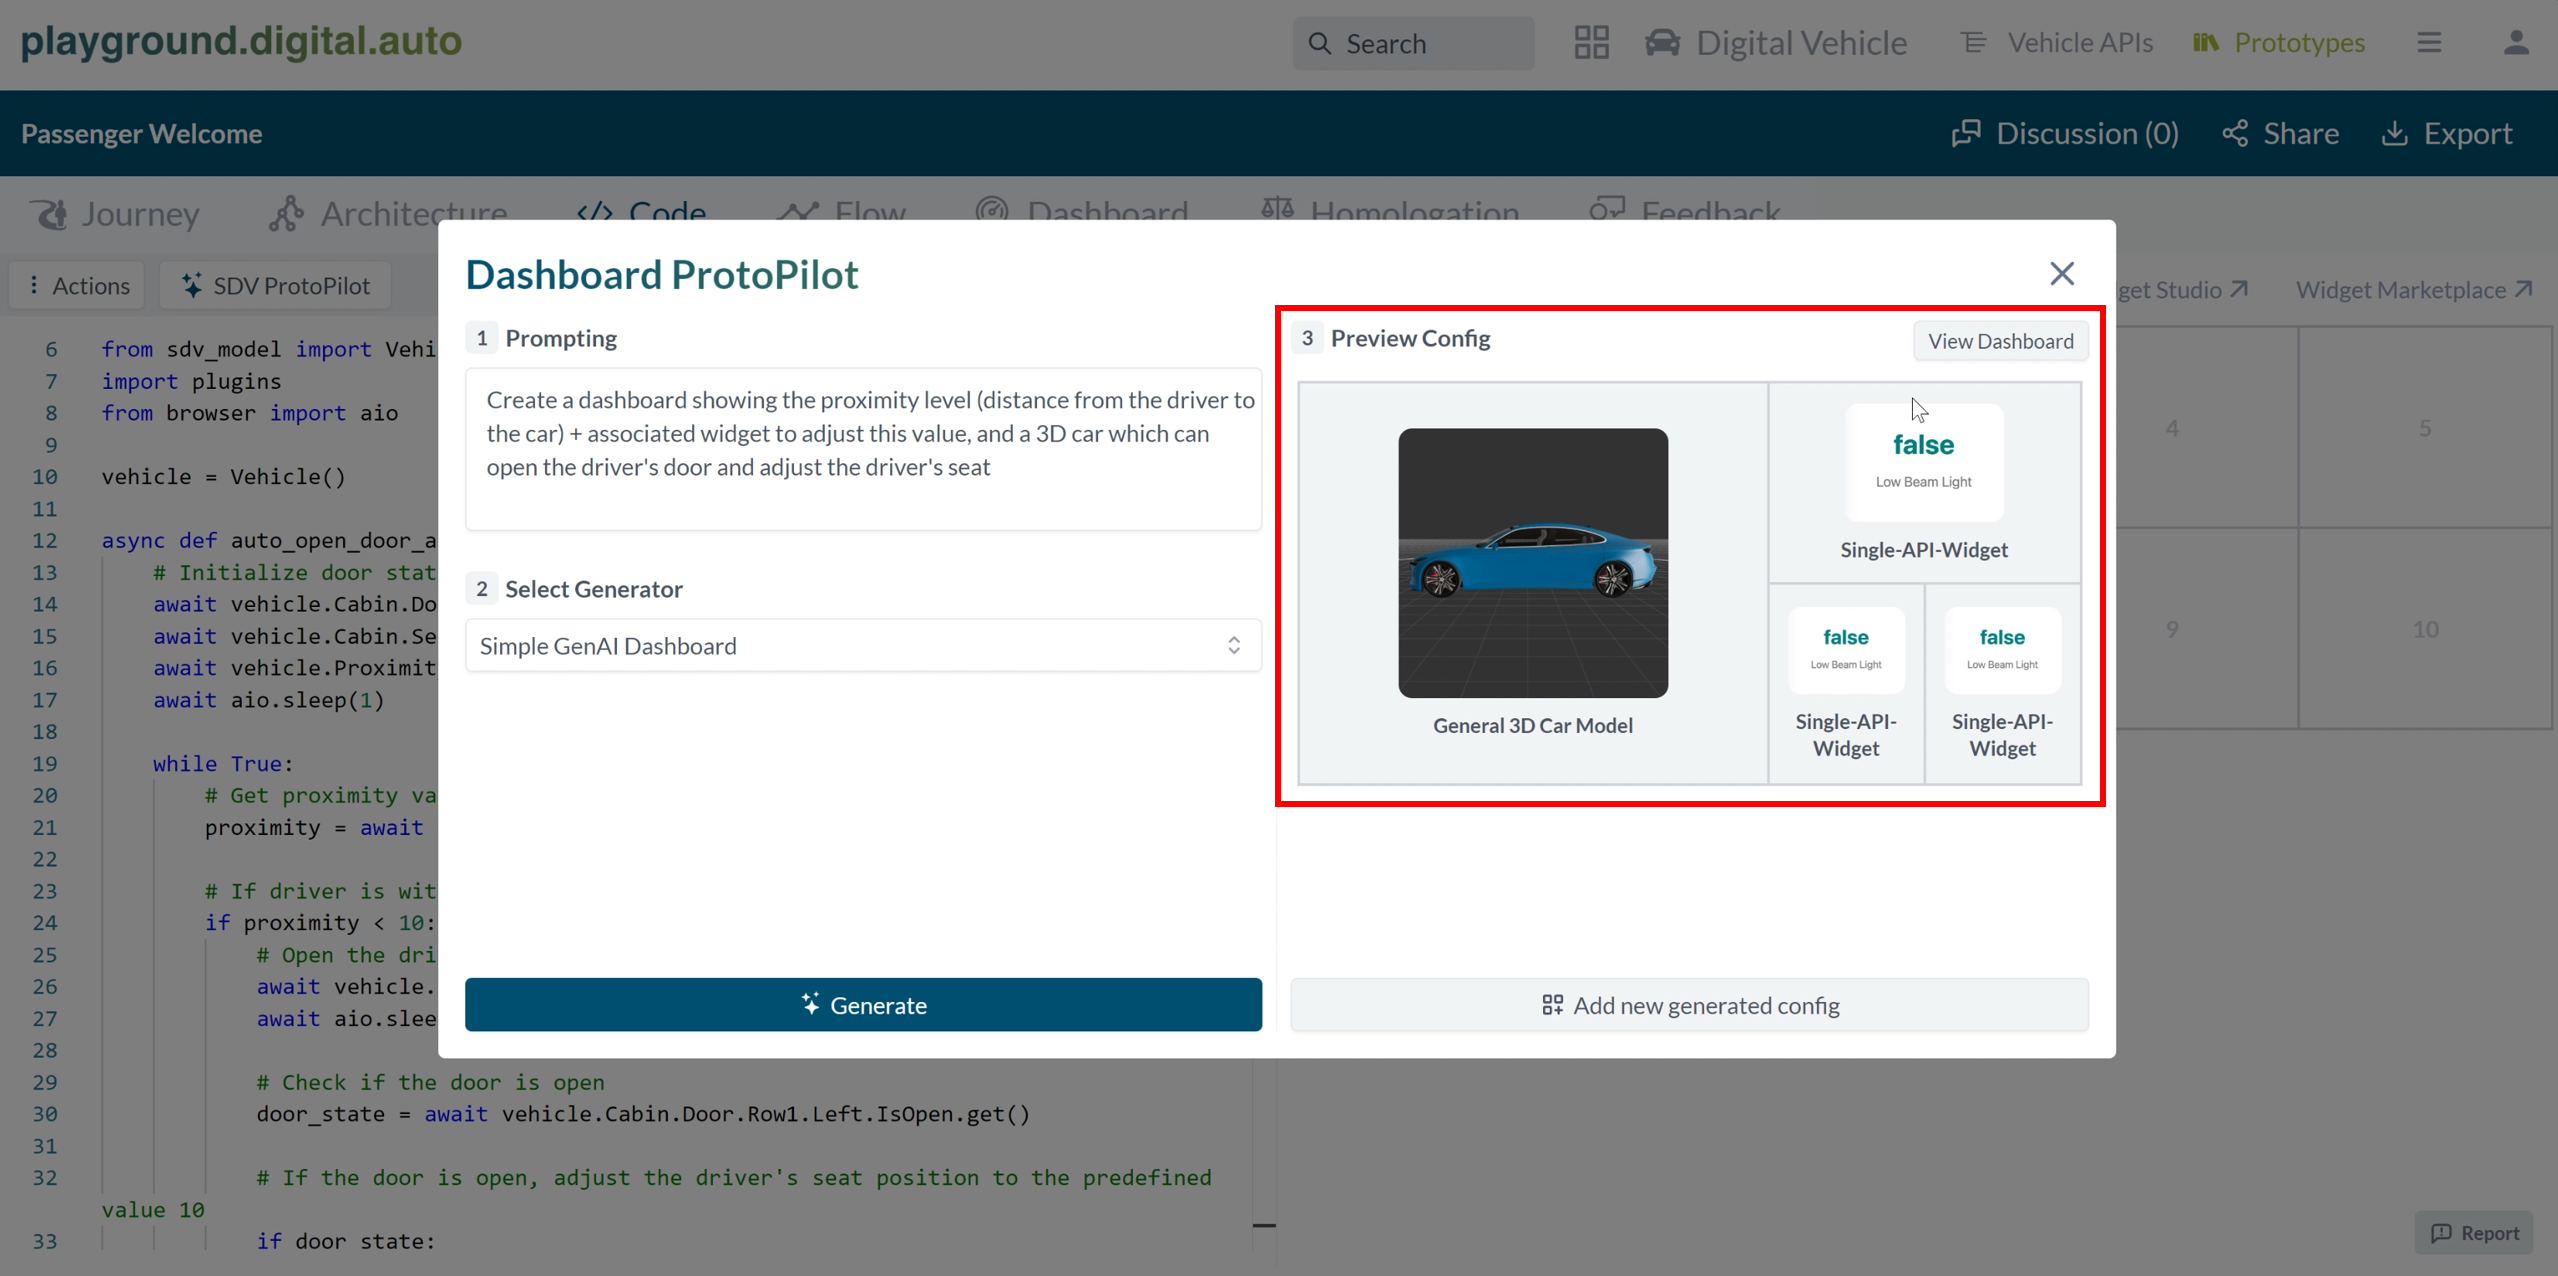
Click on the “Add new dashboard coonfig” if you satisfy with the new generated config.
3. Widget Protopilot (GenAI Widget)
If you have generated the SDV Python code, but you cannot find a suitable widget to visualize it in the built-in ones or the ones from the marketplace, you may want to create your own widget with the Widget Protopilot feature. This feature will help you generate a custom widget based on your input prompt. The procedure is similar to the Dashboard Protopilot and the SDV Protopilot, but with some differences. Here is how it works:
1. Go to the dashboard config tab and add a widget. This will open a popup where you can add a widget by “Widget Protopilot”.
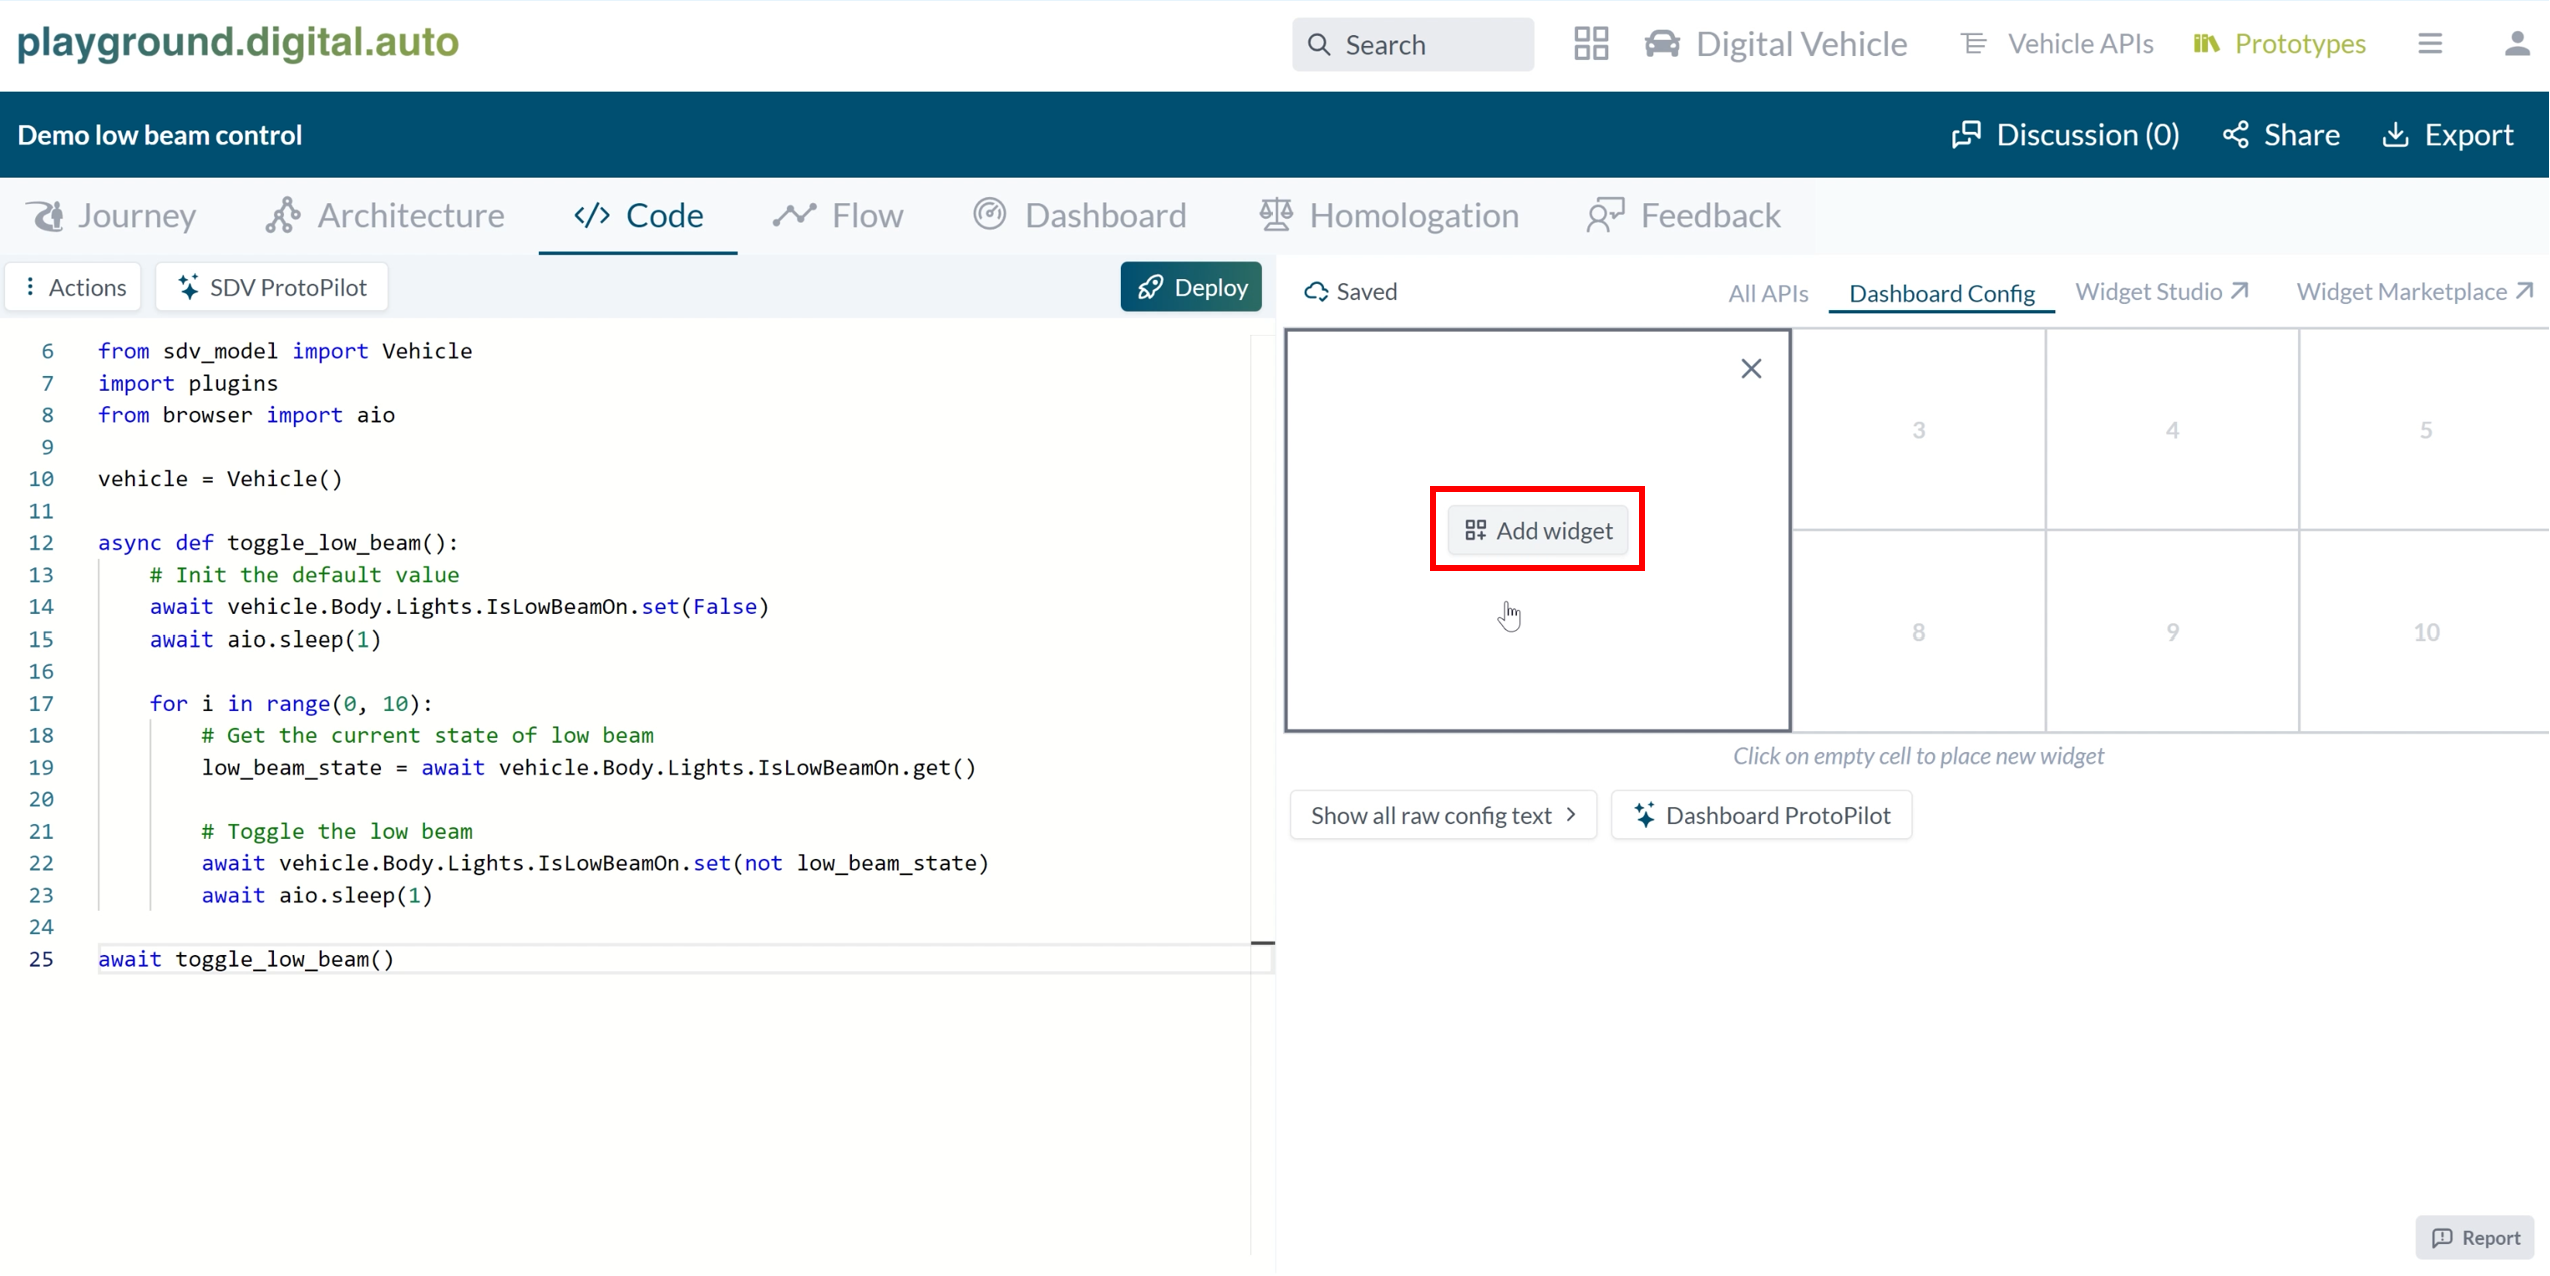
2. Click on the “Widget Protopilot” tab to open the Widget Protopilot popup window.

3. Input prompt and selected a generator, click on the “Generate” button and wait for the code to be generated.

4. Select a generator from the marketplace, your own generator will be displayed here after the admin approves it.

5. This may take from 30 to 90 seconds, depending on the complexity and quality of the generator. If the generator is well-trained and fine-tuned, it will produce the widget faster and more accurately.
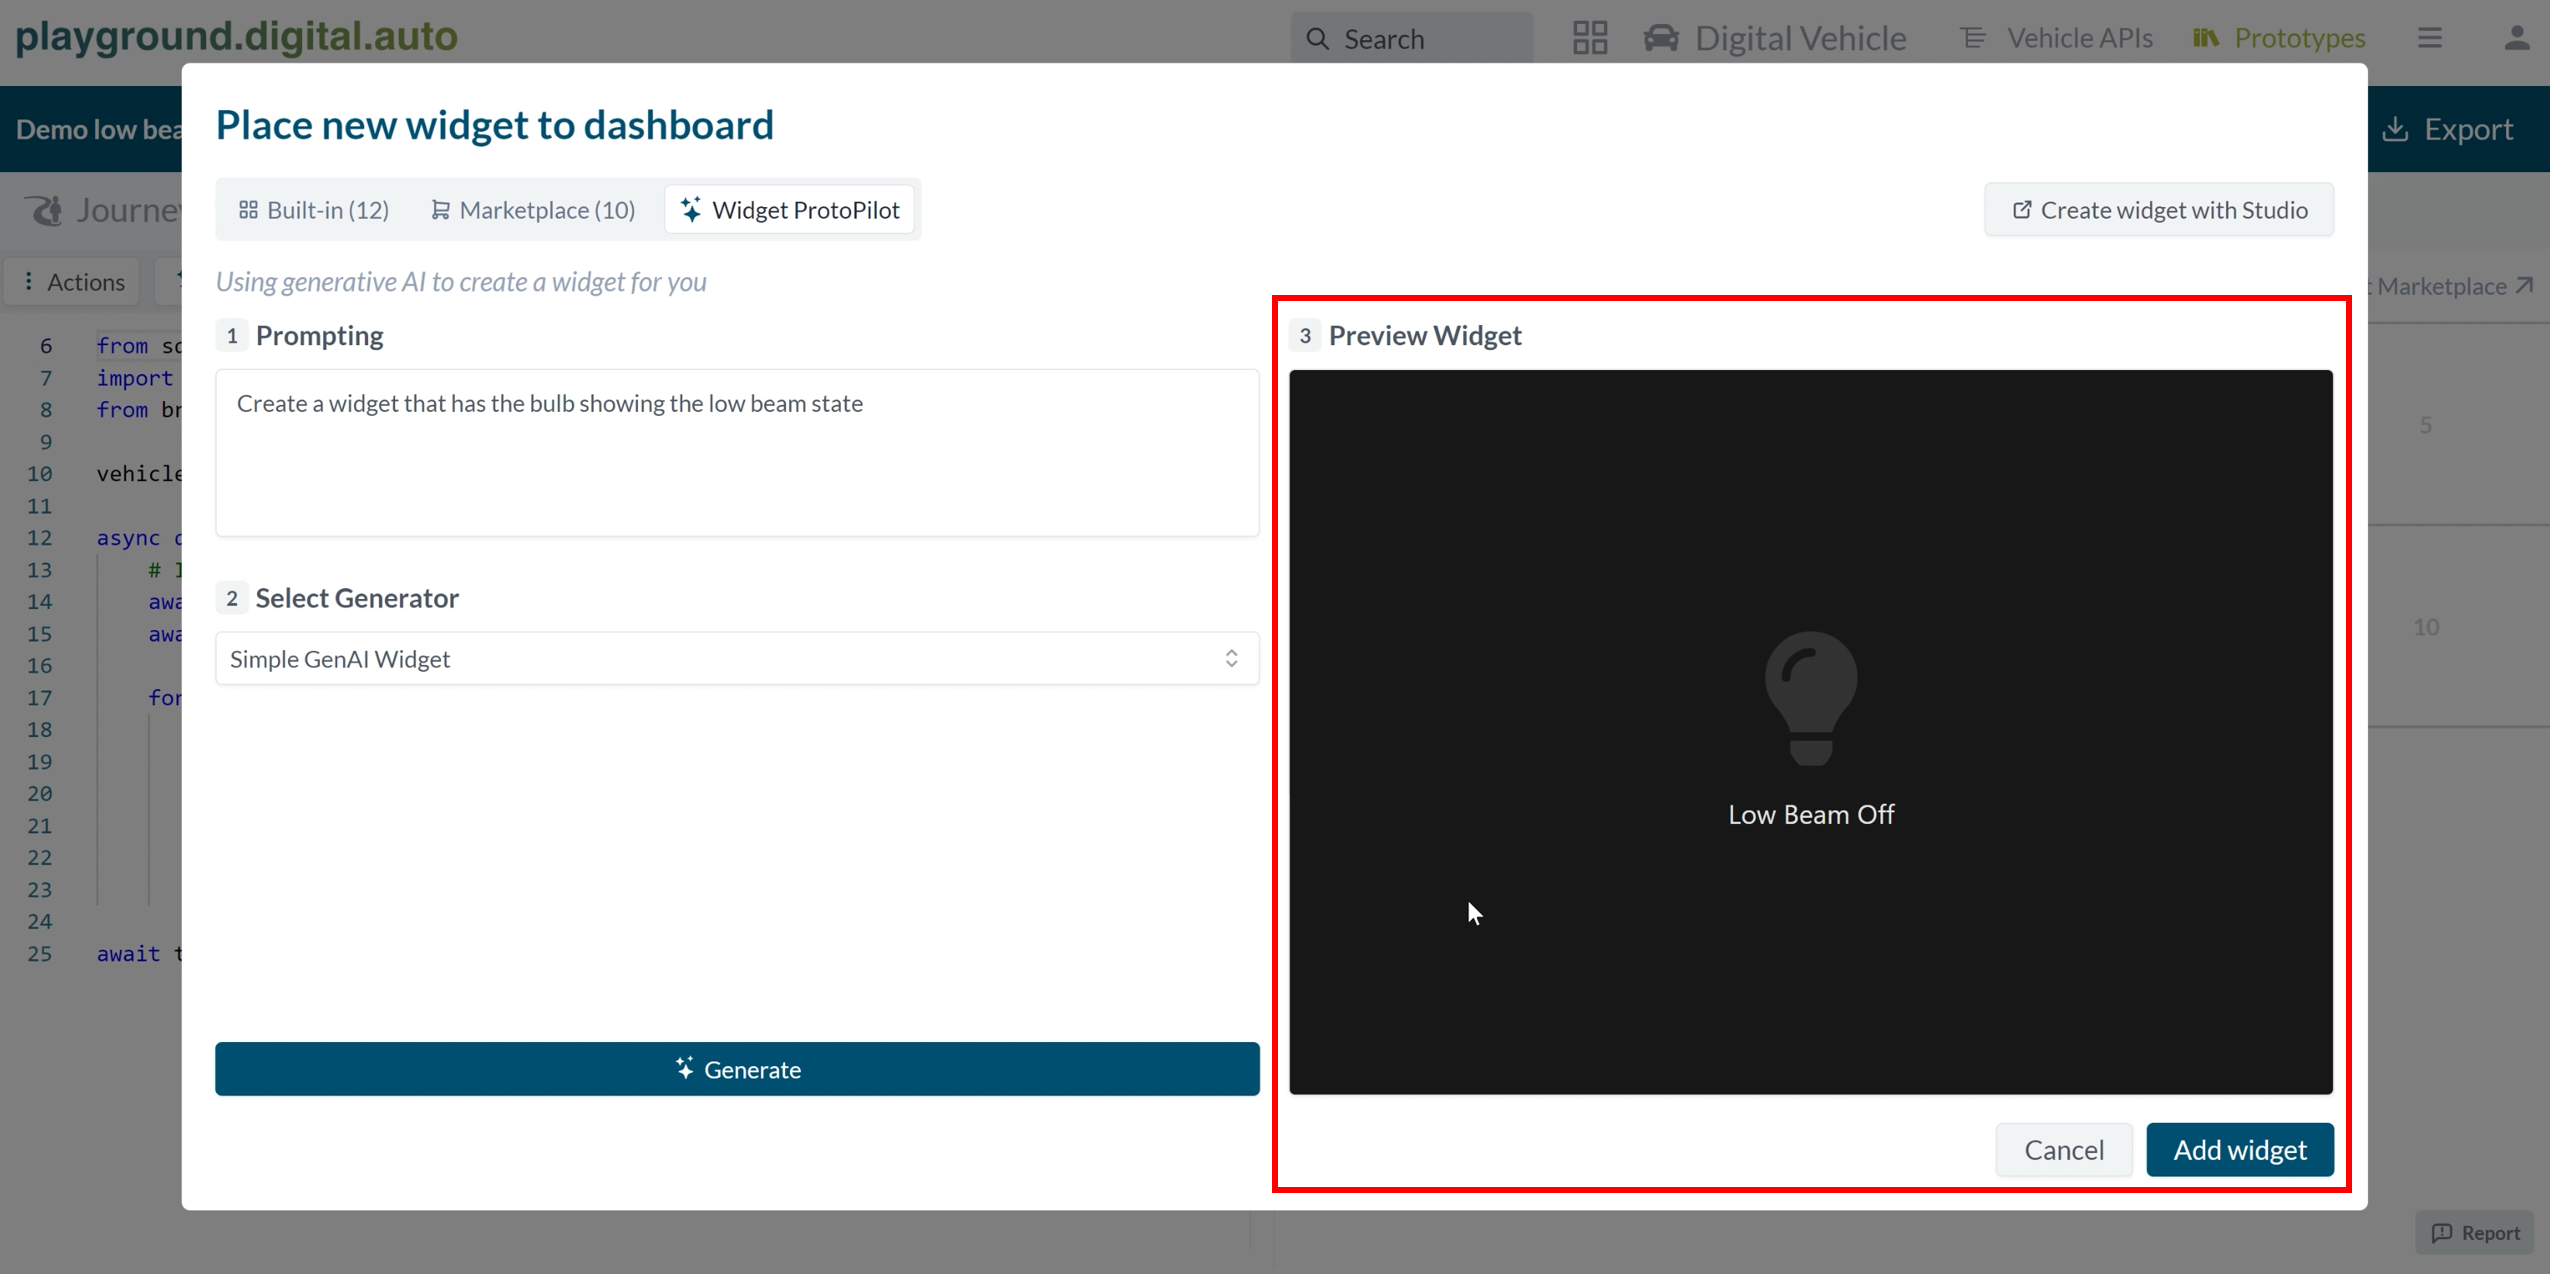
6. When the widget is generated, you will see it on the right hand side of the popup window. The widget will be embedded into an iframe for you to preview. You can see how the widget looks and works, and if it meets your expectations and requirements. If you are satisfied with the widget, you can click on the “Add Widget” button at the bottom of the right hand side. This will add the widget to your selected dashboard box on the playground, where you can edit it and see the output.
After you have added the widget to your dashboard box, you may want to view or modify the code of the widget. You can do this by hovering over the widget box and clicking on the icon that links to the Widget Studio. The Widget Studio is a tool that allows you to edit the HTML, CSS, and JavaScript code of the widget. You can use the Widget Studio to customize the widget to suit your application or debug it if the GenAI made some errors. The widget code is more complex than the SDV Python code, so the GenAI may not always generate it perfectly. You can use the Widget Studio to fix any issues or improve the widget as you wish.


4. How playground handling GenAI responses
When interacting with a GenAI model through playground, it’s important that the responses from the model servers are structured in a way that allows our system to effectively process and present the output, regardless of the hosting environment, be it Amazon Bedrock or another infrastructure.
For secure and structured communication, our platform uses the HTTP POST method to send requests to your model’s endpoint, which includes user input prompts and, if applicable, system messages.
Models Hosted on Amazon Bedrock: For models on Amazon Bedrock, the platform sends a structured request containing the user input, which is then expected to return a response in a specific JSON format. The request includes necessary AWS credentials and the input prompt, as shown below:
{
    "url": "<Your Model's Endpoint URL>",
    "accessKey": "<Your AWS Access Key>",
    "secretKey": "<Your AWS Secret Key>",
    "system": "<Your system message>",
    "input": "<User input prompt>"
}
The model’s response vary depend on which model, the examples below is from the AWS Amazon Bedrock Titan Express G1
{
    "results": [
        {
            "outputText": "This is the extracted output for AWS Amazon Bedrock Titan Express G1"
        }
    ]
}
or Anthropic Claude 3
{
    "content": [
        {
            "type": "text",
            "text": "This is the extracted output for AWS Amazon Anthropic Claude 3"
        }
    ]
}
Models Hosted on other infrastructures the request includes the user input within a messages array, which may also contain initial system messages. The request is properly formatted with the necessary content type headers and authentication details:
{
    "messages": [
        { "role": "system", "content": "<Your system message>" },
        { "role": "user", "content": "<User input prompt>" }
    ]
}
The expected response format for these models is as follows:
{
    "choices": [
        {
            "message": {
                "content": "This is the extracted output for models hosted on other infrastructures."
            }
        }
    ]
}
To clarify, here are examples illustrating how your model’s responses should be formatted for extraction across various GenAI features:
SDV ProtoPilot response should include only python format
from sdv_model import Vehicle
import plugins
from browser import aio

vehicle = Vehicle()

async def toggle_low_beam():
    # Init the default value
    await vehicle.Body.Lights.IsLowBeamOn.set(False)
    await aio.sleep(1)

    for i in range(0, 10):
        # Get the current state of low beam
        low_beam_state = await vehicle.Body.Lights.IsLowBeamOn.get()

        # Toggle the low beam
        await vehicle.Body.Lights.IsLowBeamOn.set(not low_beam_state)
        await aio.sleep(1)

await toggle_low_beam()
Dashboard ProtoPilot Example (expected in JSON format):
{
    "auto_run": false,
    "widgets": [
        {
            "plugin": "Builtin",
            "widget": "Chart-APIs-Widget",
            "options": {
                "chartType": "line",
                "num_of_keep_item": 30,
                "chart_tick": 500,
                "signals": [
                    {
                        "api": "Vehicle.Proximity",
                        "color": "#3b82f6"
                    }
                ]
            },
            "boxes": [4, 5]
        }
    ]
}
Widget ProtoPilot Example (should start with an HTML tag):
<html>
    <head>
        <!-- HTML Head content with meta, styles, and scripts -->
    </head>
    <body class="h-screen grid place-items-center bg-slate-100 select-none">
        <!-- Body content with widget structure and functionality -->
    </body>
</html>
To ensure the integration goes smoothly, it is advised to double-check the format of your model’s responses before integrating them with the playground. This preparation can help prevent potential issues and make sure your model’s functionalities are effectively utilized within the playground.
Conclusion
We hope this guide has been helpful for you to learn how to submit and use your generative AI on the playground. With this tool, you can create amazing SDV prototypes with less effort and more creativity. You can also share your models and widgets with other users on the marketplace, and use the ones that they have created and submitted. The playground is a place where you can experiment, explore, and have fun with generative AI.
Walkthrough videos
Experiment GenAI on playground: SDV Code & Dashboard
Experiment GenAI on playground: SDV Code & Widget