Playing with Prototypes
This page provides instructions on how to interact with the prototype and try it out on yourself.
To begin with, open the desired prototype from the model you have selected.
The prototype offers 5 primary sections that you can explore: Journey, Code, Dashboard, Discussion, and Feedback. In the following guide, we will walk you through each of these sections in detail.
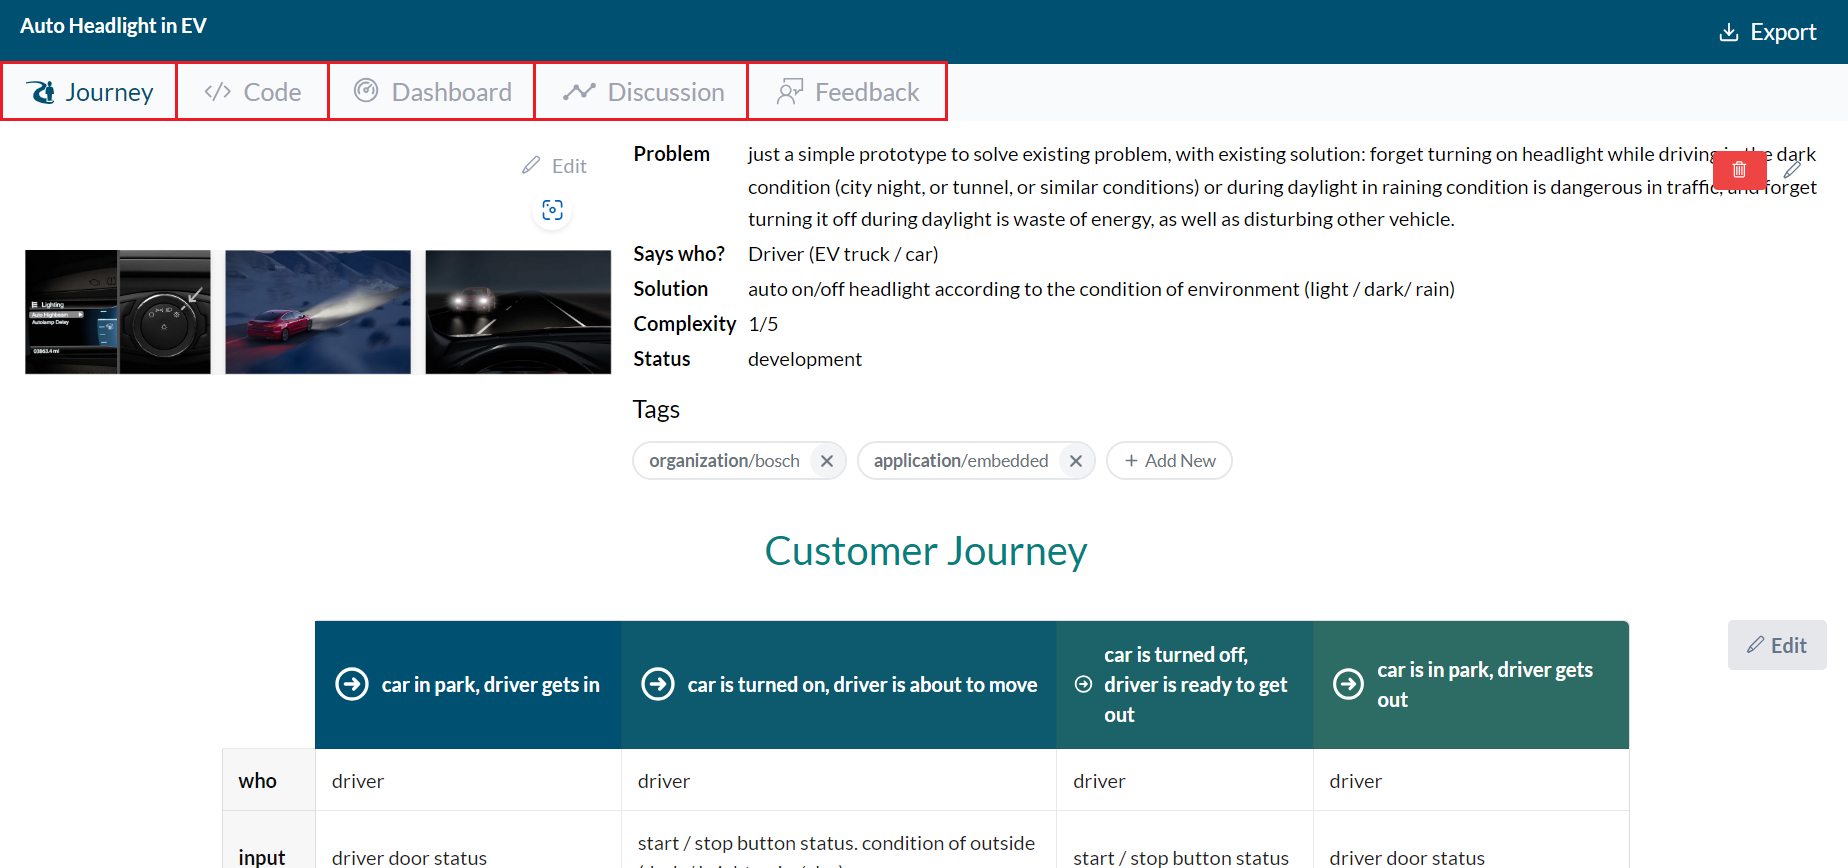
Journey
In this section, you have the opportunity to either introduce your own prototype or read about the introductions of others. The main focus of this section is to showcase the purpose and objectives of each prototype
Code
Within the Code section, there are two parts that you will be working with: Code space and Dashboard config.
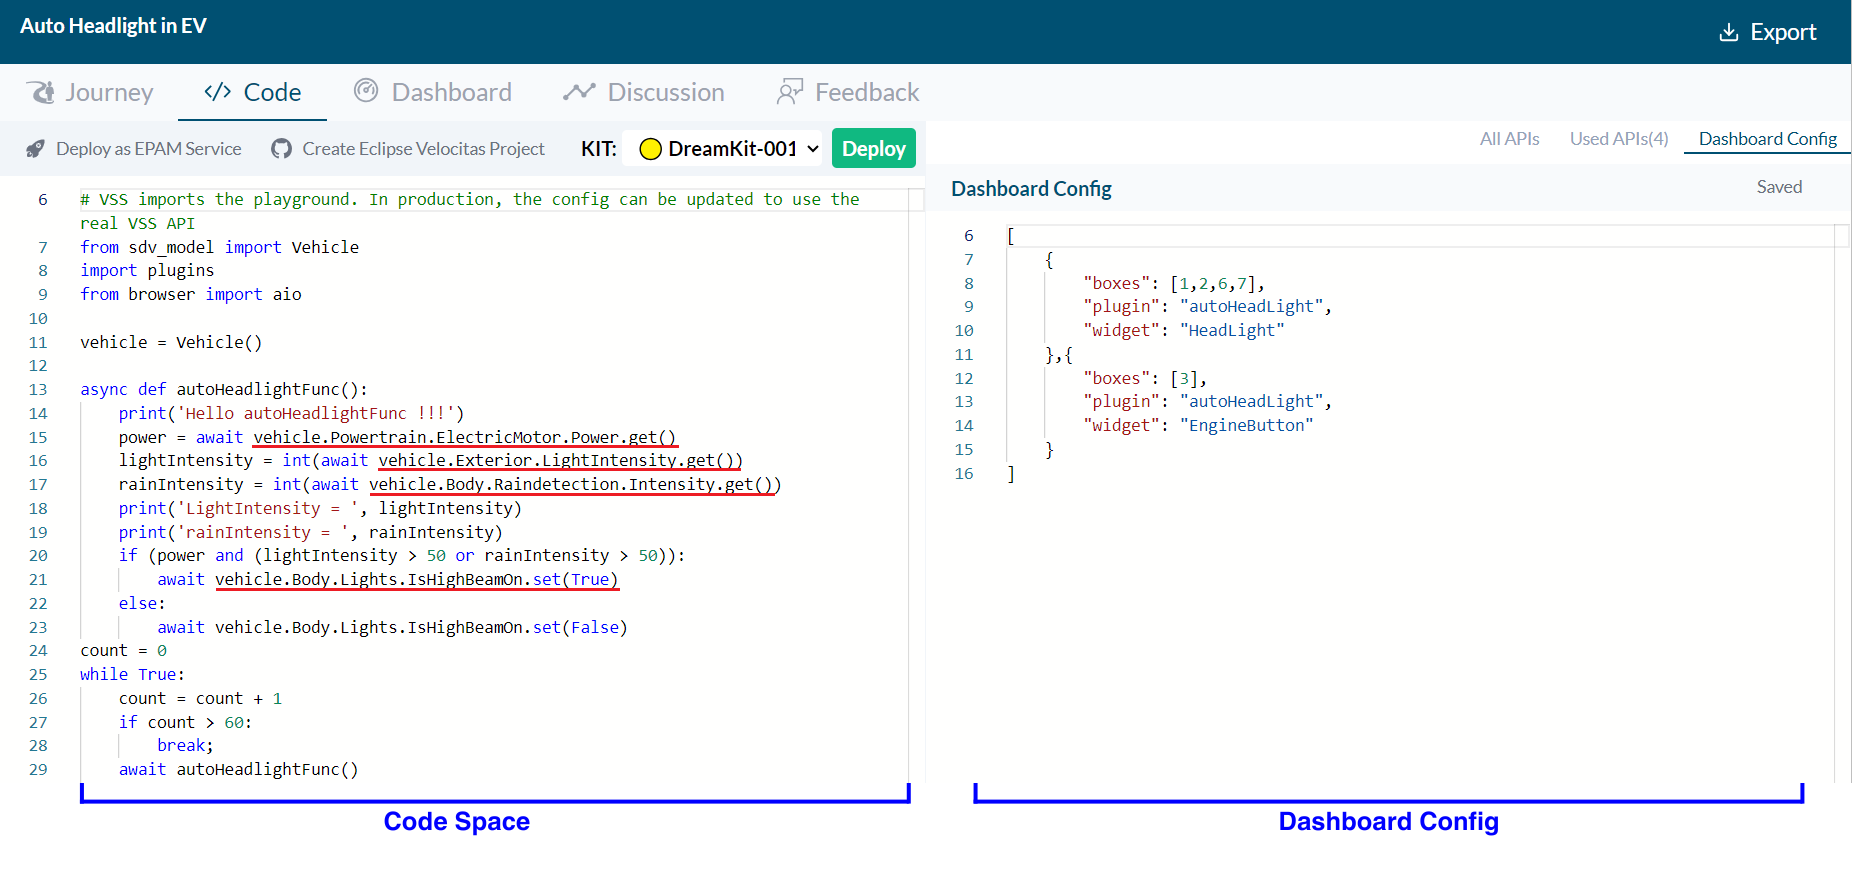
The code space:
In this area, you have the ability to write functions that control the prototype by getting/setting the VSS APIs. These APIs come in three types:
- Branch: Used to store actuator and sensor APIs.
- Actuator: Uesd to get/set/subscribed the vehicle actuator part (Electric motors, Electro-magnetic valves, etc.)
- Sensor: Used to get/subscribed the vehicle sensor part (Air-flow sensor, Temperature sensor, etc. )
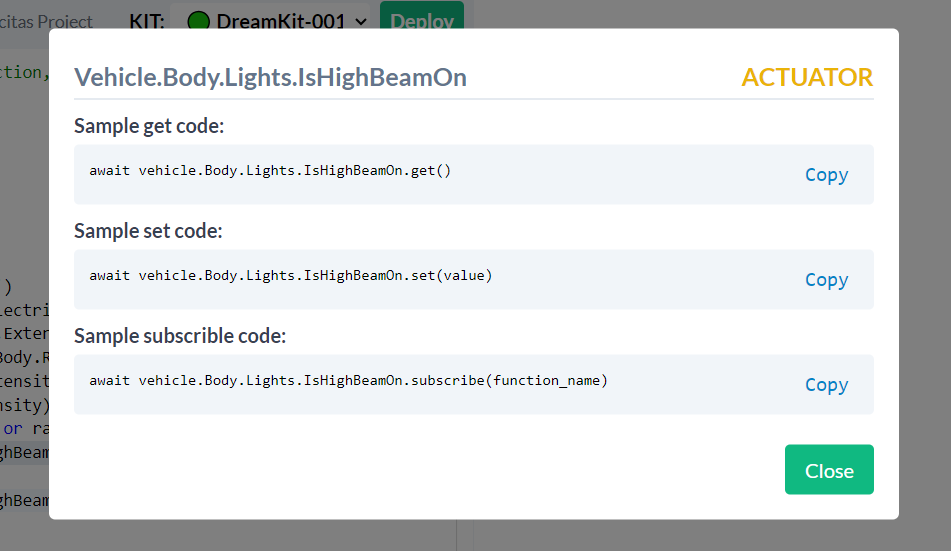
As an illustration, let’s take a closer look at the Vehicle.Body.Lights.IsHighBeamOn Actuator API. This particular API allows you to perform the following actions:
- Get Light Value: You can retrieve the current status of the high beam lights. This provides you with information about whether the high beam lights are currently turned on or off.
- Set Light Value: You have the capability to set the state of the high beam lights. This means you can command the lights to either turn on or off according to your requirements.
- Subscribe to API: By subscribing to this API, you can receive real-time updates whenever there is a change in the status of the high beam lights. This allows you to stay informed about any modifications to the light state.
This level of control over the Vehicle.Body.Lights.IsHighBeamOn Actuator API enables you to actively monitor and manipulate the high beam lights of the vehicle through the VSS API within the prototype.
The dashboard config
You have the ability to perform the following actions:
- Boxes: Arrange and position your widgets within designated boxes numbered from 1 to 10. This allows you to organize the visual layout of your dashboard and decide where each widget will be displayed.
- Plugin: Specify the name of the plugin that you wish to utilize. This defines the set of functionalities and features that will be available within your dashboard.
- Widget: Select and assign a registered widget from the chosen plugin to be displayed in the designated box. Widgets are visual components that provide specific information or interactive elements on your dashboard.
Note:
You can make edits to the Code Section only within your own prototype. Other users will only have viewing access to your prototype and won’t be able to make edits.
Dashboard
This section will visualize and actualize the prototype.
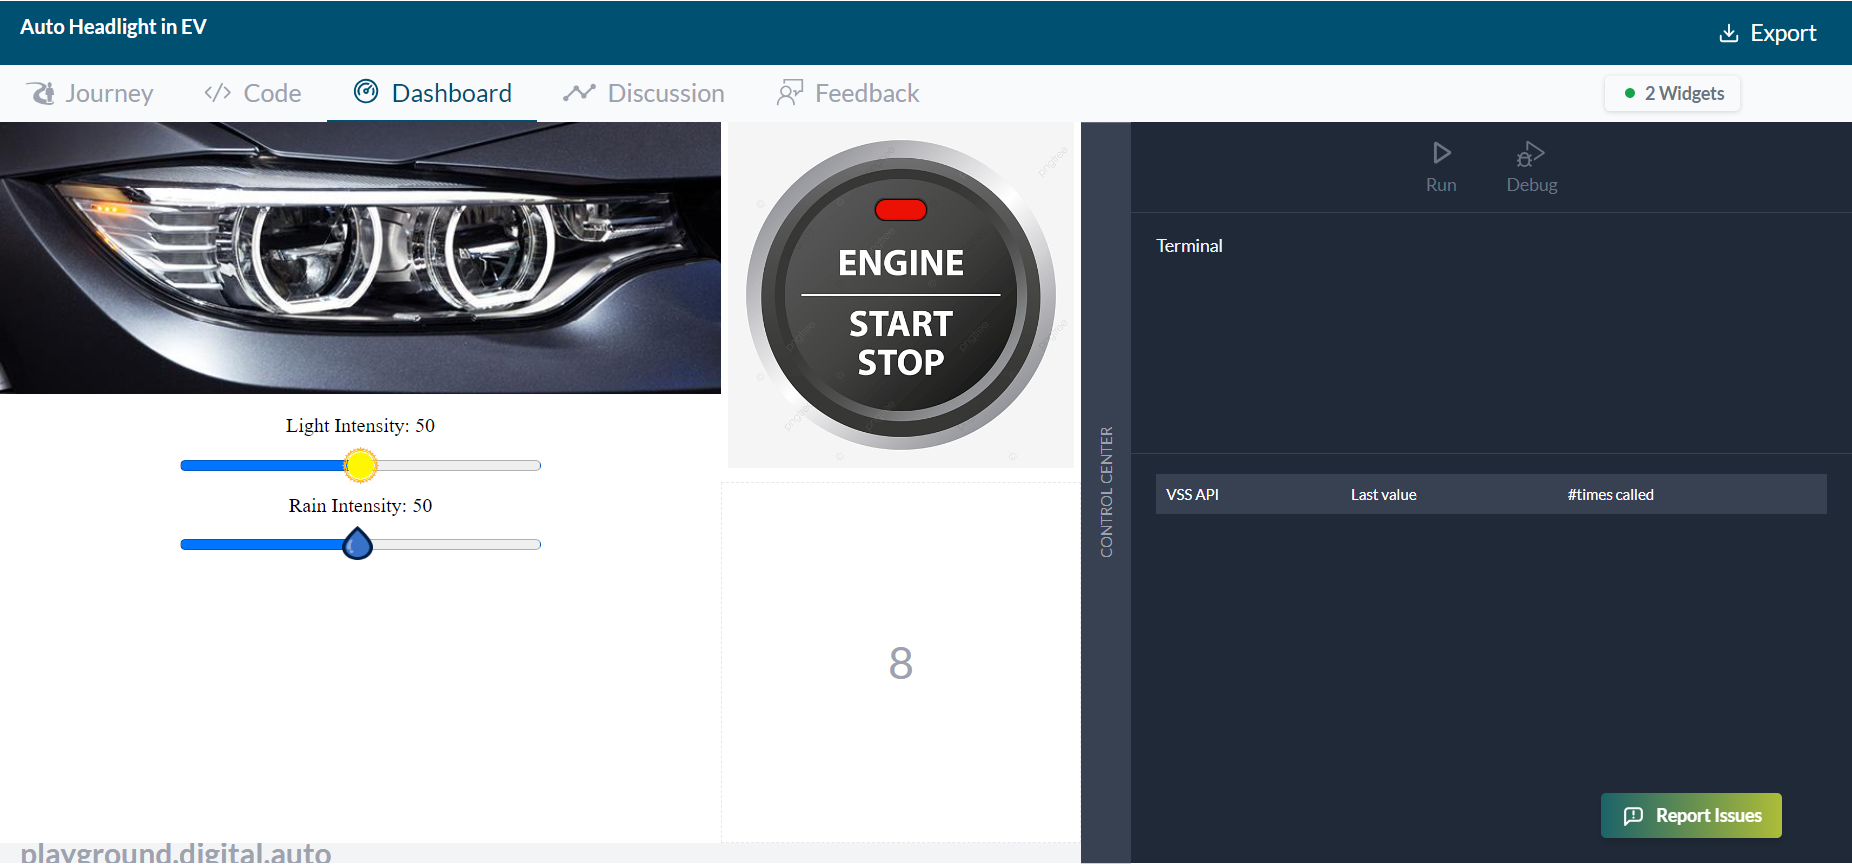
Once you have configured the widgets and their positions using the Dashboard Configuration, these widgets will be displayed within the frames you’ve set up. Widgets that you have used will be listed in the top right corner of the dashboard.
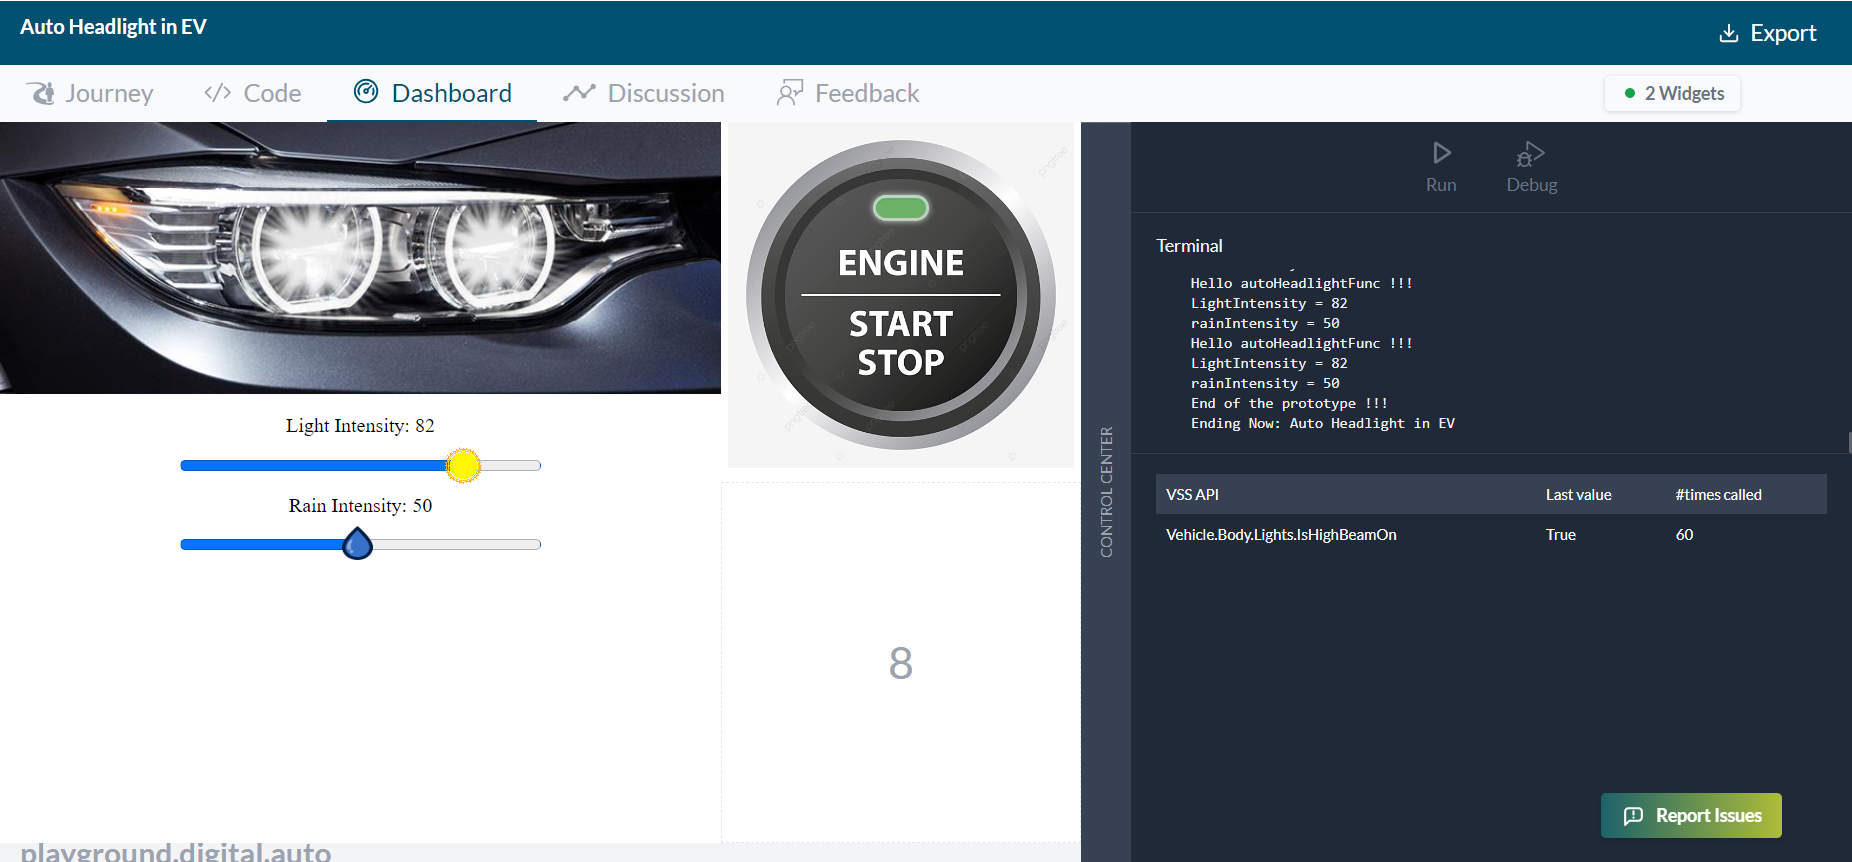
- After completing the setup, simply click on the Run button to initiate testing of your prototype.
- To monitor and manage the outputs of your prototype, access the Control Center located on the right-hand side. Within the Control Center, you can track all the outputs generated by your prototype and also view a comprehensive list of all the invoked [VSS] APIs. It’s important to note that the execution of your prototype code follows a sequential order, from top to bottom. If you require a more detailed analysis of your code’s execution, you can utilize the Debug button. This feature allows you to step through your prototype’s code line by line, enabling a more granular understanding of its behavior.
This dashboard serves as a visual representation of how your prototype is functioning and interacting with various aspects of the vehicle simulation.
Discussion
Within the Discussion section, you will find a display of ongoing discussions and interactions among the developers involved in the creation of the prototype. This area serves as a platform for developers to communicate, exchange ideas, share insights, and address any questions or concerns related to the prototype’s development process. It facilitates collaboration and enables a transparent and organized channel for team communication.
Feedback
In the Feedback section, you have the option to both read existing feedback from users and provide your own feedback regarding the prototype. Clicking on this section allows you to access user-generated comments, suggestions, and evaluations of the prototype’s performance and features. Additionally, you can contribute by submitting your own feedback, sharing your observations, insights, and suggestions to help improve the prototype’s quality and functionality. This section serves as a valuable avenue for collecting input from users and developers to enhance the overall prototype experience.
Note:
To get the source code of python, dashboard configuration, plugin information, prototype information and related medias, click on the Export button in the top right corner of the screen
After finishing the prototype, you can deploy the prototype to the KIT and experience it in real life.