Experiment
To get started on your experimental journey, visit the playground Home and scroll down to Prototypes Gallery section
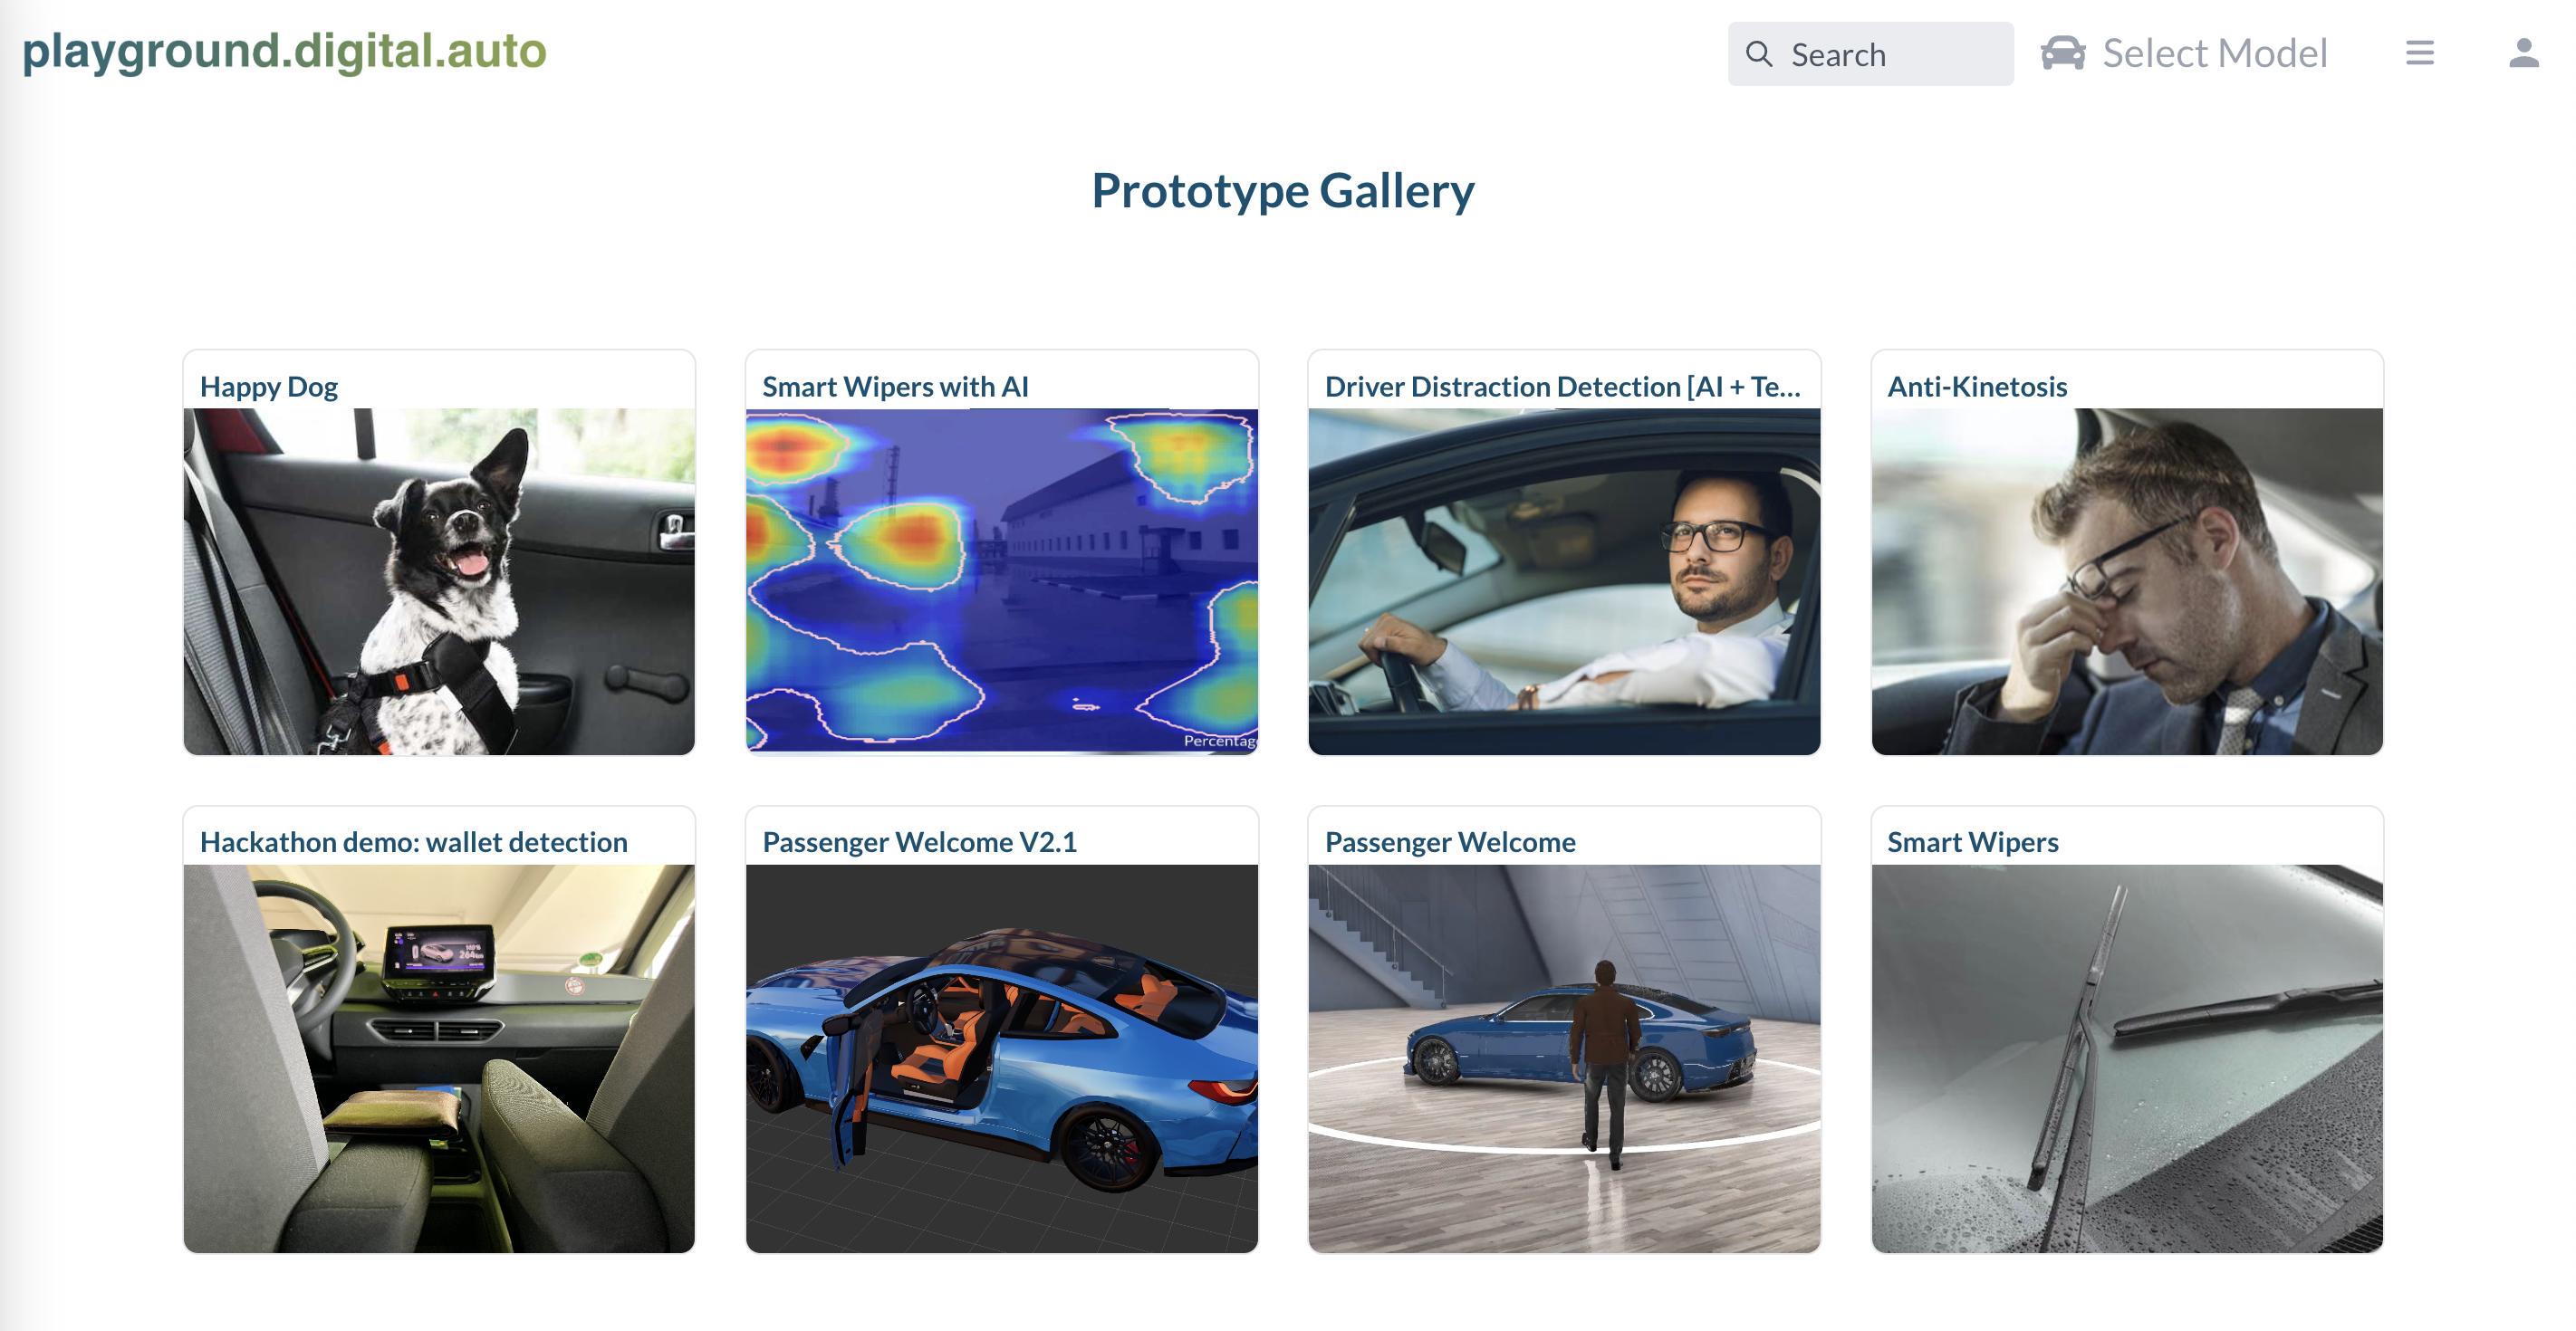
These are the most common prototypes help you undertand how the playground working, and what it can do.
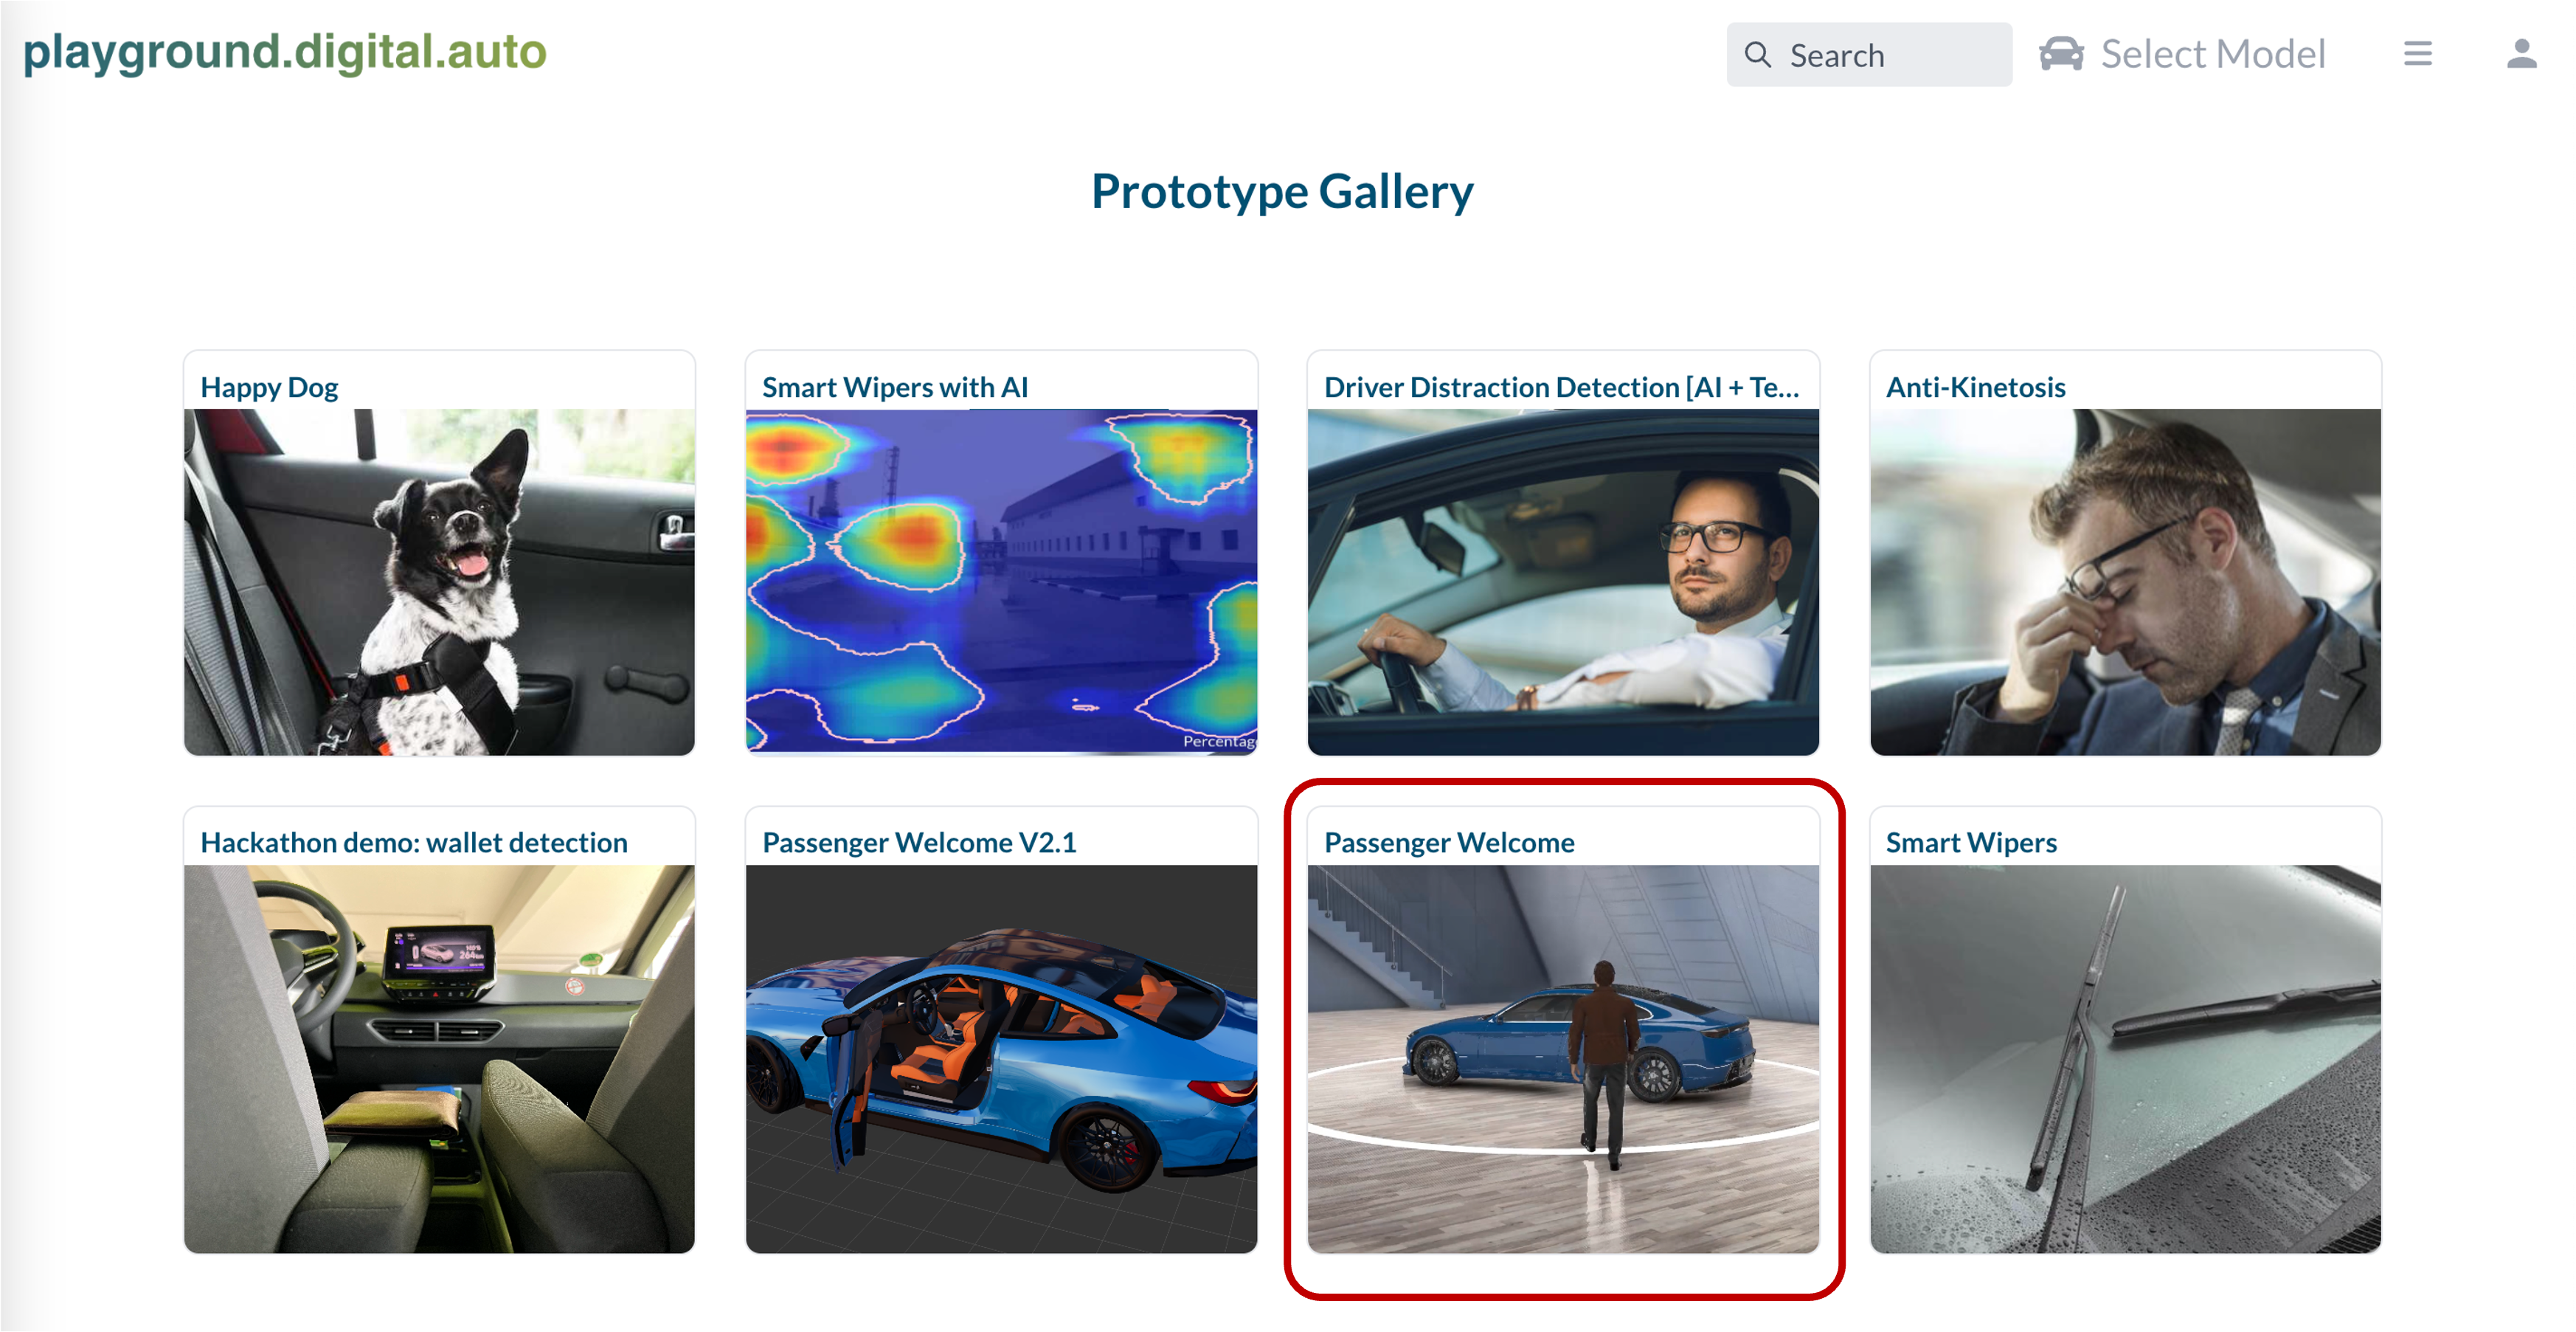
Select prototype Passenger welcome and explorer what it does.
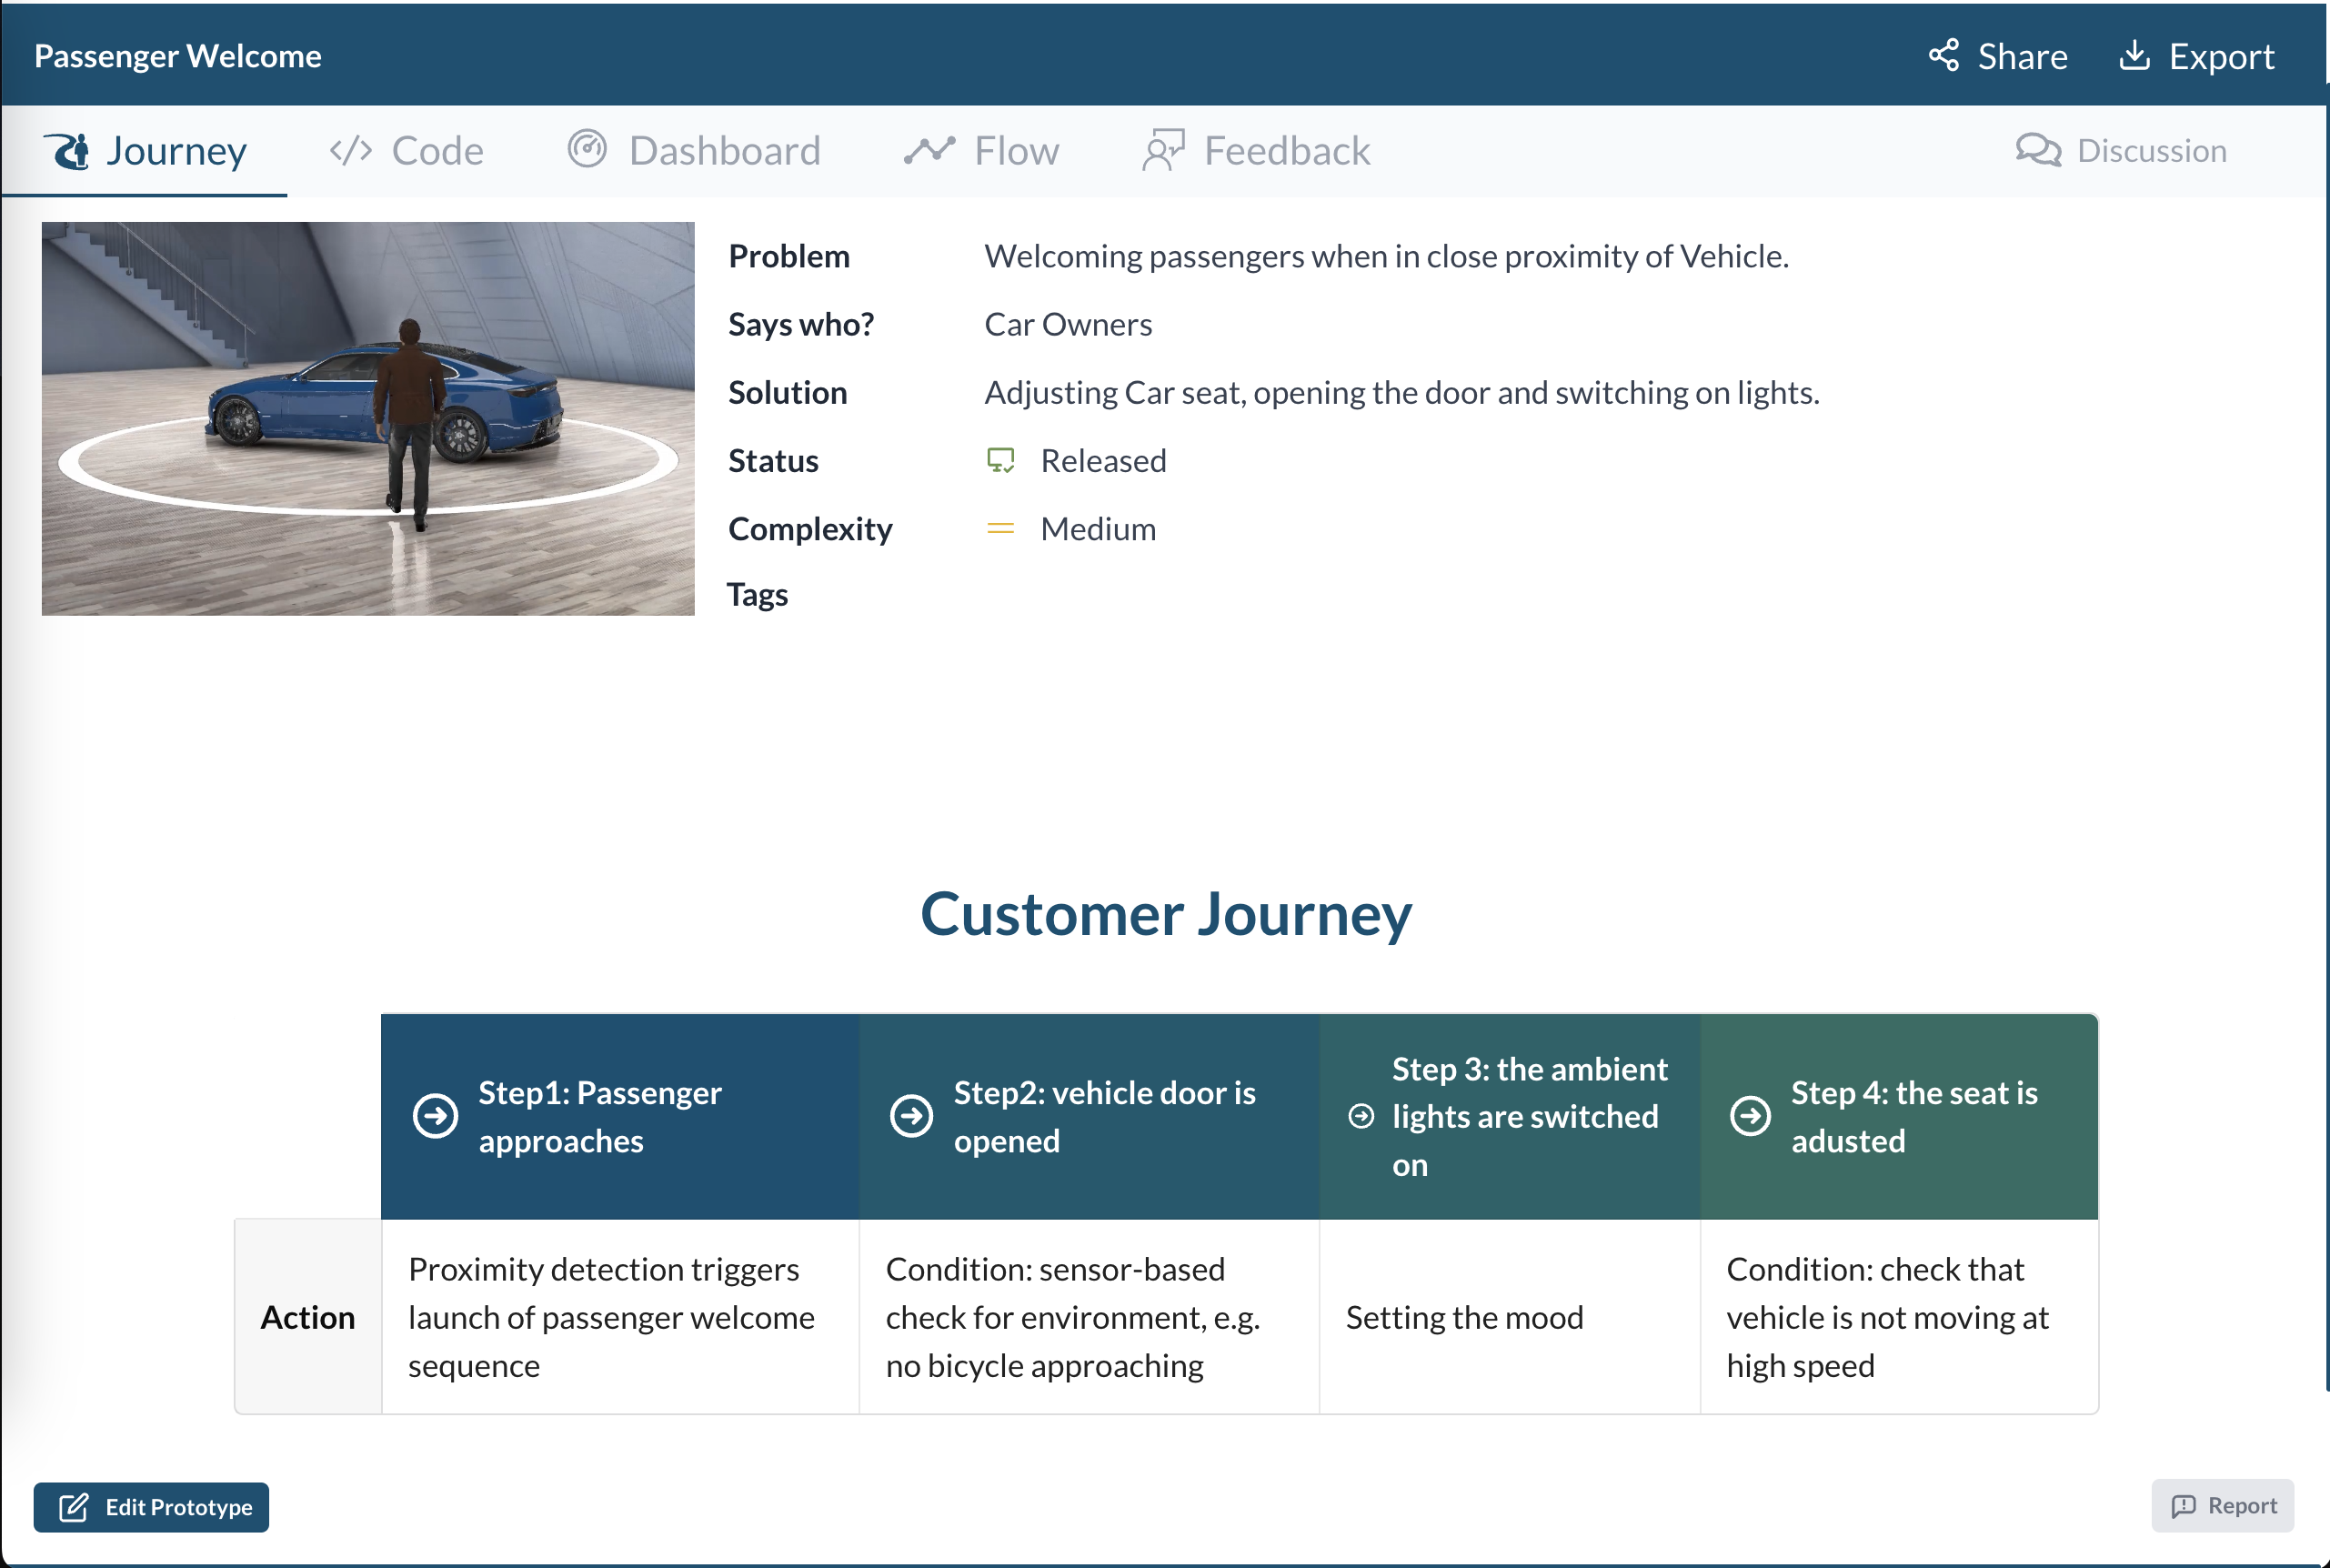
At the first Tab, Customer Journey, we can see the general description of this prototype, what the problem it solve, who will get impact on this issue, the complexity level, also the release status. And at the bottom, the most important thing, is Customer Journey. This table will describle the story line step by step. Who will do what, you will have the picture what going in each minor step.
Now let jump to the tab Dashboard, this tab is the central point of the prototype, where “the steps” describle in tab “Customer Journey” will become true.
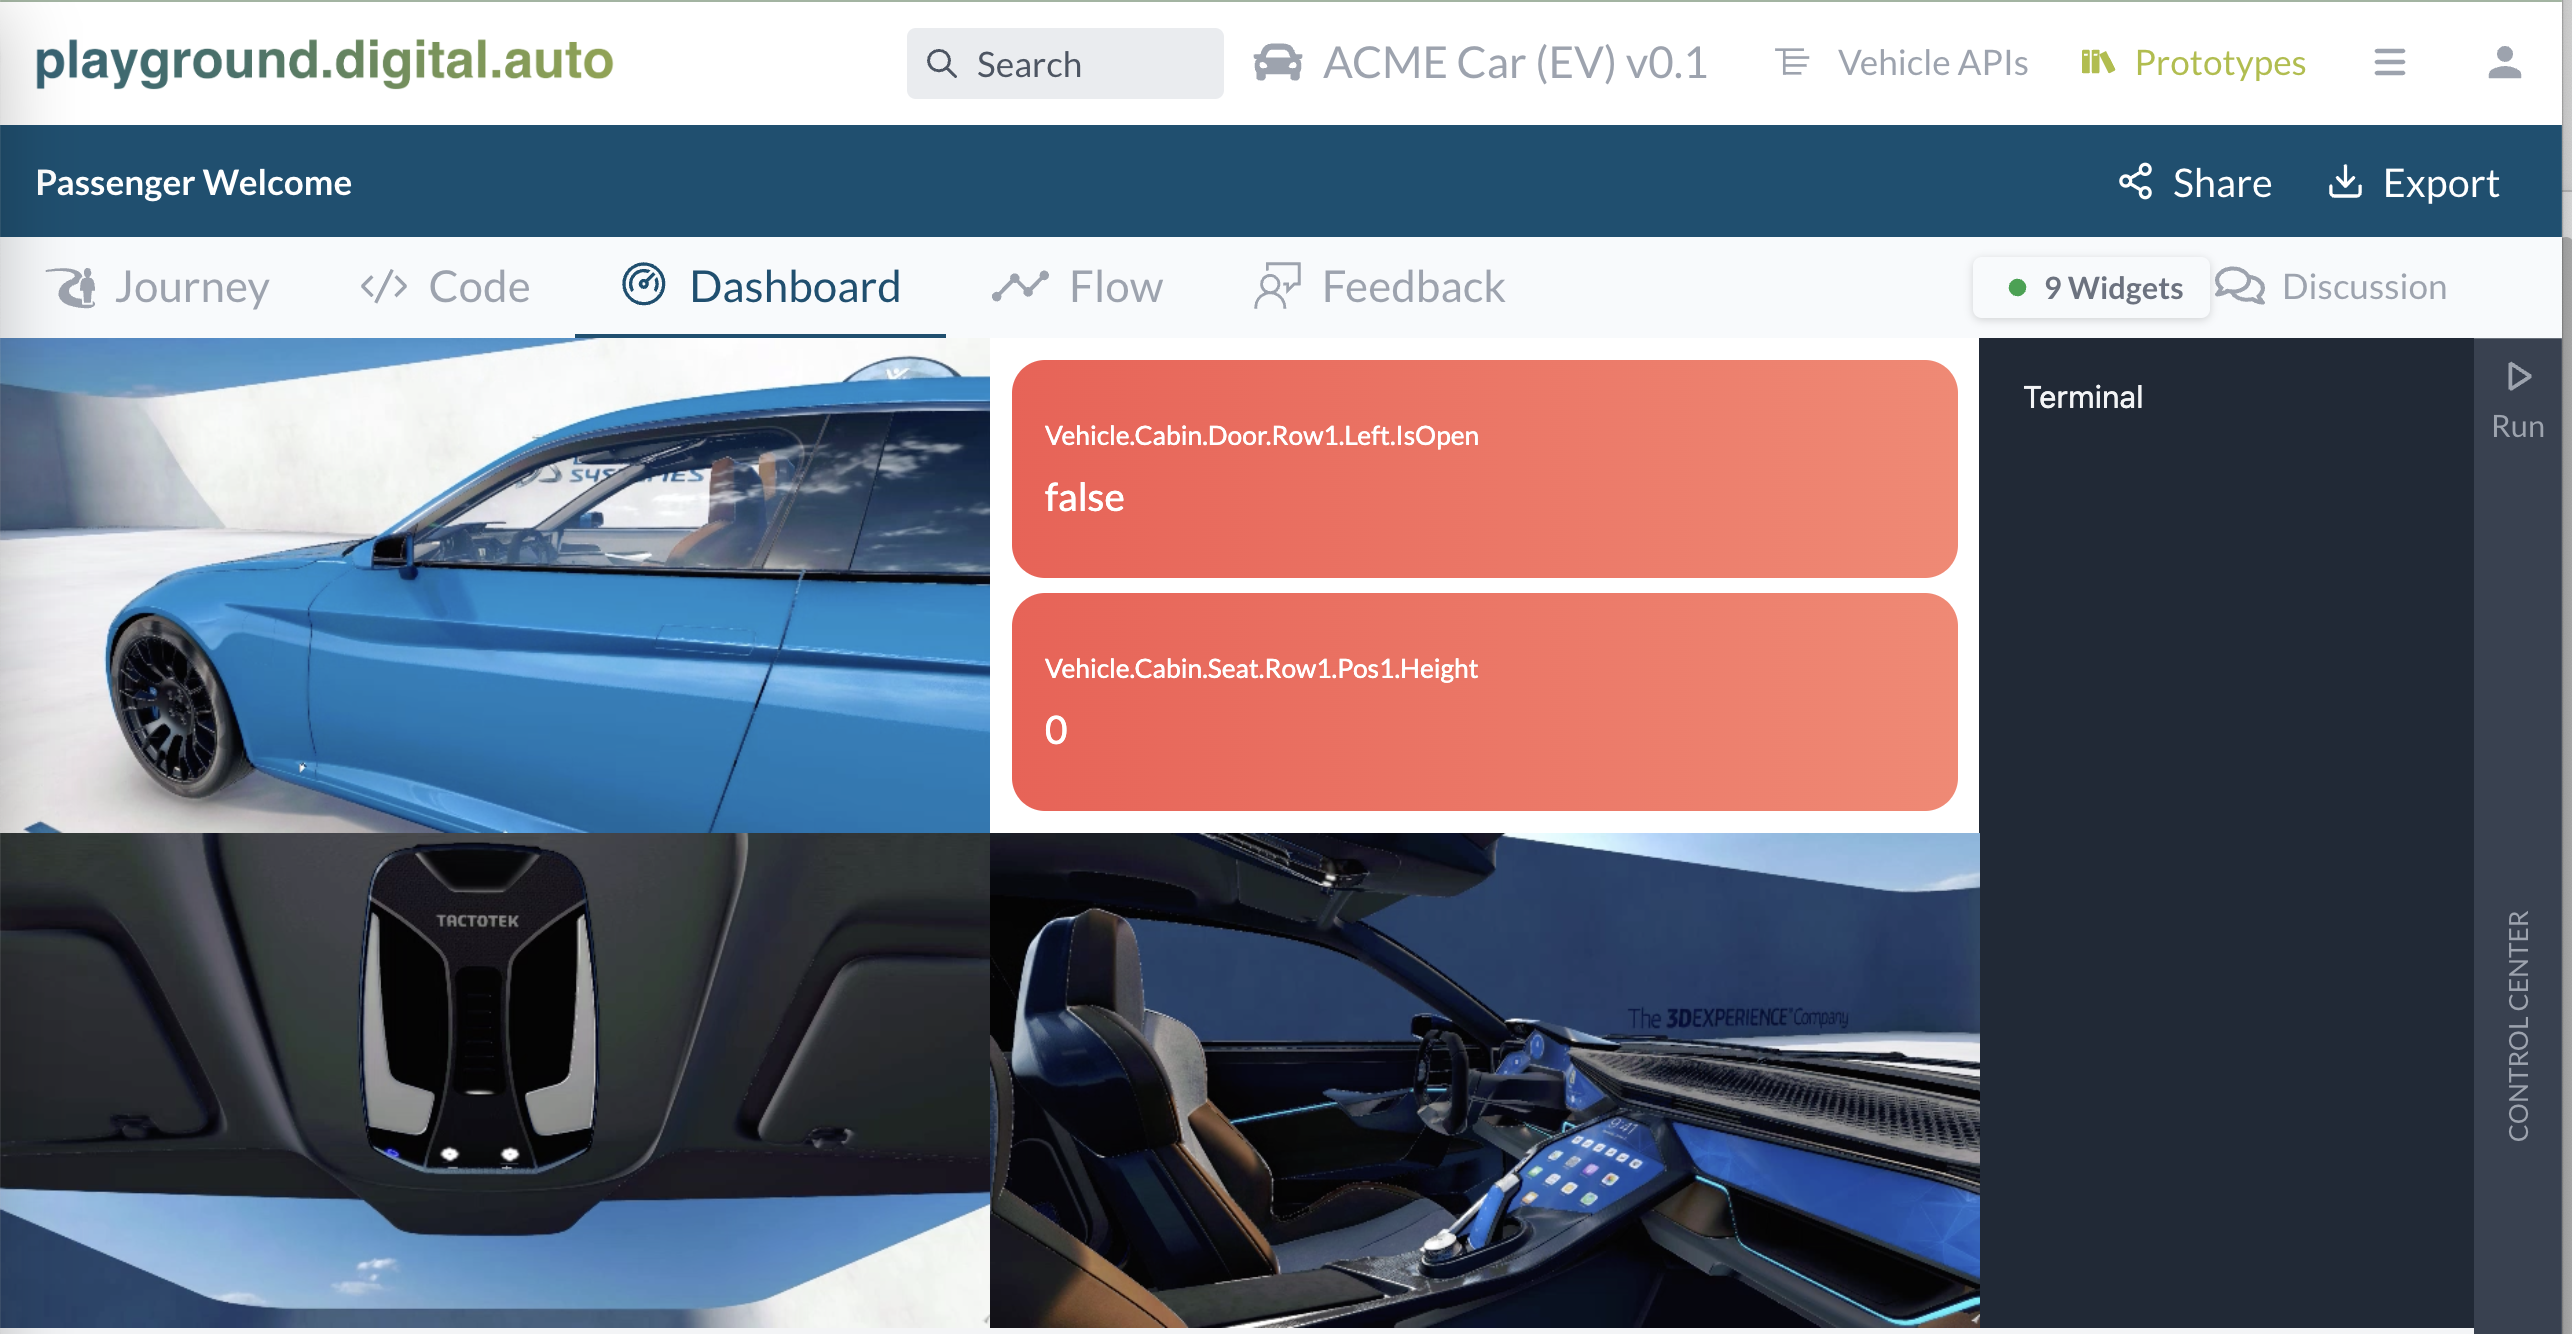
To start the show, click Run button on the right side bar and watching how the dashboard change.

Just a simple showcase, when car owner approach his car, the proximy detect him, then it will play a sequence of actions to prepare for his drive, and his mood too: Open door, adjust seat, and turn light on.
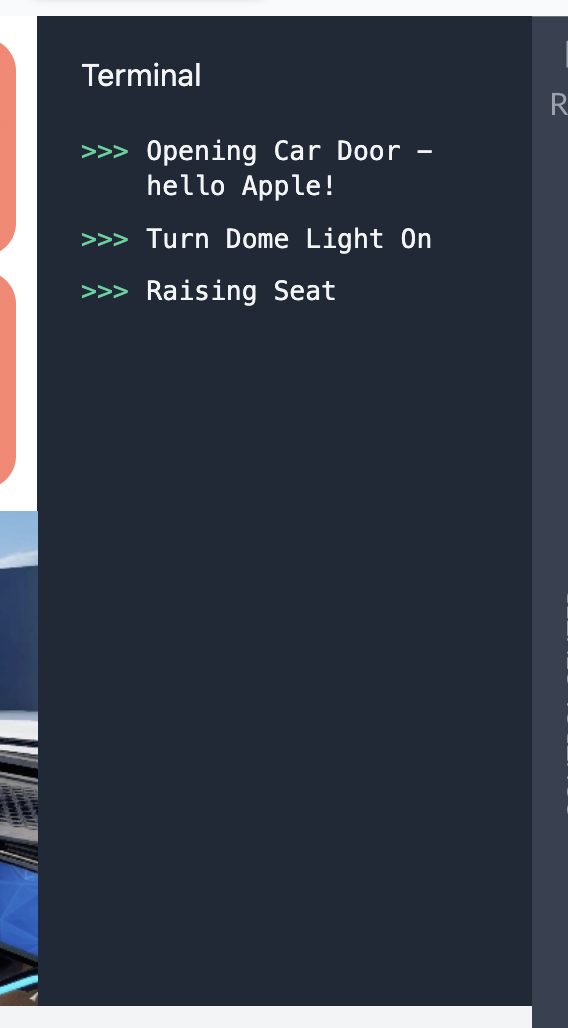
Also, watching “the terminal block”, we call it widget, some message print out to welcome the owner. This is just a simple way help you debug or testing you code.
That’s it! A simple show to demo what should going on when you go nearby your lovely smart car. But, wait, how can those magical things happen? What is the magic behind that? Let’s open Code Tab to see more detail on code and config.
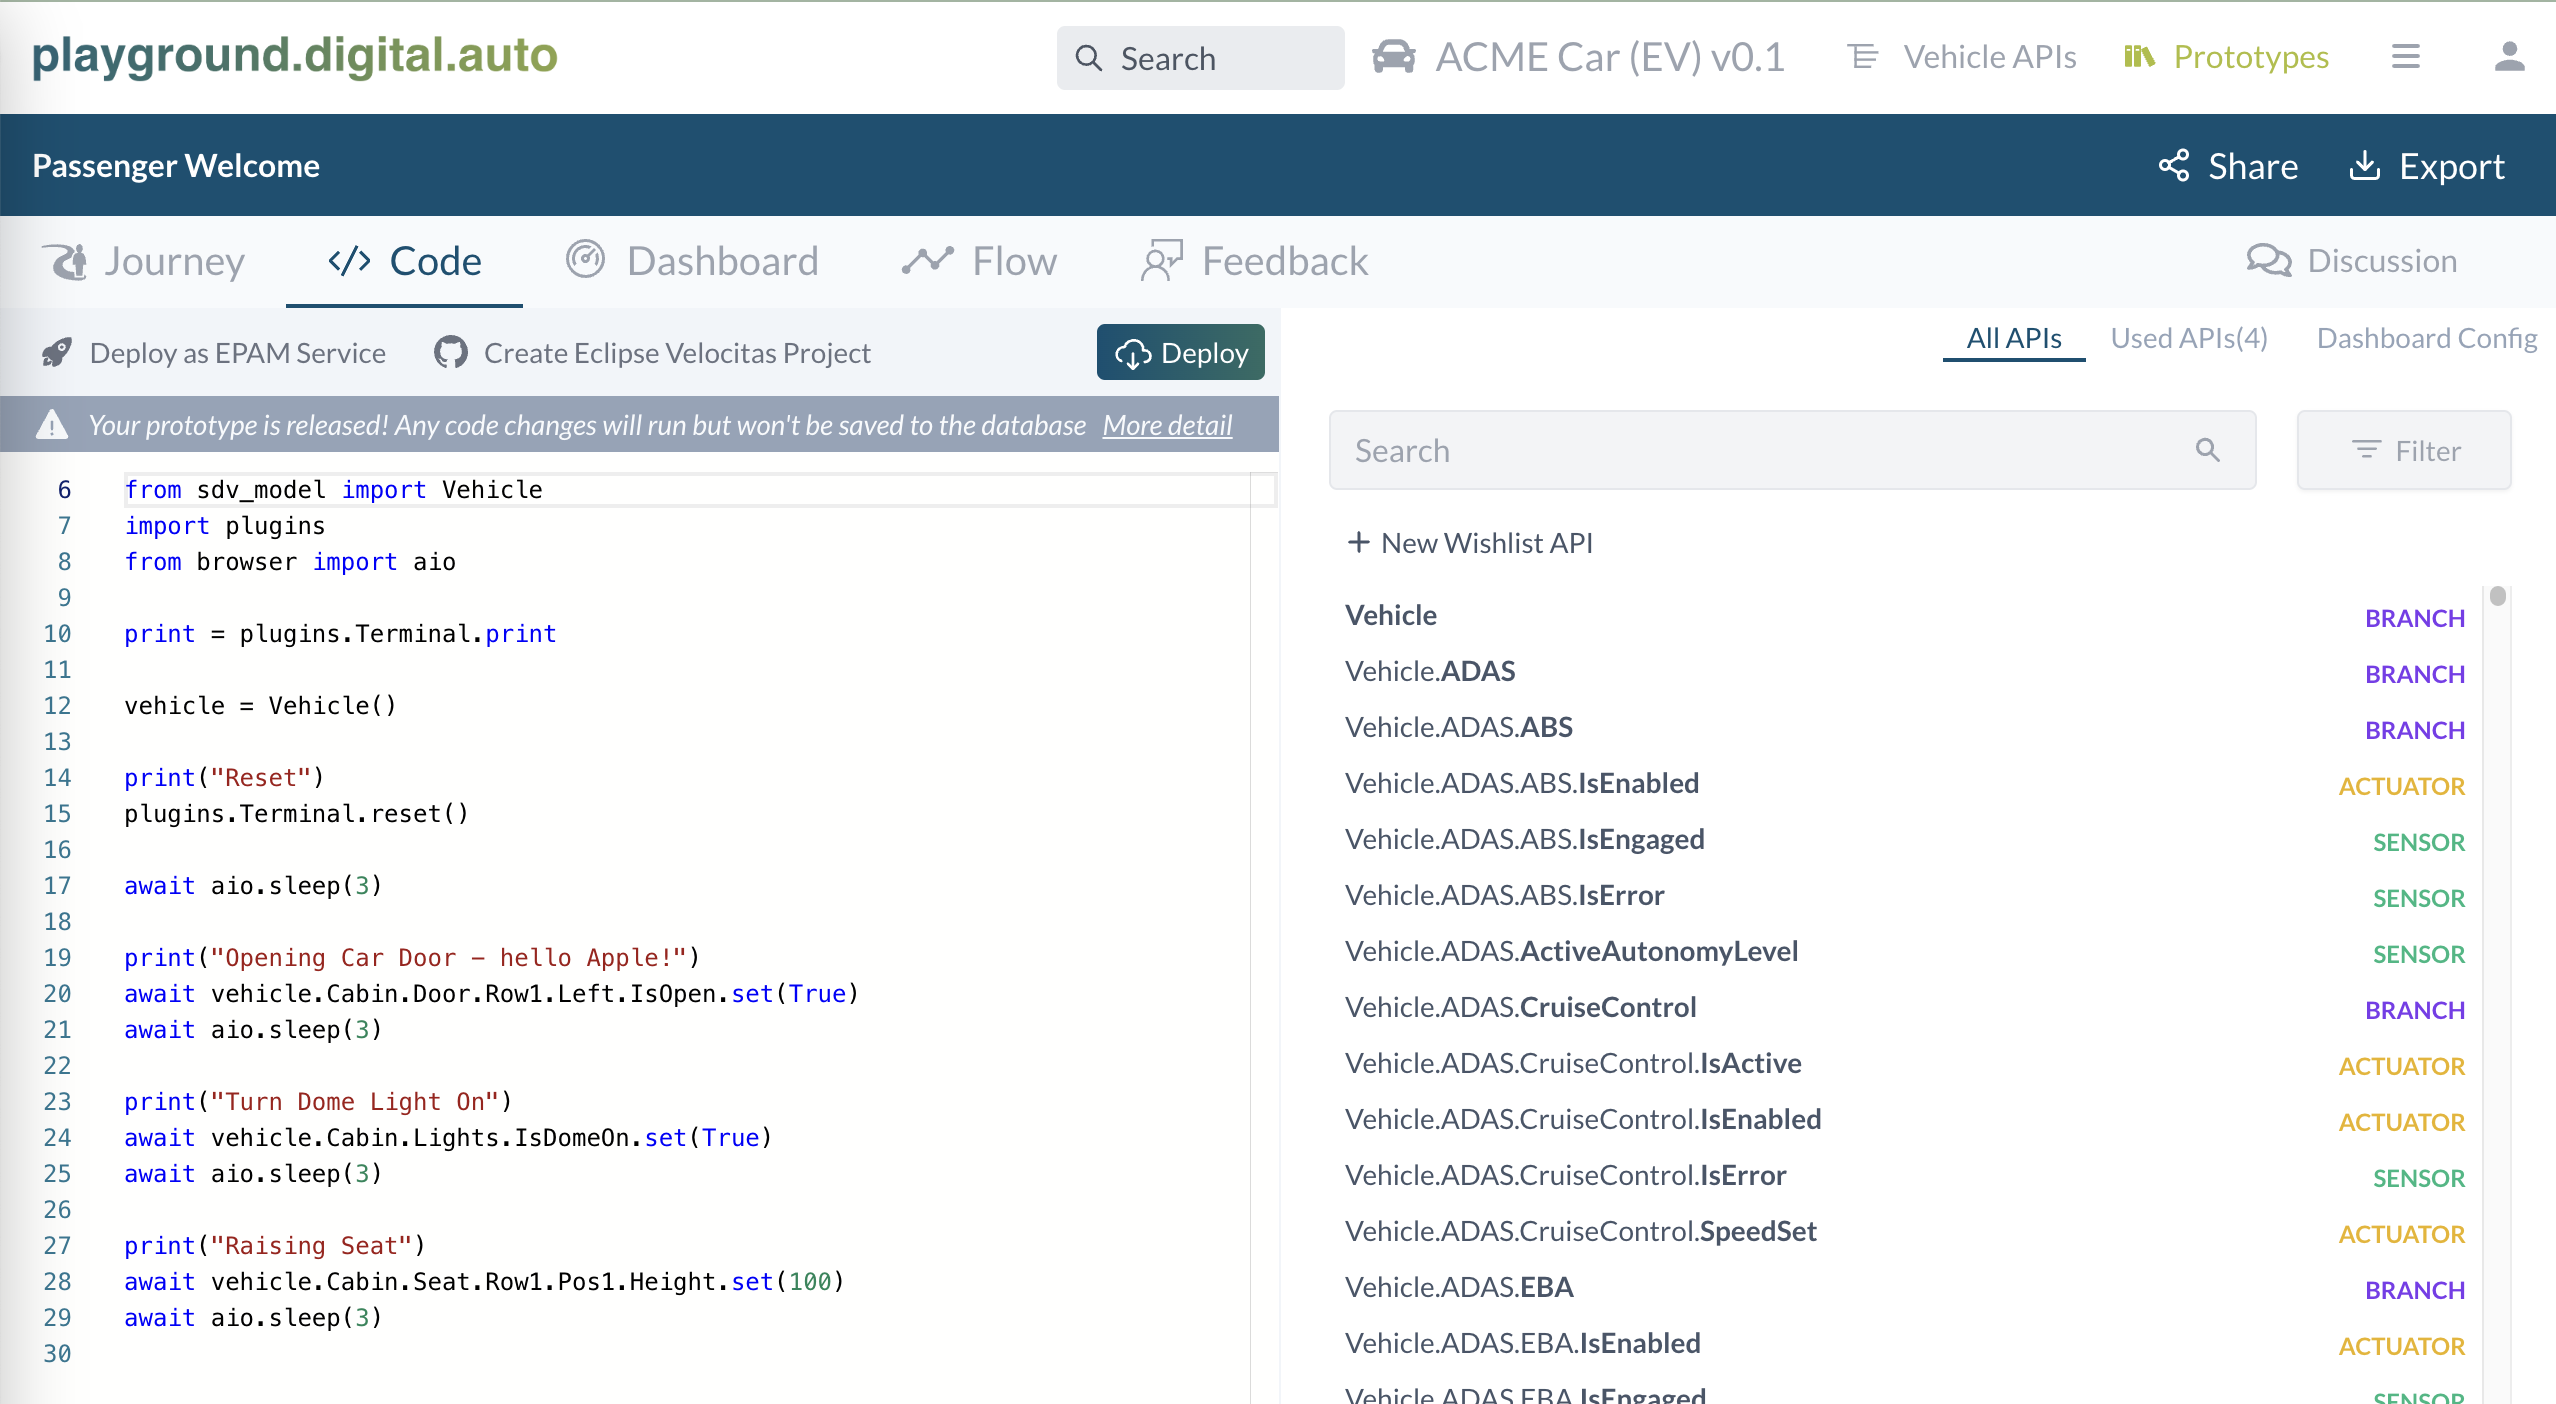
In Tab Code we have two main panel. The left one is where you write the logic code in python. The right panel is home of three sub tabs, APIs, Used APIs and Dashboard Config.
Left Panel
Code tab: simple code in python, using to get/set api value
Right Panel
APIs: all the vehicle available for this Vehicle model. Visit ‘Model API’ section for more detail.Used APIs: list out all APIs are currentl used in this demo, this list auto generate out when you write code.Dashboard Config: config how the dashboard look like, which widget will be used, size of widget, place to put on grid….
At Code tab on the left side, try to read through the code, I believe you can understand it. Very simple, by using the Covesa VSS API, you can control the vehicle with Get()/Set().
Would you like to try to modify to code and see the effect?
On the python code line #19
print("Opening Car Door - hello Apple!")
Change hello Apple! to your hello your name, then give a 3 seconds for system to apply the change. Then go to Dashboard tab, click Run again and enjoy the result.
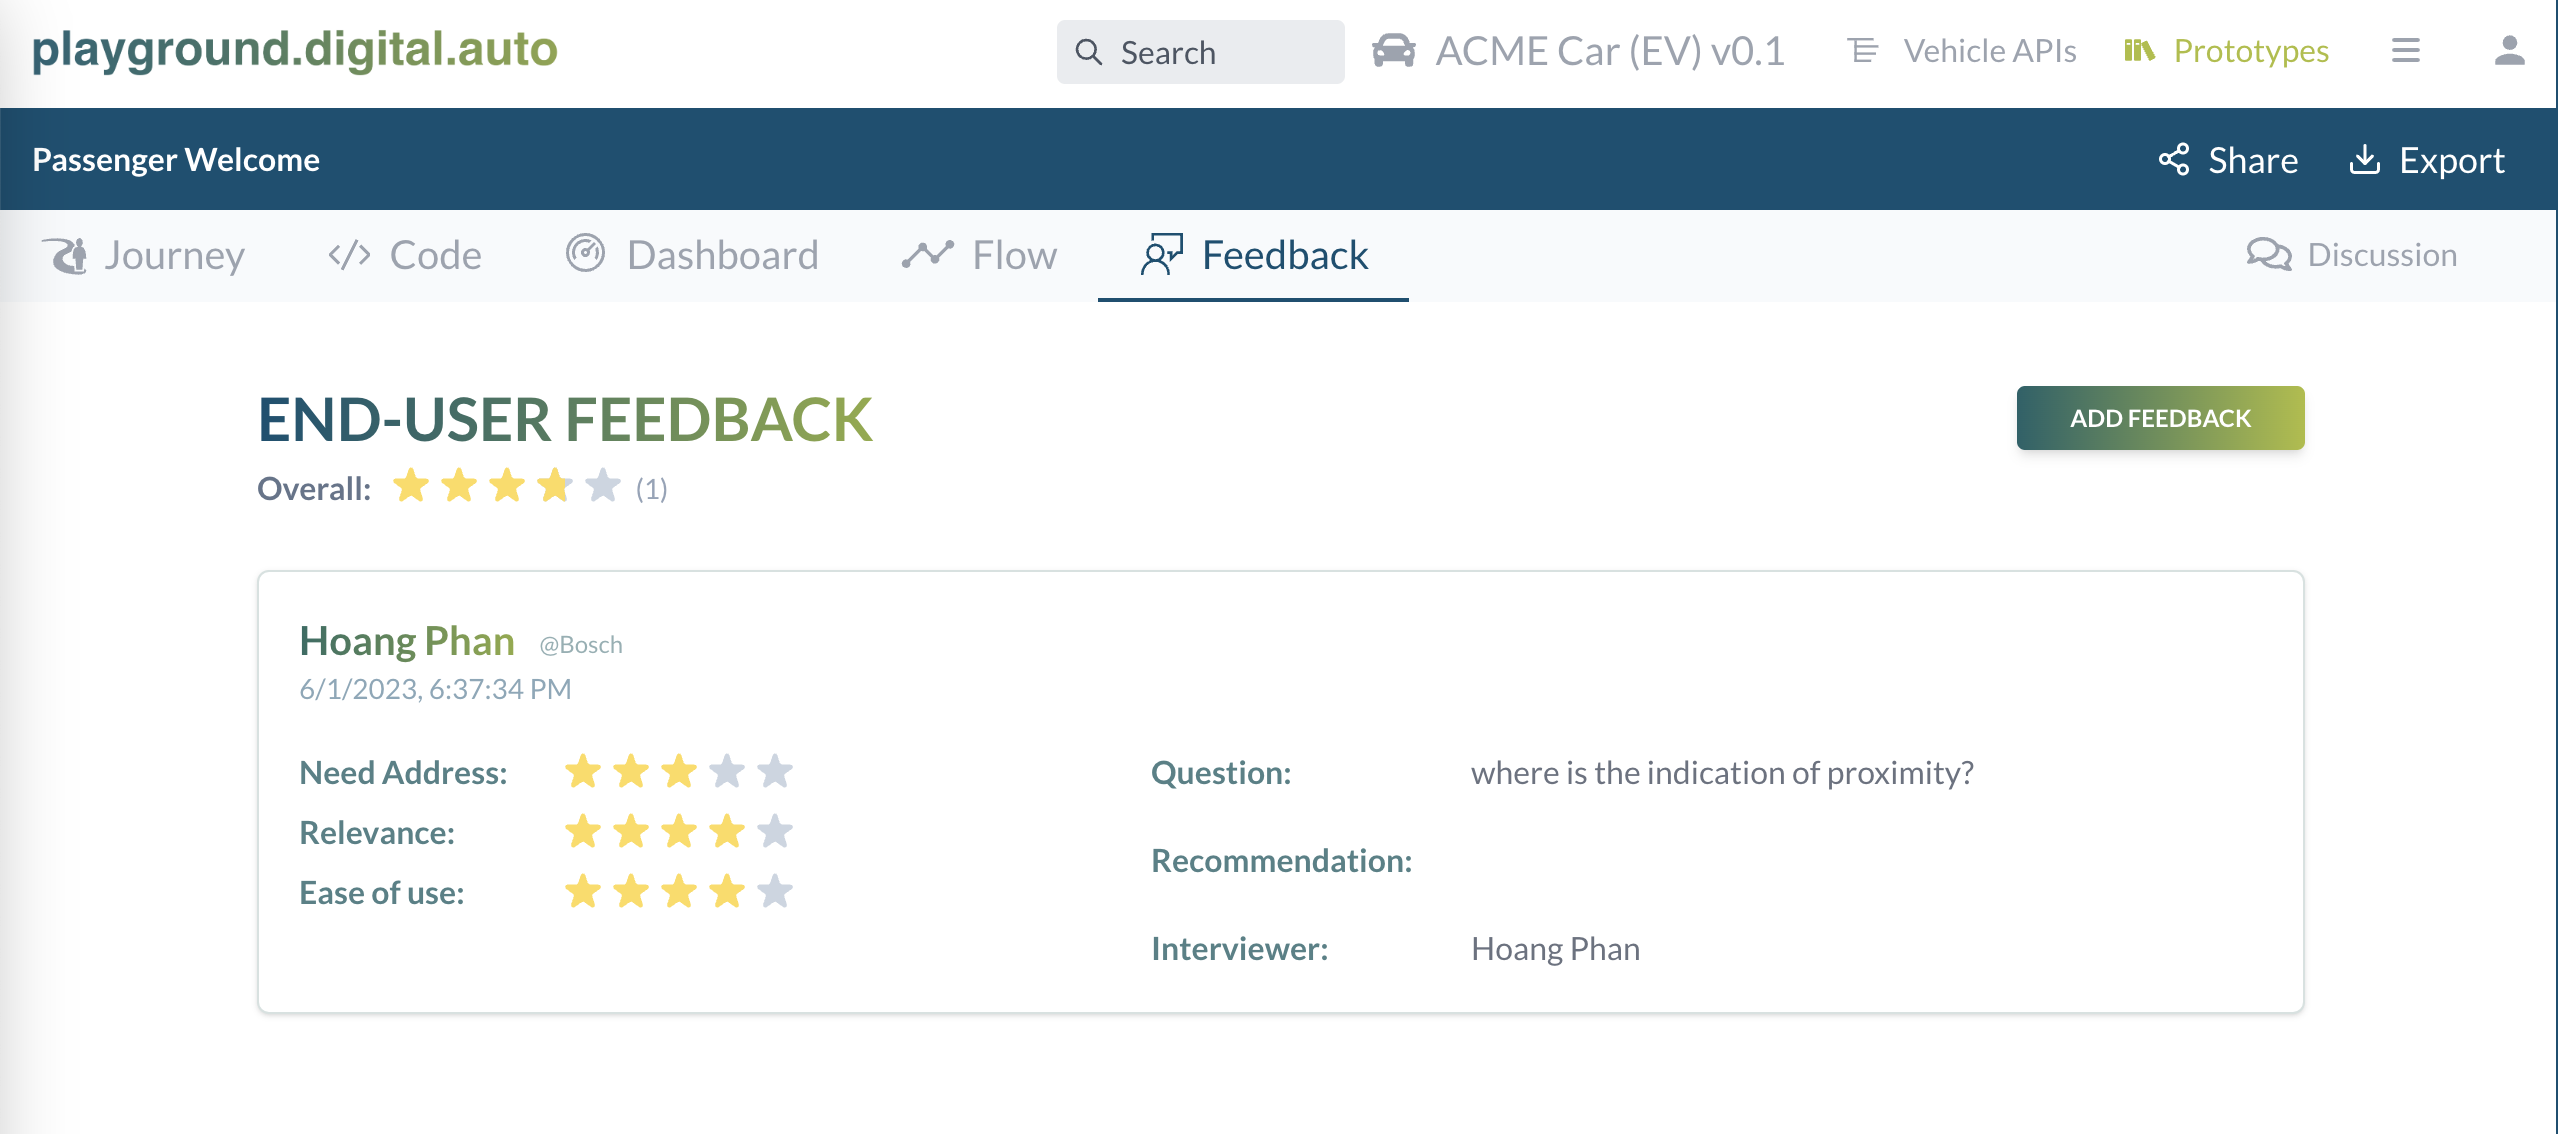
Up to now, you can see how the playground working, but still there two more steps need your hand. Do you like the idea of this prototype, go to Tab Feedback and share your thinking there. Feedback is the place you give your thinking on the point of viewer of end user, the car owner, who using this feature, does this fearure need to have? Does it useful or not? Do you need it?
And, on top right corner, which the mindset of development, there is a Discussion Panel, where you can discuss with the deverloper how the code should be improving or does the dashboard config whould look like. Discussion is design for deleloper guys to help each other.
If you feel that this show case is quite simple or boring, be patient, this just a simple one to help you get the idea. Go back to Prototype Gallery, there are some other beauty and complex prototypes waiting for your exploration. Enjoy!