How Python-Javascript works
Prerequisite
To understand how this Python-Javascript works, you need some foundation knowledge of HTML, Javascript, and Python. You also need to read Create ‘Hello World’ Prototype guide or at least have some experience with prototype on Playground before reading this documentation.
Similarity of Python code on Playground
No matter what prototype and model is being used, every Python code on Playground share the same structure. They always contain this line of code:
from sdv_model import Vehicle
Below is a snapshot of Python code on Playground. In this Python code, you can clearly see a Vehicle class is imported from sdv_model module.
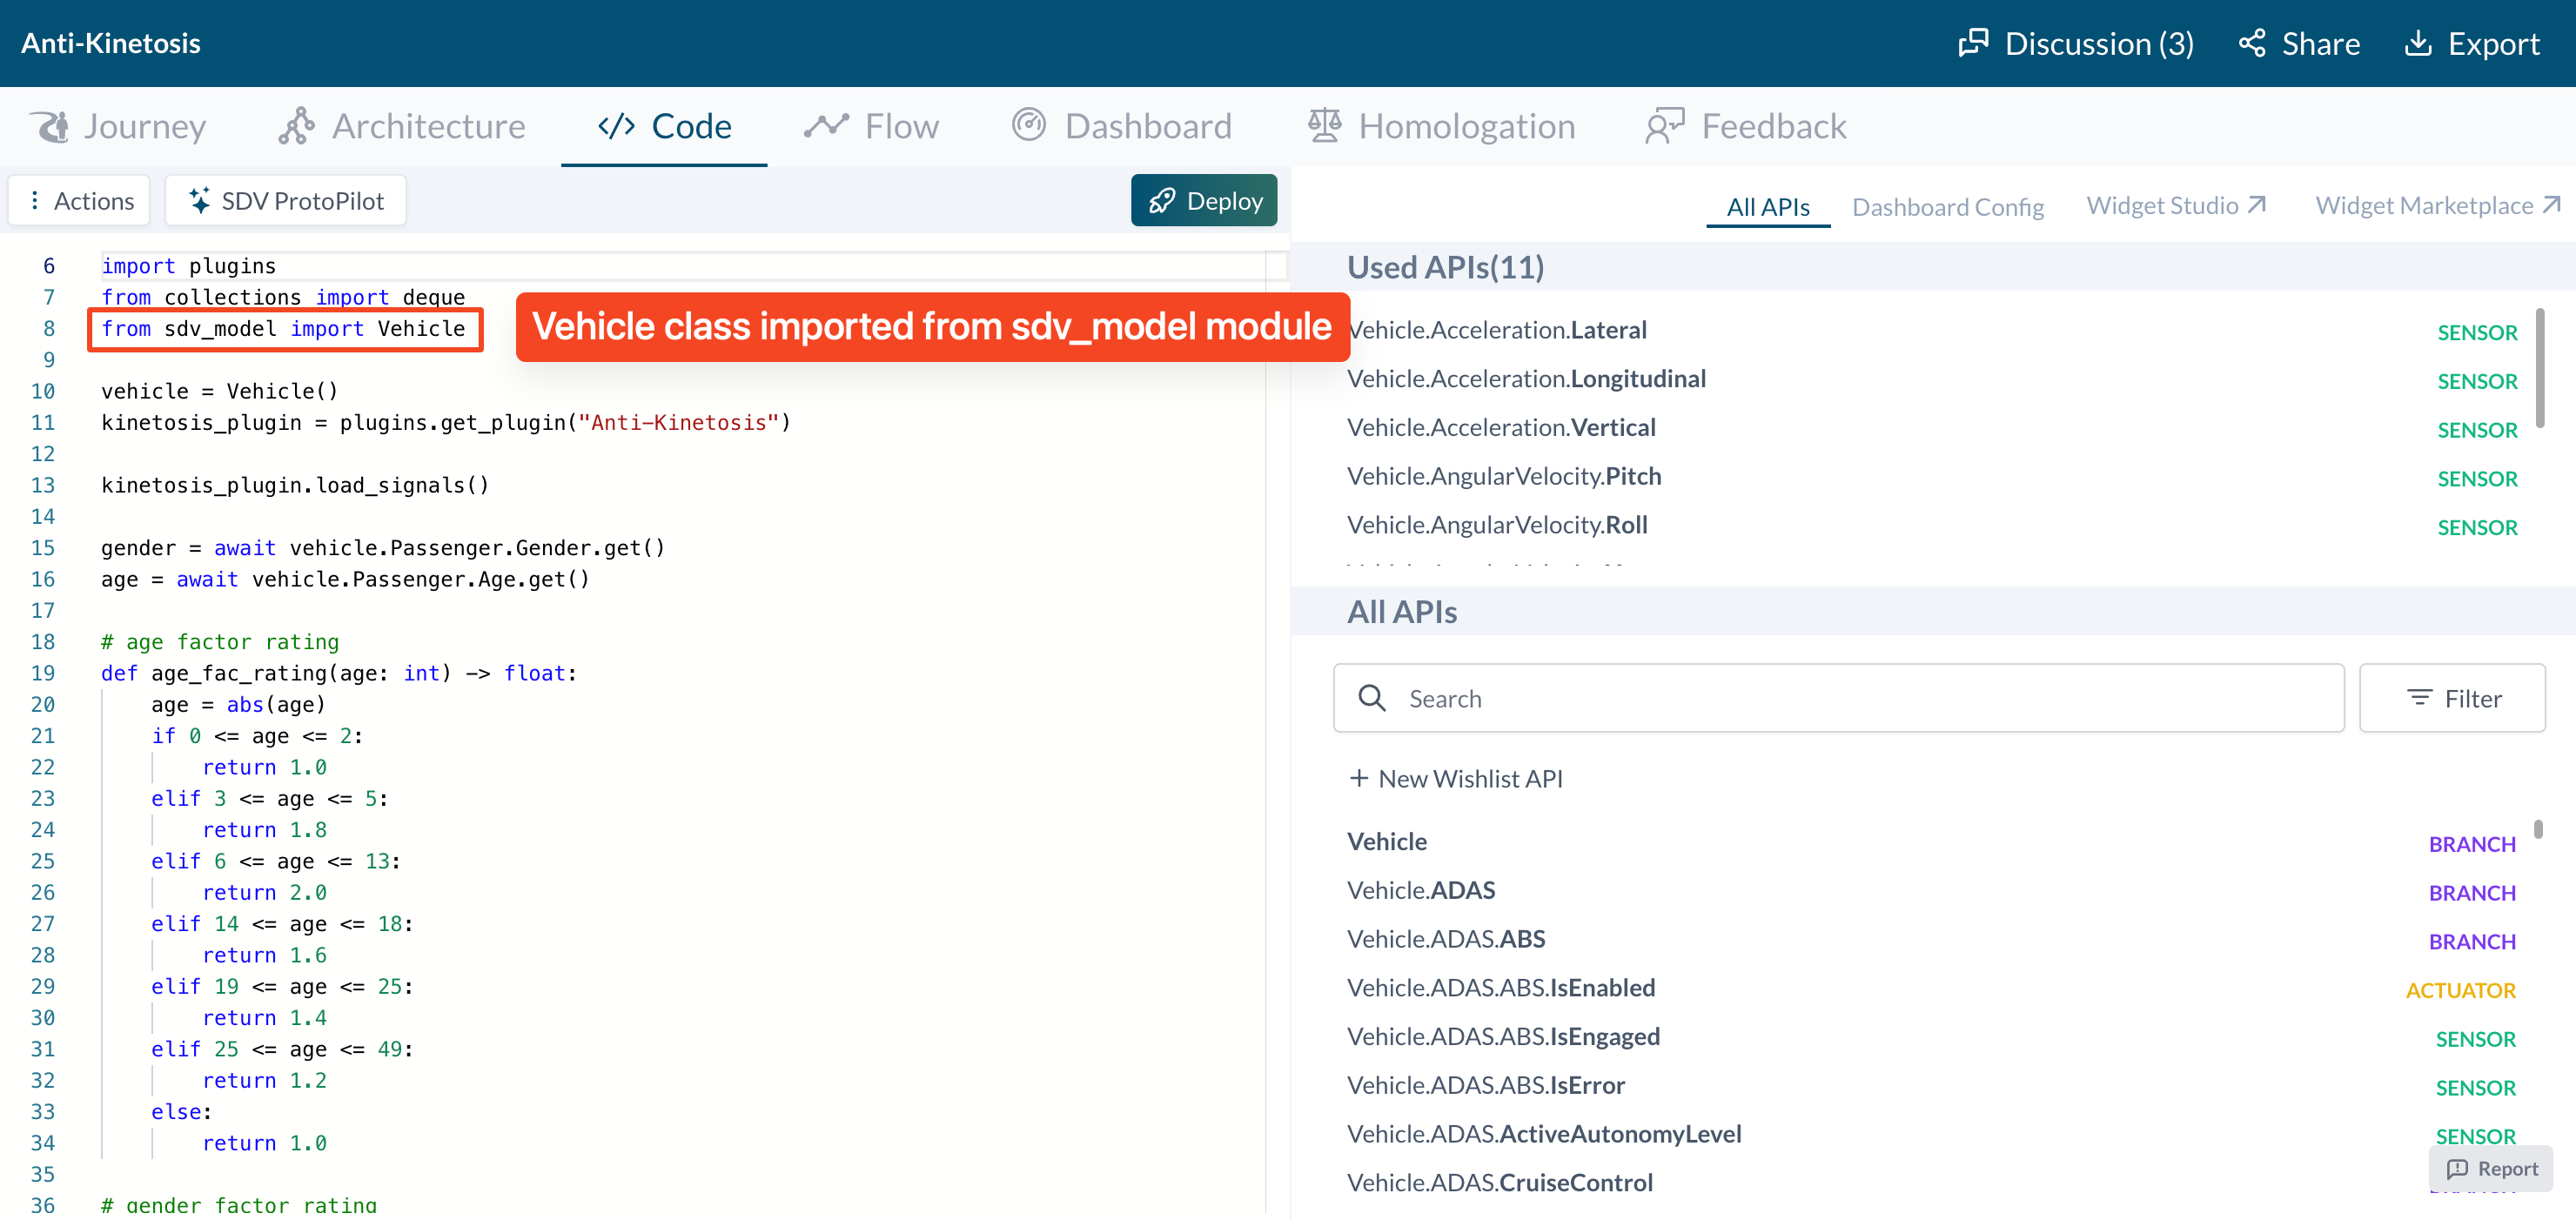
This Vehicle class serves as a core component. It is responsible for simulating all APIs within prototype and facilitating every APIs call in the code. Understanding the implementation of the Vehicle class is a must for gaining insight into how Python-Javascript works.
Vehicle class implementation
This class is written in Python.
Vehicle class is capable of:
- Recognizing and interacting with APIs in the prototype (APIs can be VSS API or Custom/Wishlist APIs).
- Simulating of all states and values associated with the APIs.
- Facilitating of API calls, including get, set, and subscribe operations.
- Validating of data types passed to API calls.
Later the
Vehicleclass is converted to Javascript code using Brython library. Then it is saved as a file at https://digitalauto.netlify.app/brython/sdv_model.brython.js
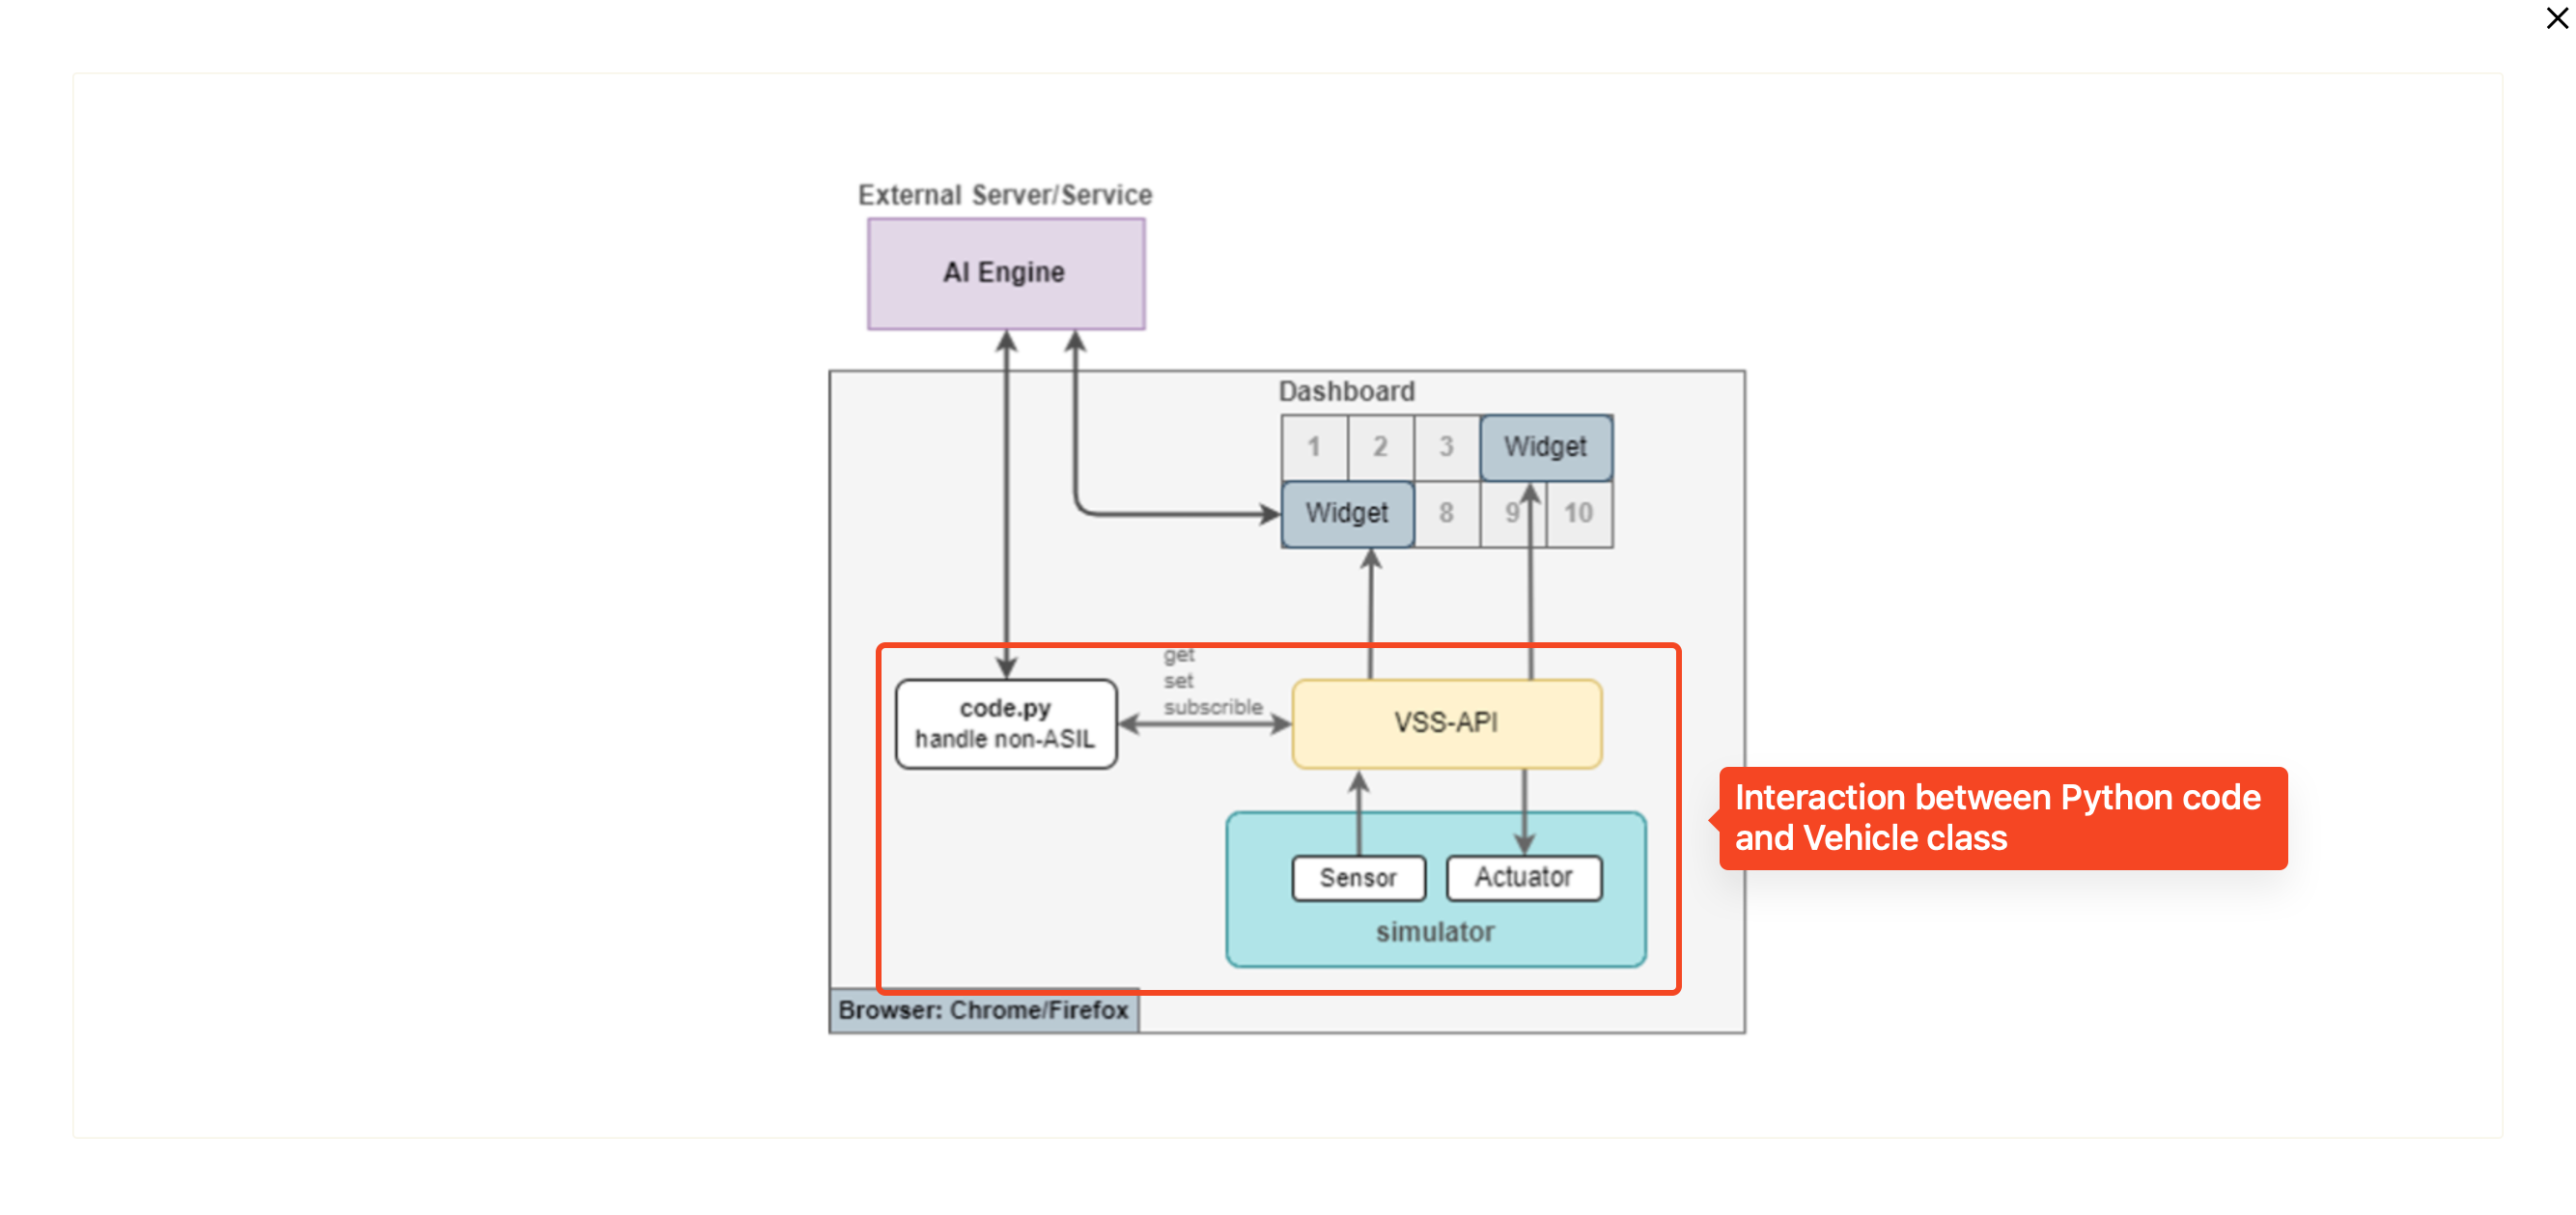
The below picture depicts the interaction between Python code (code.py) and the Vehicle class (simulator)
How Python code on playground is executed
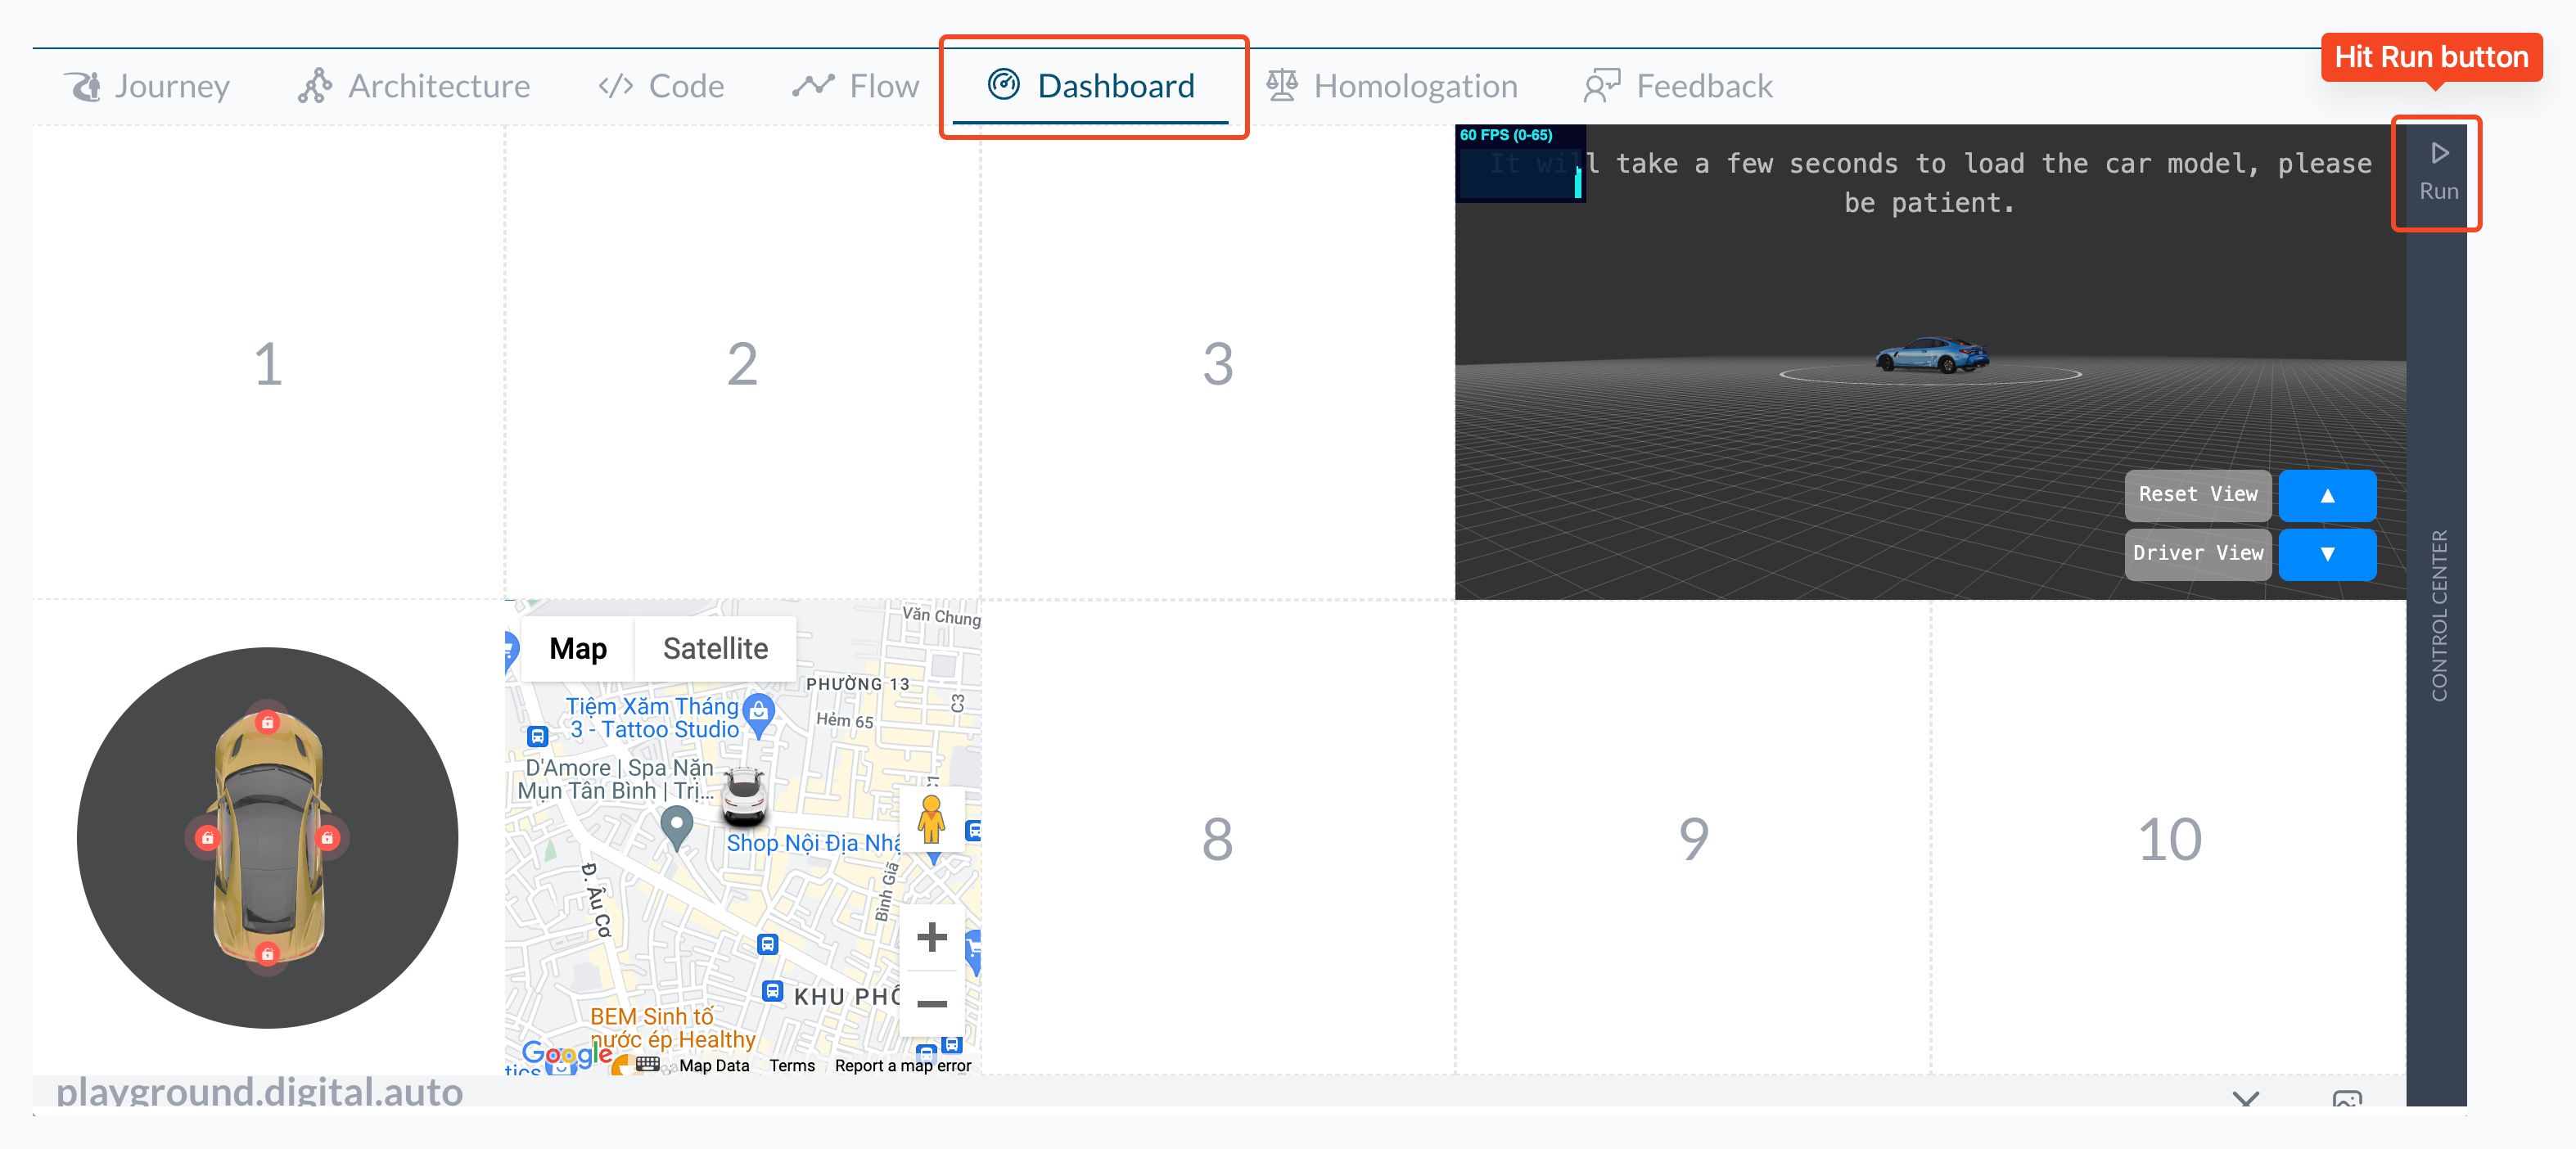
Within a prototype, proceed to the Dashboard tab and click the Run button. This action triggers the execution of the Python code written in the Code tab. The Widgets should then be able to detect the changes made by your Python code to the APIs. Again, please refer Create ‘Hello World’ Prototype guide to understand what we are doing.
The Python code itself cannot directly run on browser. Thus, a series of steps must be undertaken to enable its execution. For more detail, the following approach is adopted:
First, an iframe was created. This iframe contains all of these things:
The Python code in the Code tab
The Brython scripts are embedded through CDN. It allows us to run Python code in browser:
<script referrerpolicy="origin" src="https://cdnjs.cloudflare.com/ajax/libs/brython/3.10.5/brython.js"></script>
<script referrerpolicy="origin" src="https://cdnjs.cloudflare.com/ajax/libs/brython/3.10.5/brython.js"></script>
Finally, the aforementioned
Vehicleclass:<script referrerpolicy="origin" src="https://digitalauto.netlify.app/brython/sdv_model.brython.js"></script>
After that, utilize Brython library, the Python code in the Code tab will be converted to Javascript.
Finally, execute Javascript code using
evalfunction.
Why we need to create a separate iframe?
- Due to the utilization of the
evalfunction for execution, the code must be within a separate iframe to prevent the potential risks of dangerous or destructive actions. - The Brython library and the Javascript itself don’t have a native mechanism to stop the running code (in this case it’s a Javascript Promise), for example, a infinite loop code block. Put it in a separate iframe will make it a lot easier to stop it when required.