AI with playground
Introduction
AI becomes more and more popular in daily life, and definitely it is also a trend in the automotive industry. In this section, we will introduce how to use AI in the playground.
Note: AI have a lot of different applications, and we will only introduce a simple image processing use case in this section.
We assume that you already know how to create account, model and prototype in the playground. If not, please refer this Helloworld section.
1. Go to the playground, and login with your account.
2. Create a new model, if you don’t have one.
3. Create a new prototype
Make sure you select the model you just created.
4. Config dashboard
Go to the prototype page, and click the “Code Tab” and on the right side, click “Dashboard Config” tab. Then pick a widget, and select “Driver Distraction” widget, place it on the dashboard.
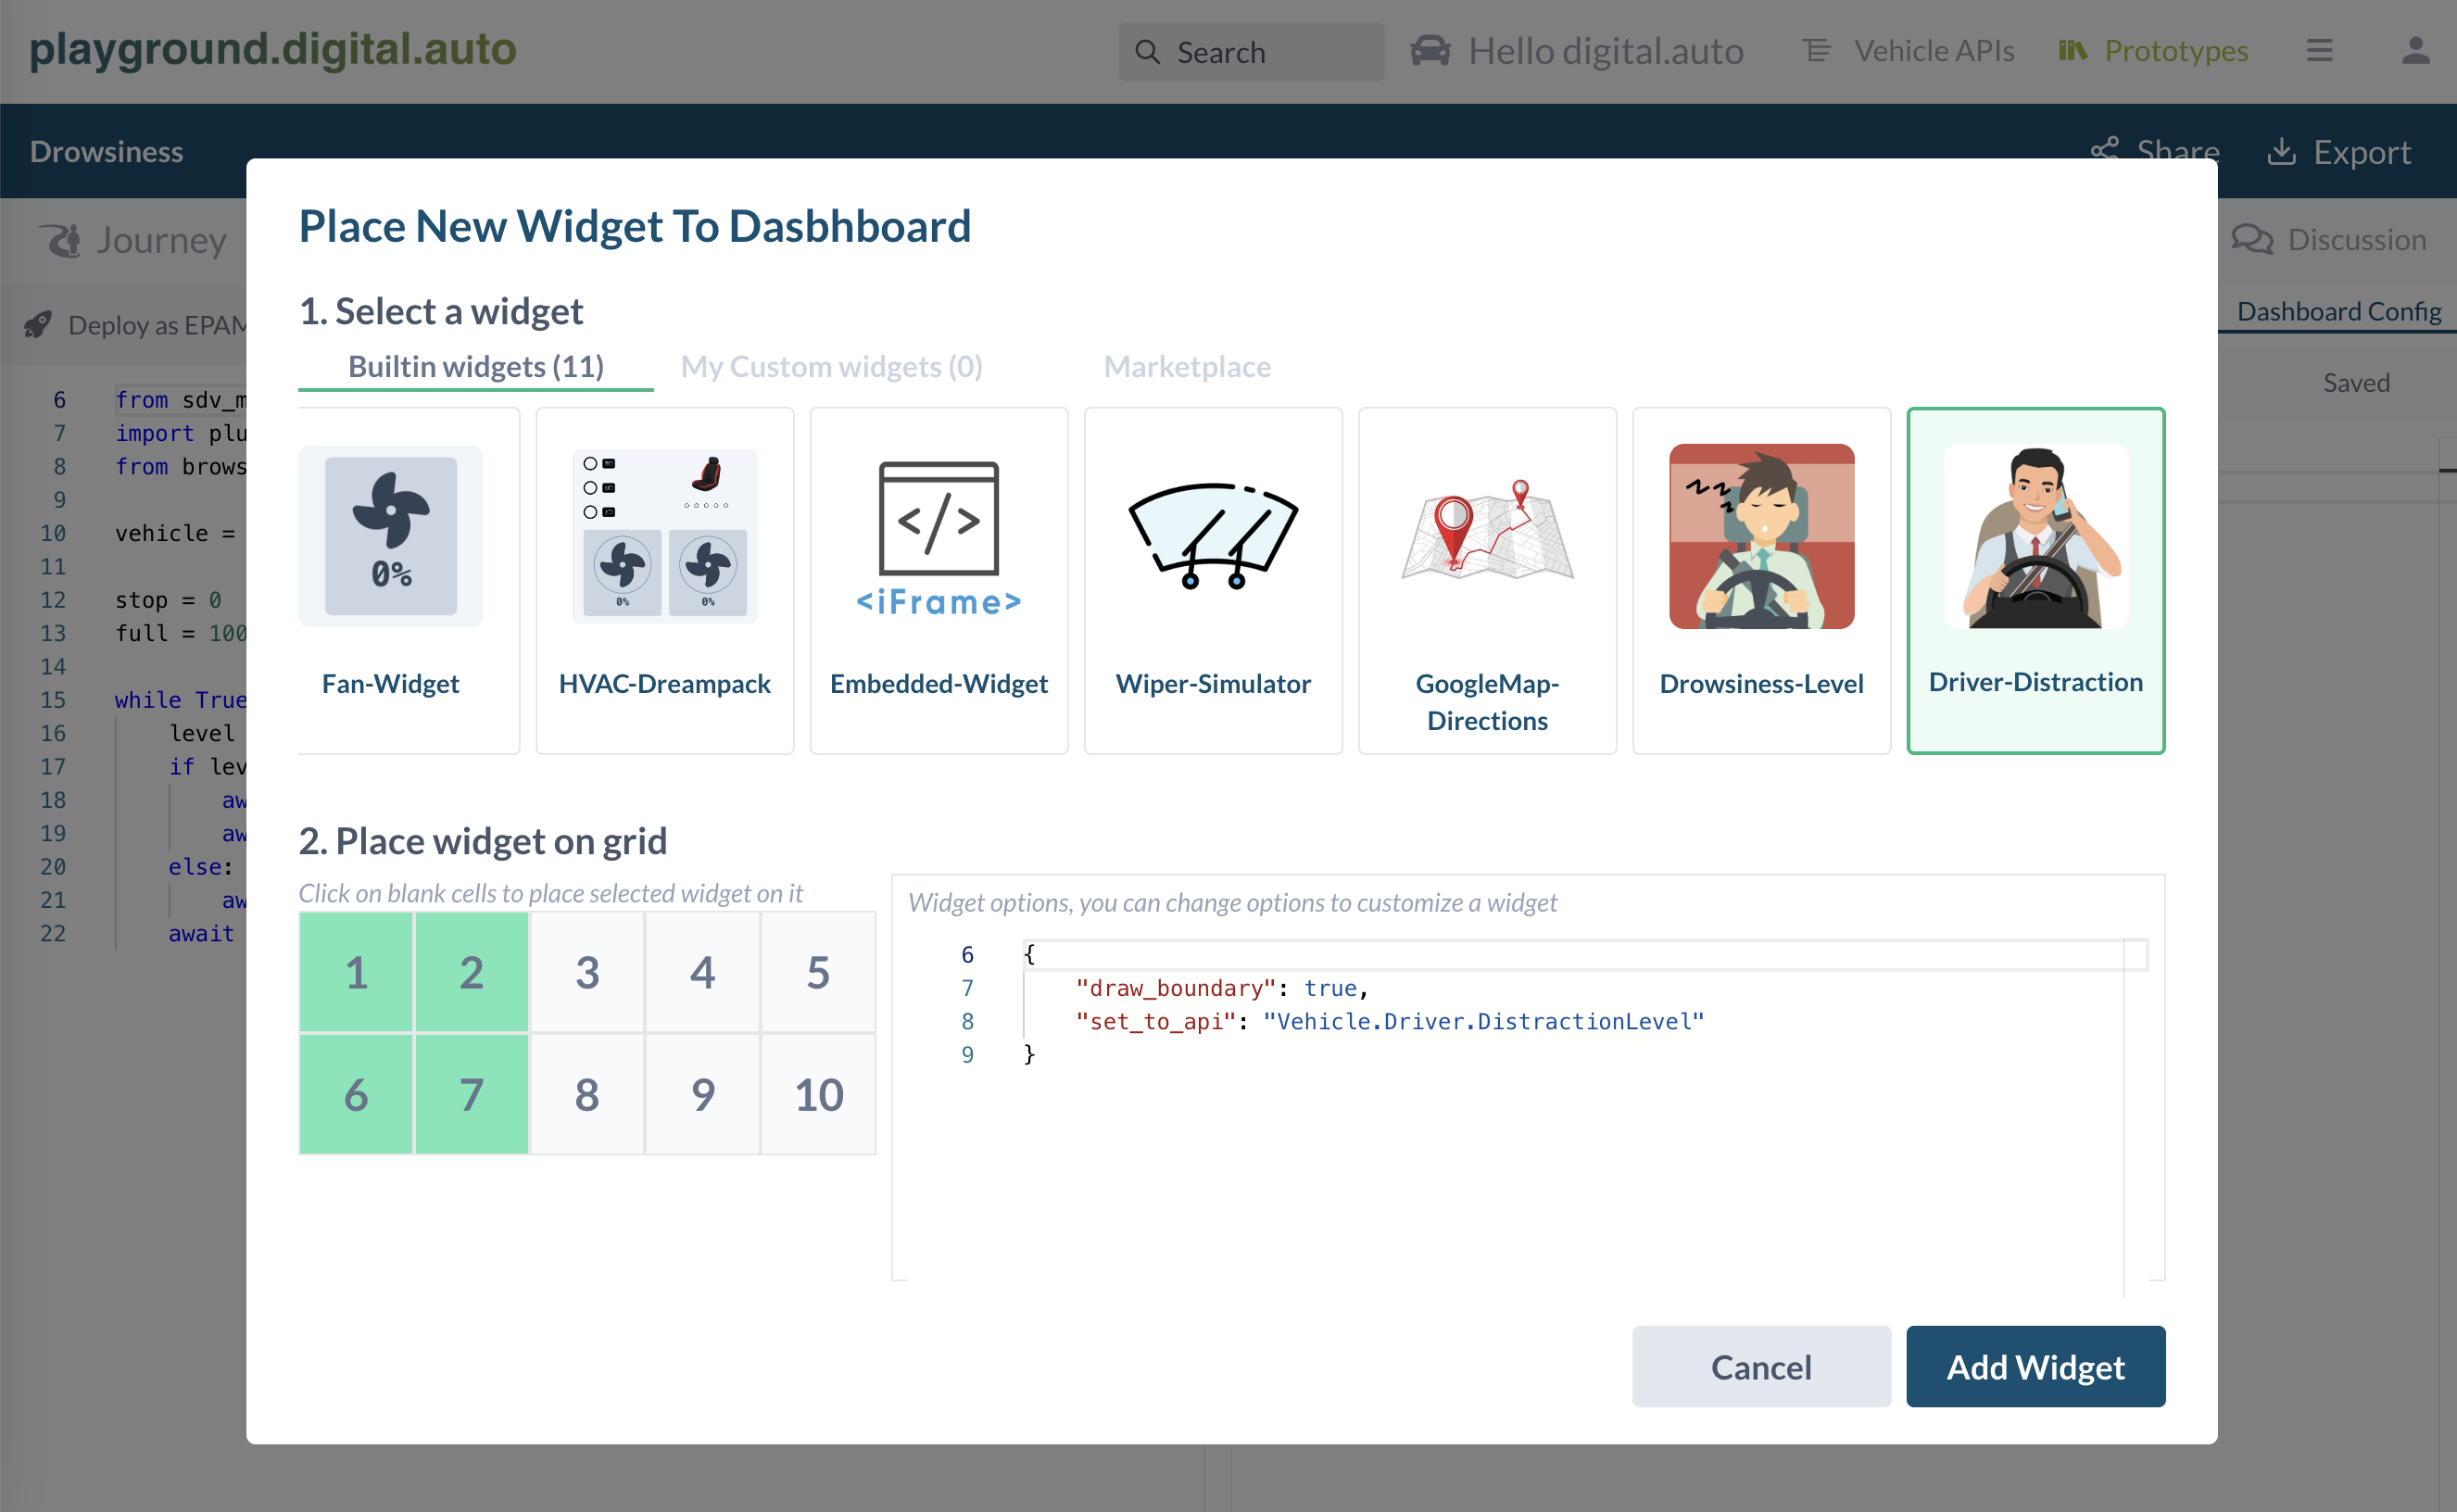
Then you have a “Dashboard Config” as below:
[
    {
        "plugin": "Builtin",
        "widget": "Driver-Distraction",
        "options": {
            "draw_boundary": true,
            "set_to_api": "Vehicle.Driver.DistractionLevel"
        },
        "boxes": [
            1,
            2,
            7,
            6
        ]
    }
]
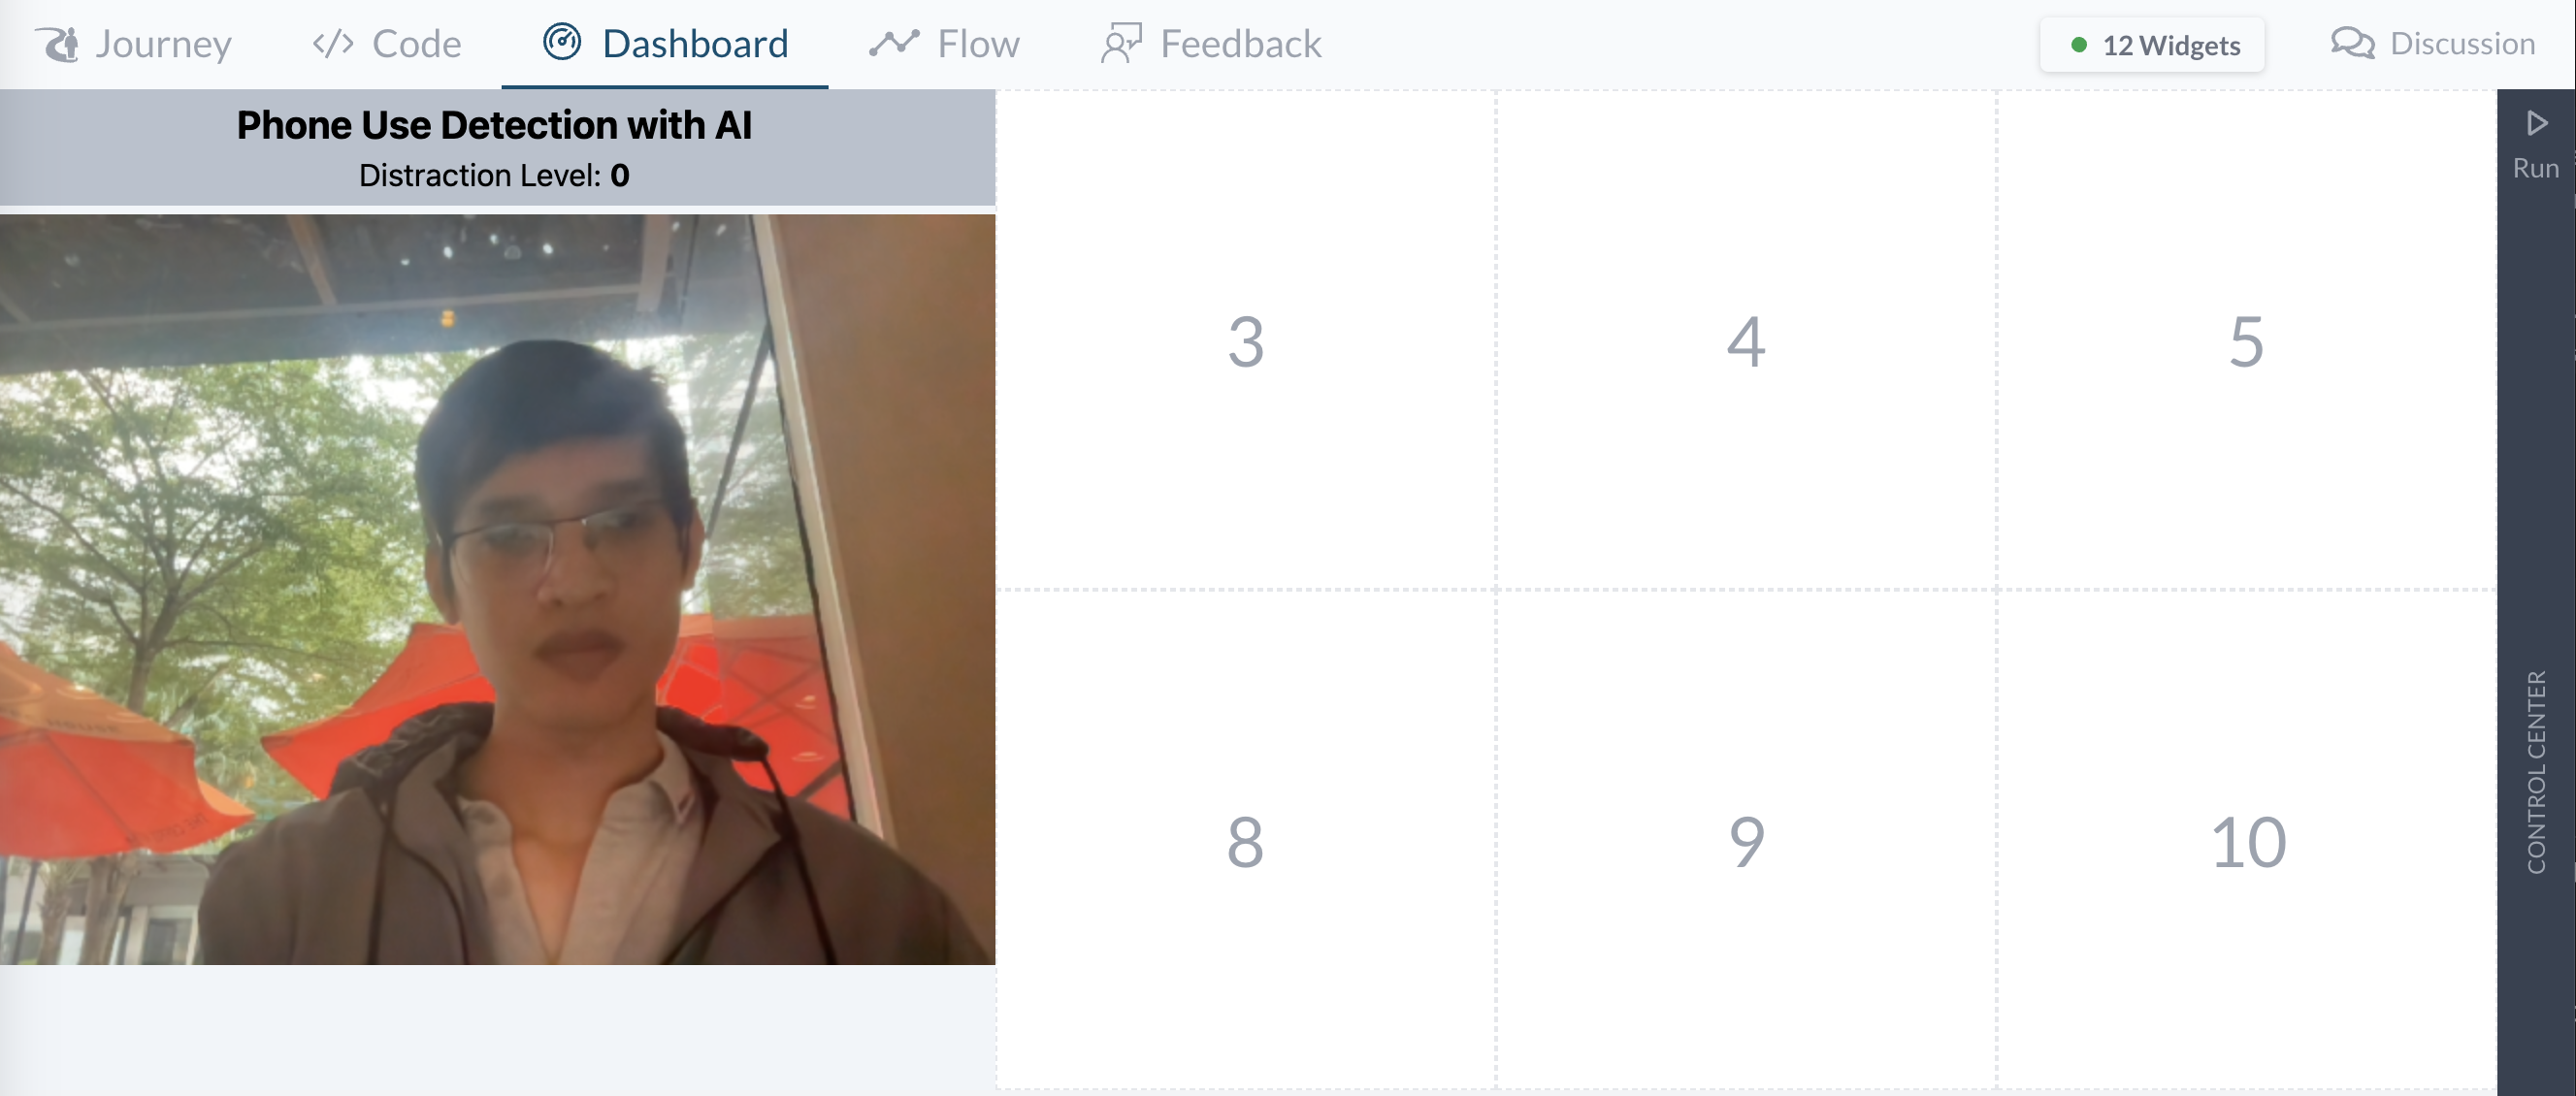
5. Use AI Widget
Switch to “Dashboard” tab, give some seconds for the widget and AI model to load, and you will see a “Driver Distraction” widget on the dashboard.
If the browser ask you to allow the camera, please allow it. The widget need to access your camera to capture the image.
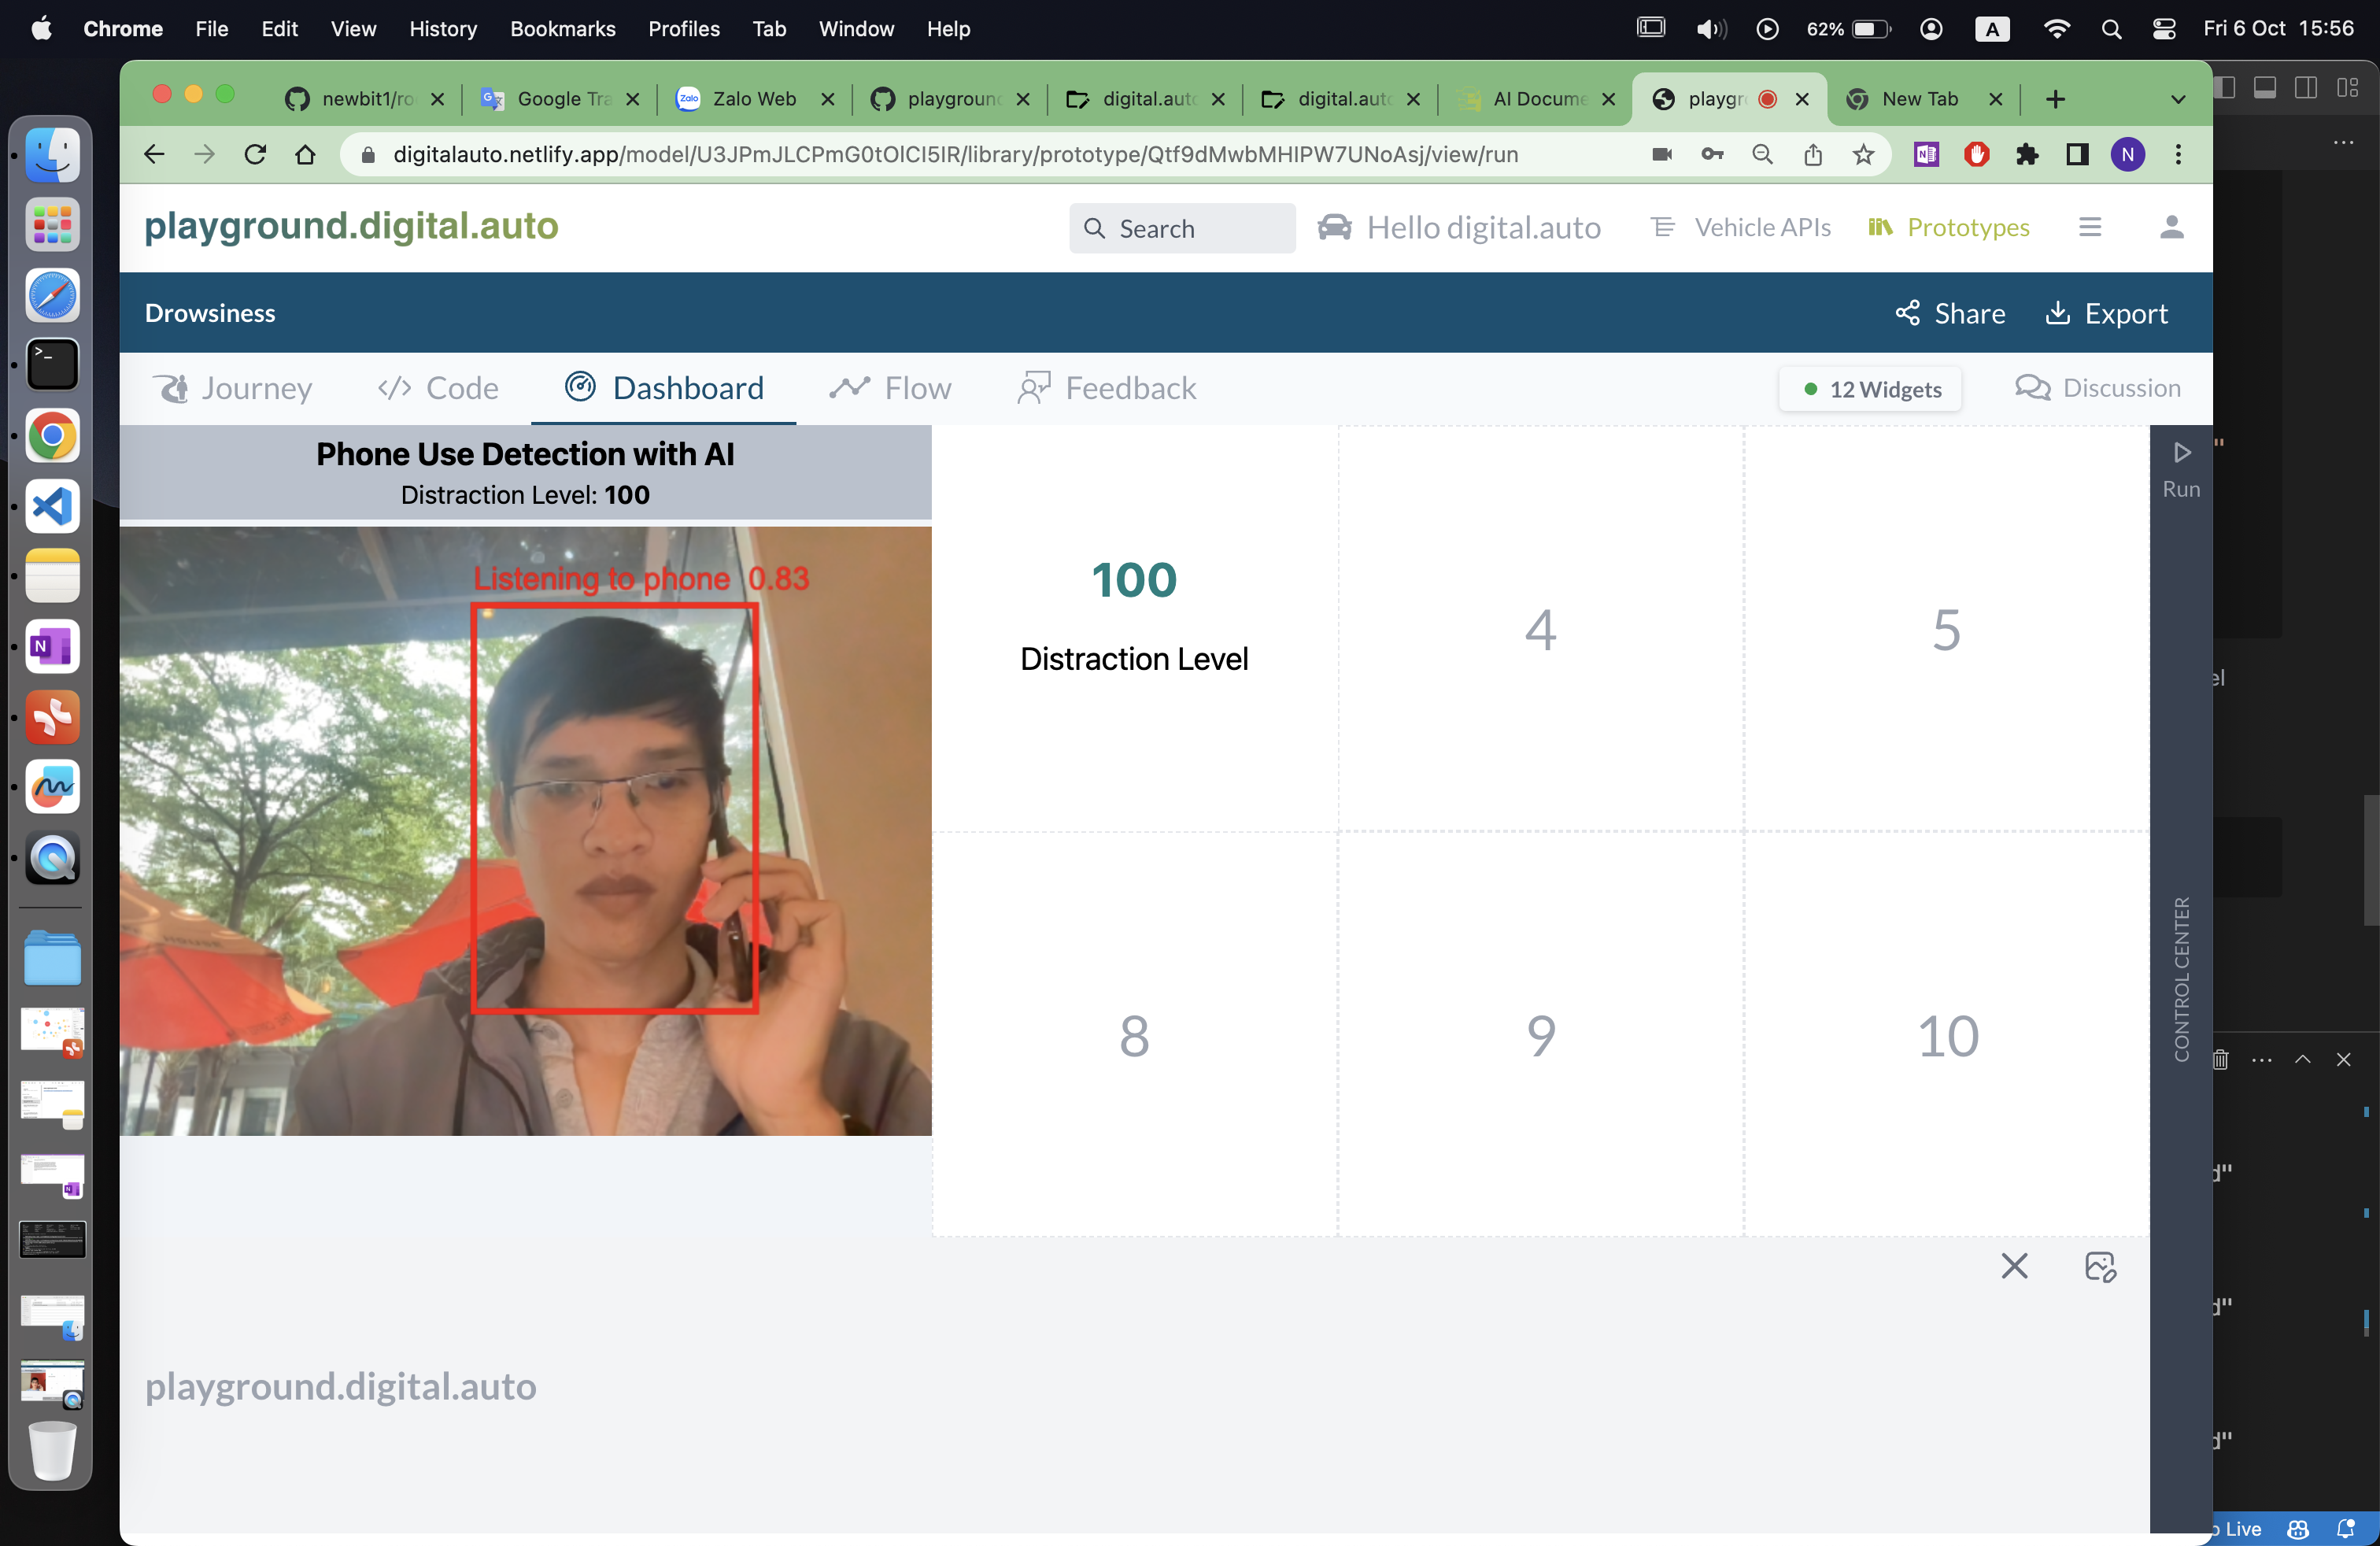
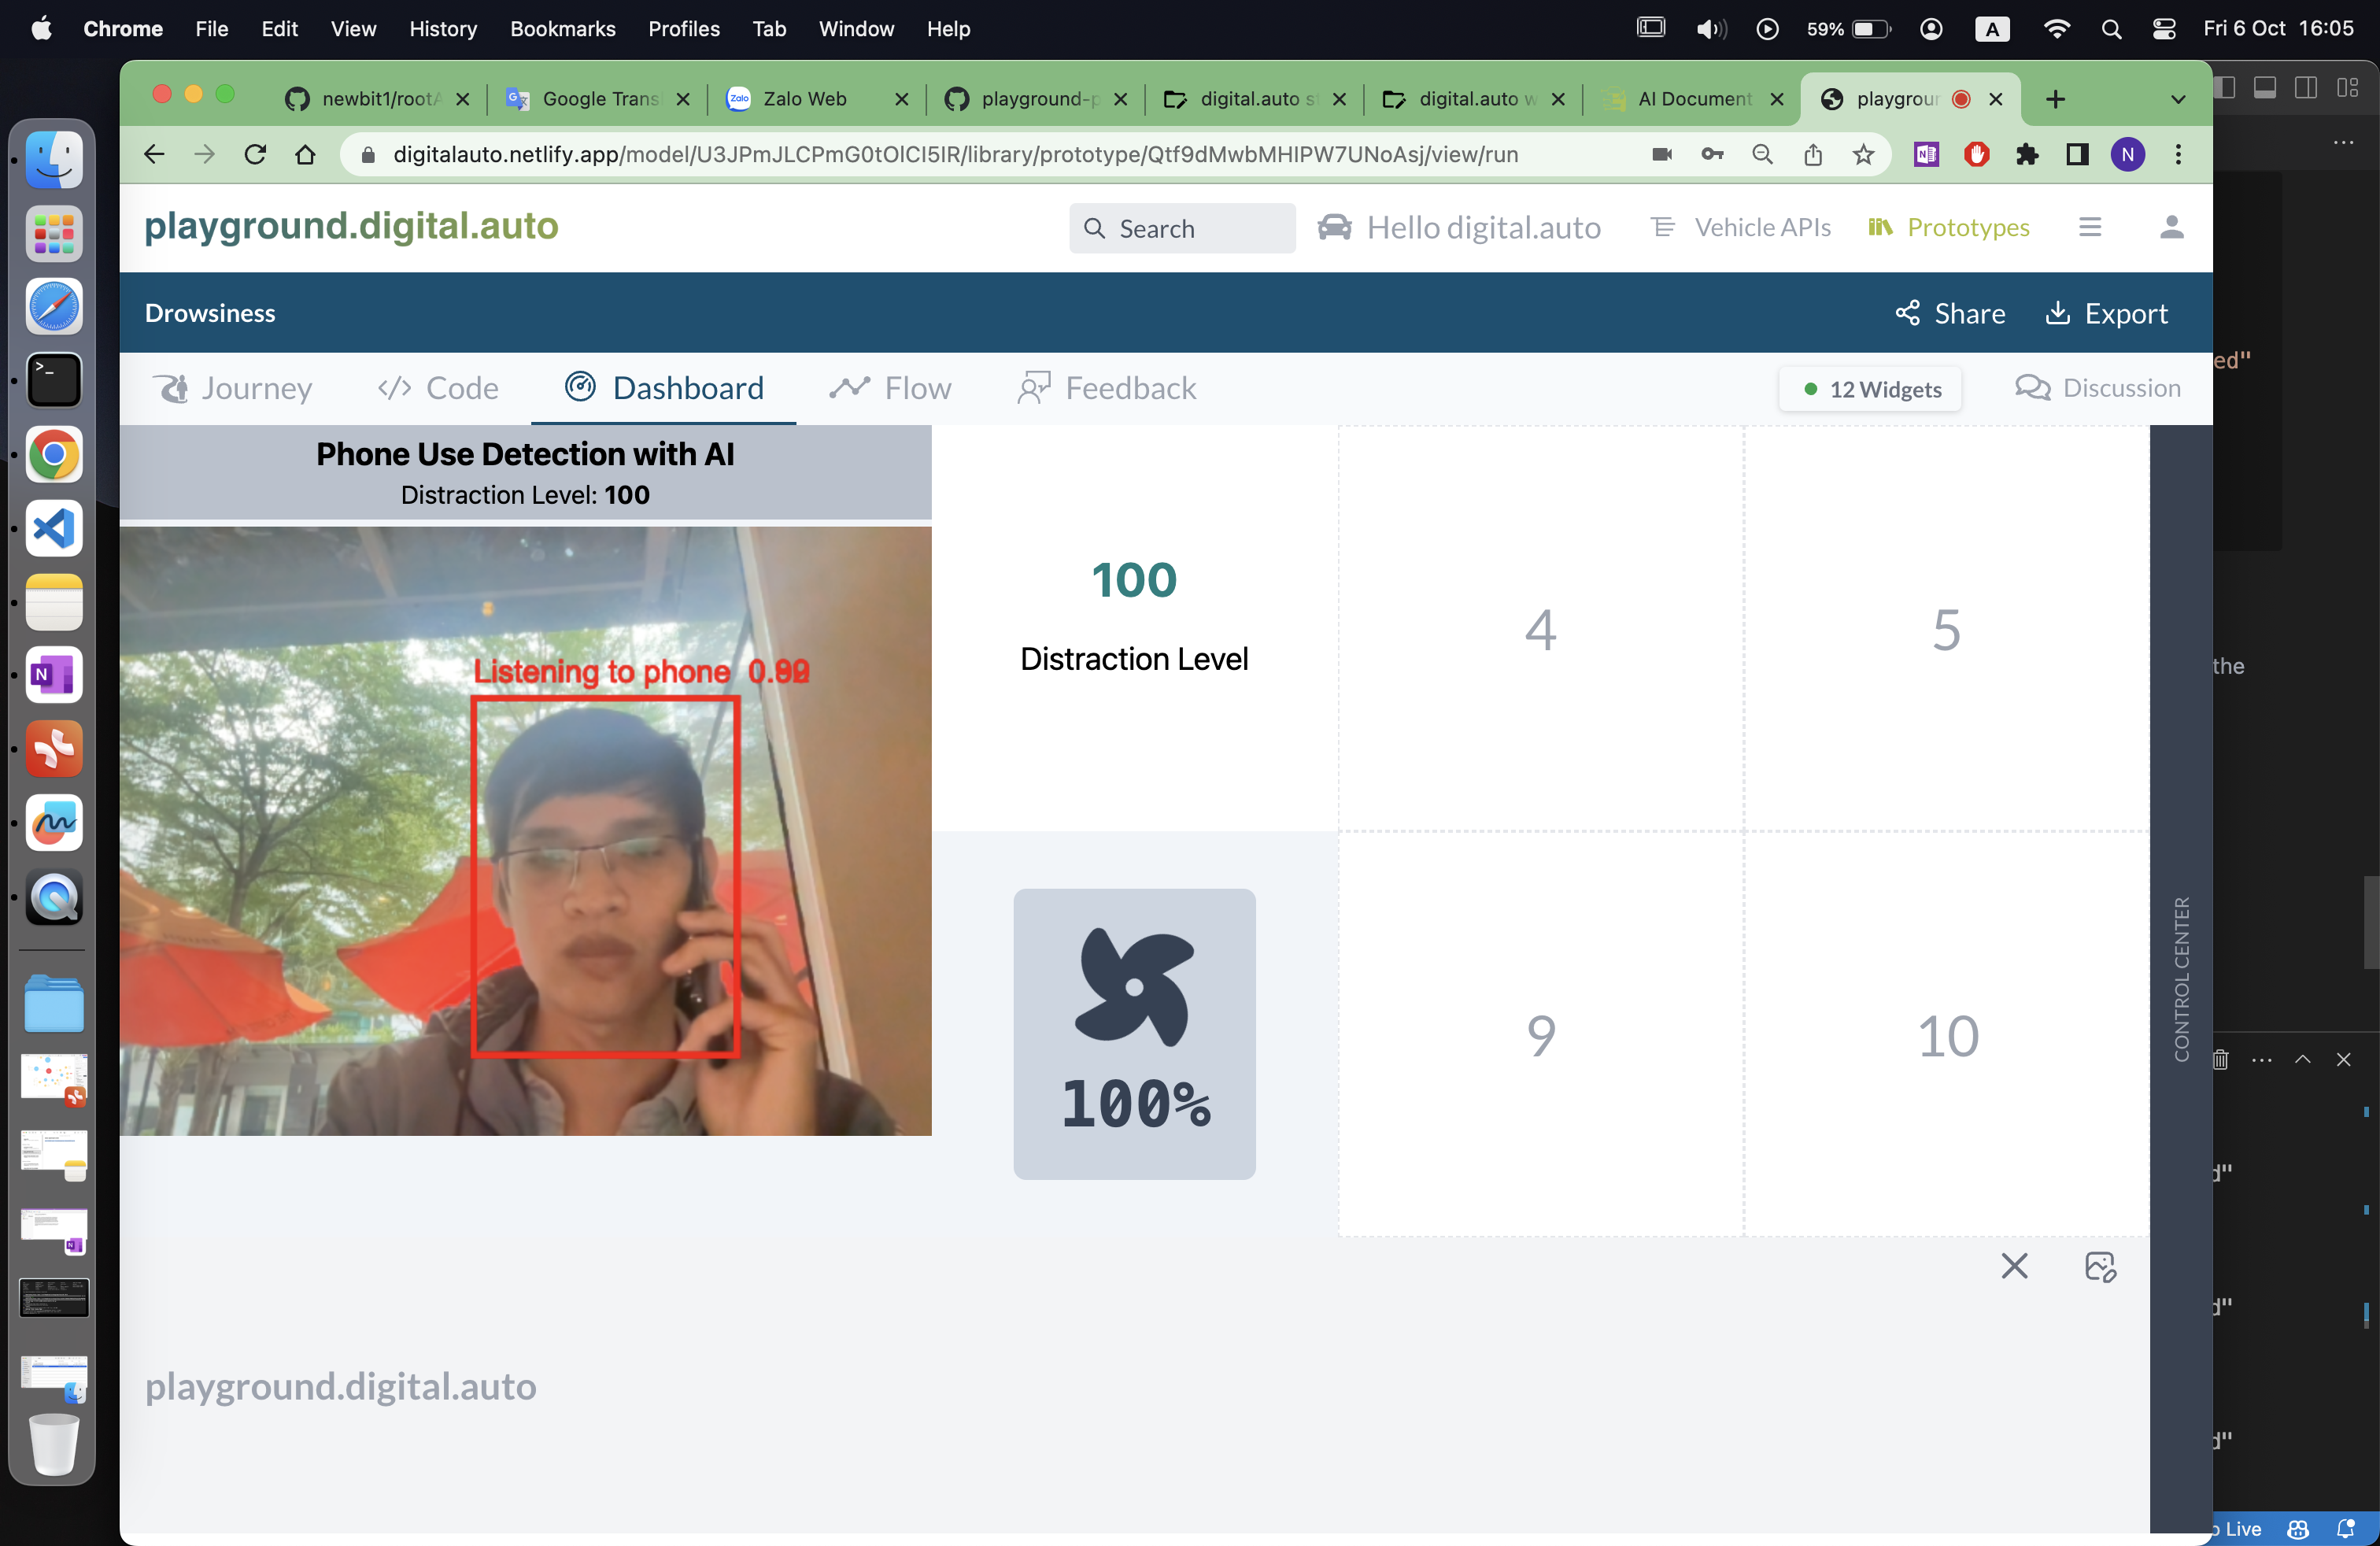
After AI model successfully loaded, you will see the result, try to use your phone, put it in your ear, AI widget can detect you are using phone or not. Base on that, it will give you a distraction level. The distraction level is a number between 0 and 100, 0 means you are not distracted at all, 100 means you are distracted. This level will auto set to api: “Vehicle.Driver.DistractionLevel”.
You can call this api in your app, and do some actions base on the distraction level.
You can tell the widget to set the distraction level to any api you want, just change the “set_to_api” option in the “Dashboard Config” tab.
 No phone used result
 Phone used result
6. Verify API result
Display the distraction level result in another widget.
Go back to “Dashboard Config”, pick a new widget, and select “Single-API-Value” widget, place it on the dashboard.
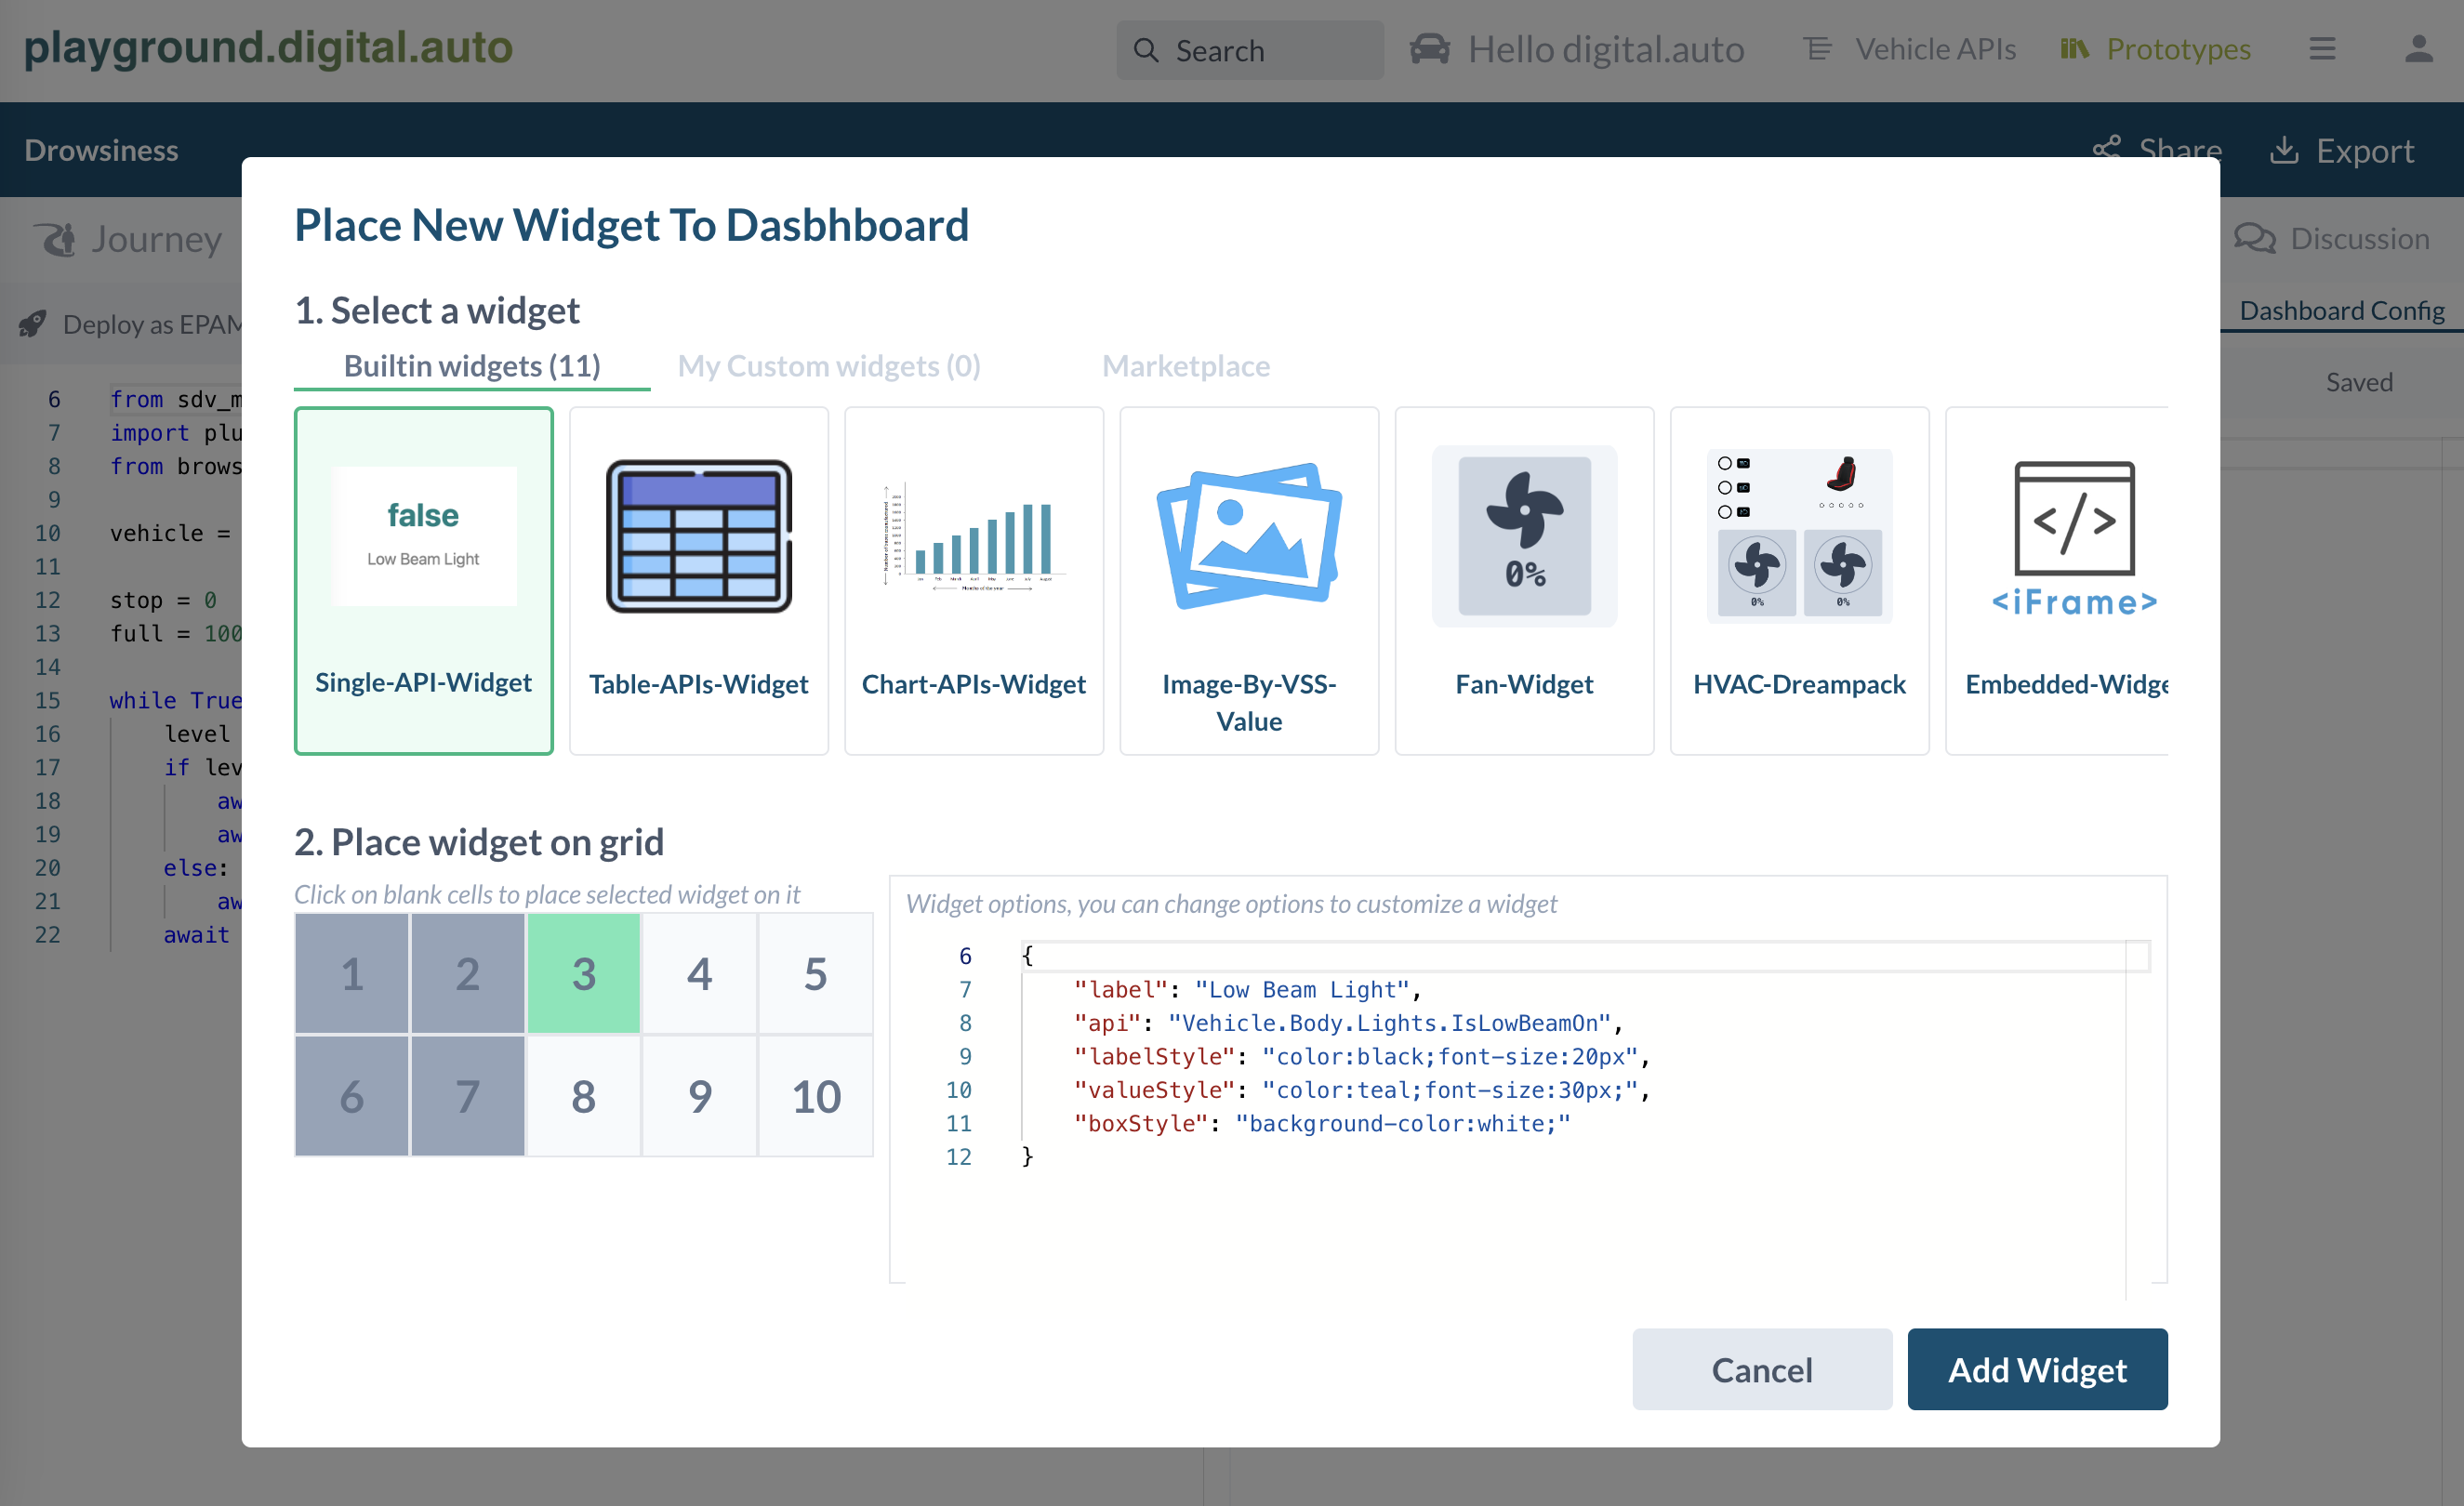
In new widget option, change to name and API to “Distraction Level”, and API to “Vehicle.Driver.DistractionLevel” as below.
{
    "plugin": "Builtin",
    "widget": "Single-API-Widget",
    "options": {
        "label": "Distraction Level",
        "api": "Vehicle.Driver.DistractionLevel",
        "labelStyle": "color:black;font-size:20px",
        "valueStyle": "color:teal;font-size:30px;",
        "boxStyle": "background-color:white;"
    },
    "boxes": [
        3
    ]
}
Go back to “Dashboard” tab, you will see the distraction level result in the new widget.
7. Write application code
Write some code to do some actions base on the distraction level. In the “Code” tab, you can write your python code in the left panel. Try to using distraction level to control HVAC Fan.
from sdv_model import Vehicle
import plugins
from browser import aio

vehicle = Vehicle()

stop = 0
full = 100

while True:
    level = await vehicle.Driver.DistractionLevel.get()
    if level>50:
        await vehicle.Cabin.HVAC.Station.Row1.Left.FanSpeed.set(full)
        await aio.sleep(3)
    else:
        await vehicle.Cabin.HVAC.Station.Row1.Left.FanSpeed.set(stop)
    await aio.sleep(1)
8. Add a Fan widget to the dashboard
Go back to “Dashboard Config”, pick a new widget, and select “Fan-Widget”, place it on the dashboard. In widget option, mention the API you using in python code.
{
    "plugin": "Builtin",
    "widget": "Fan-Widget",
    "options": {
        "api": "Vehicle.Cabin.HVAC.Station.Row1.Left.FanSpeed"
    },
    "boxes": [
        8
    ]
}
9. Run the application
Go to “Dashboard” tab, click “Run” button, and you will see the fan speed change base on the distraction level.
You can follow this video for step by step guide:
How the AI widget works
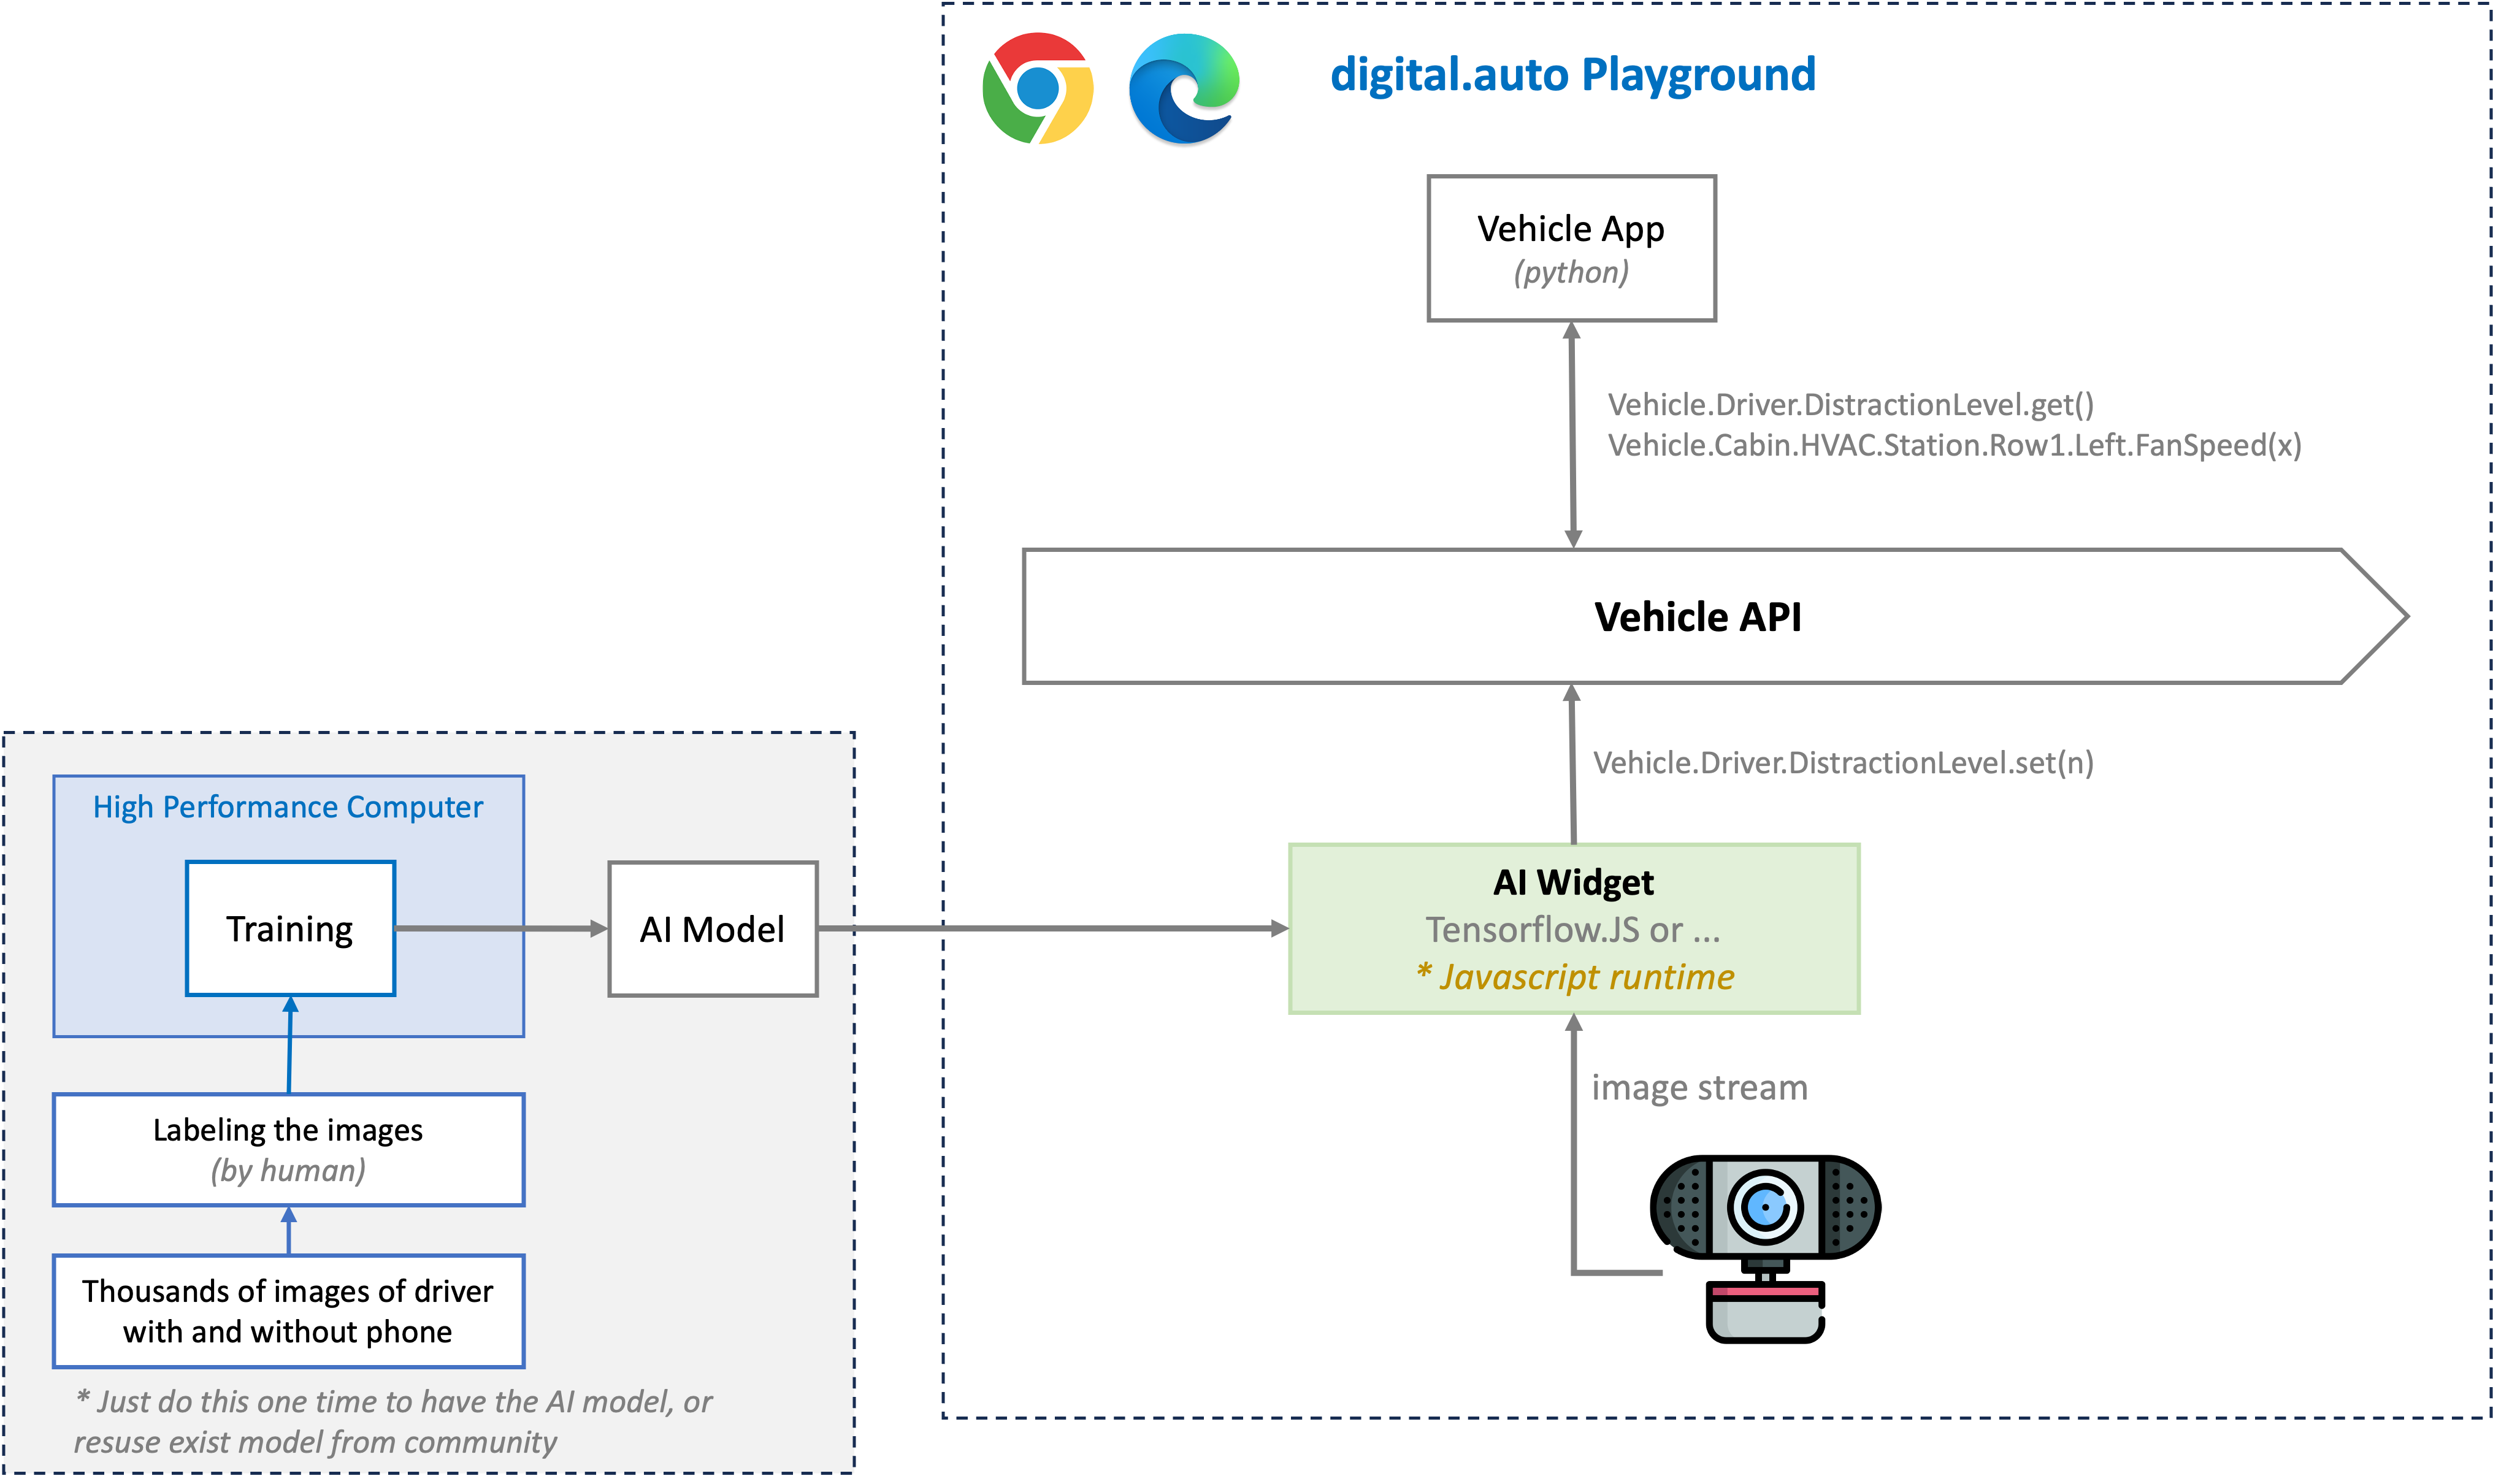
The AI widget is a wrapper of the Tensorflow.js library.
Step 1:
We train a model with Tensorflow, and export it to a format that tensorflowjs can be used.###
Step 2:
We use the tensorflowjs to load the model, and run it in the browser. Capture the image continously, and run the model to get the result(distraction_level)
Step 3:
The widget will set distraction_level to the api, via a special mechanism provide by digital.auto so that a widget can set a value to an API. This is a builti in mechanism, and you don’t need to care about it. Please refer Create Custom Widget tutorial for more detail.
And from now on, you can use the distraction_level via API in your application code, and do some actions base on it.
Source code for Driver Distraction Widget
You can find the source code for the Driver Distraction Widget here
This is just an example, and you can use the same method to apply AI in other use cases.
The are plenty of models available in the internet, and you can use them in the widget.
You can also train your own model, and use it in the widget. Please refer to Tensorflow.js for more detail.
You can also using another method to have an AI engine running and give the result to widget. This tutorial is just one of the way to do it.
How about real vehicle envinronment?
On real vehicle, we need to consider the performance of the AI model, and the performance of the hardware.
On vehcile context, python code(or C++) keep the sample logic. And the AI model is running on a separate hardware or seperate app/service, and the result is send to the python code via API. The python code will do some actions base on the result from the API.